You are being tracked! Yes, at least by half a dozen apps at the same time. Although this is done to offer you better services, your confidential or sensitive information is always at risk of being exposed. This blog highlights the critical importance and the ways to protect your iPhone’s privacy.
Disabling your location services doesn’t make sense, just to avoid being tracked by your local pizza delivery outlet. But hear me out! There's more to it than just targeted ads and customized toppings for you. You must have seen movies that show how easily the CIA, FBI, or other law enforcement agencies hack into a suspect's device. It’s not so easy in real life, but it’s very much possible. In place of the CIA or FBI, it could be a hacker next door or someone in East Siberia. Who knows?
You know, the problem with iPhones is that people think they are more secure than other devices, and that’s the reason they ignore taking additional protective measures or precautions to secure their data. However, despite robust security features, even the safest vault can be robbed, if left open.
In this article, we will discuss the essential iPhone privacy features and hacks that can help keep your personal data secure while enhancing your data privacy when you are online.
1. Lock or Hide an App
After the recent iOS 18 update, iPhone users can now hide and lock any app with face ID. The Lock and Hide feature allows you to hide iPhone apps, which can be opened only with the Face ID or passcode. If the app is locked or hidden, it will not appear in the Apps section, or even in search results, and protect your app data from prying eyes, malicious software, and hackers.
- Find the third-party apps you want to lock or hide from your iPhone device.
- Touch and hold the app icon until the quick actions menu appears, as shown below.
- Tap on - Require Face ID.
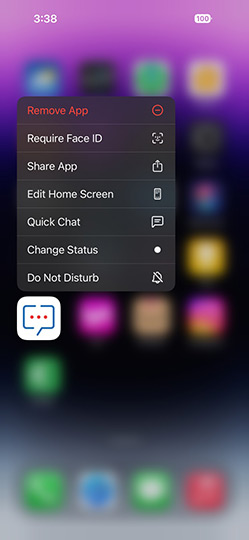
- From the pop-up menu, tap on Require Face ID to lock the app.
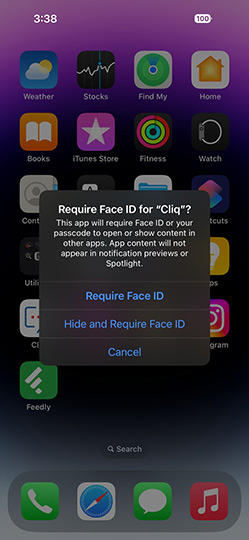
- Else, tap on Hide and Require Face ID to hide the app.
- This will not only hide the app from the home screen but also make it undiscoverable.
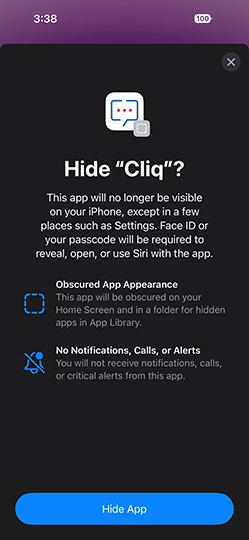
- On the next screen, tap on Hide App to confirm this.
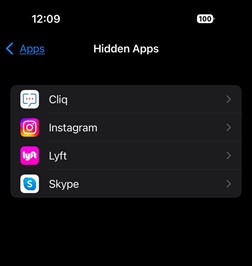
You can access the hidden apps on your iPhone by swiping left on your home screen until you reach the App Library page, then you need to scroll to the end of the page to find the Hidden Apps folder.
Else, you can check the list of hidden apps from Settings > Apps. Scroll down to the end and look for a folder named Hidden Apps.
2. Share only specific contacts with Apps
This thoughtfully designed feature in Apple devices lets you share only the specific iphone contacts on your device with the apps you have installed. iPhone allows users to choose specific contacts they want to share with apps instead of sharing their entire contacts list.
This is necessary because most social media apps can access the contacts stored on your device and share custom profile suggestions with them.
3. Protect from Link Trackers
Link tracking protection is another useful feature introduced in iPhone with the recent iOS updates. It is a privacy feature that, once enabled, automatically activates on all the links shared over email, messages, and Safari browser.
The Link Tracking Protection feature removes any tracking code or parameters from URLs accessed from the device, thus protecting your privacy from spam sites and unethical tracking. However, this does not affect UTM links and analytics, and advertisers can still get click info, but you still get protection from suspicious tracking activities and sites.
This feature is enabled by default iOS 17 and above. However, you can also check if this setting is disabled and then you can enable it by following the steps below.
- Go to Settings > Apps > Safari.
- Scroll down to the section Privacy and Security.
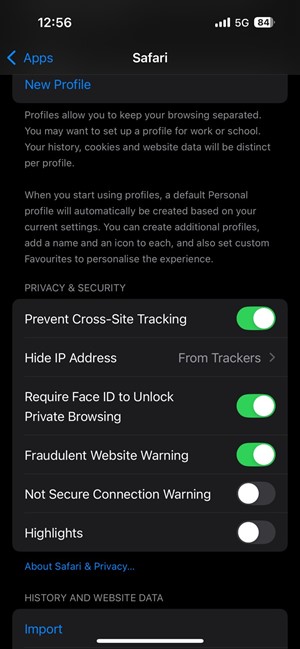
- Now check if Prevent Cross-Site Tracking is enabled.
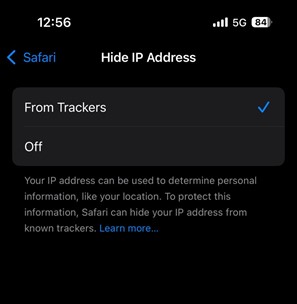
- Also, check if Hide IP Address is enabled for Trackers.
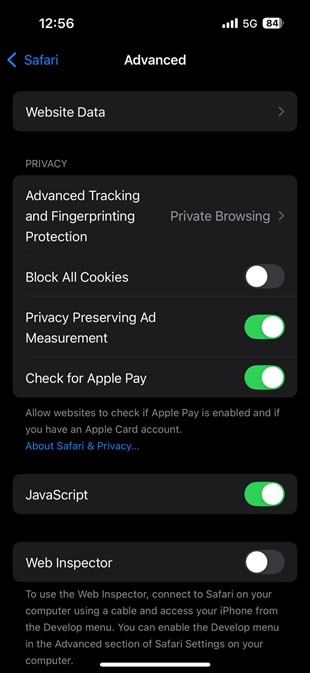
- Now scroll down and go to the Advanced section.
- Check if the settings are enabled as shown in the image below. Also, remember to enable Privacy Preserving Ad Measurement.
4. Use the Hide My Email Feature
Hide My Email is another secure Apple service that allows you not to share your personal email address with apps and websites. This service allows you to create random email addresses to use with apps, websites, and other places.
However, mails sent to these random email addresses forward to your official Apple email’s inbox, so you can still read them without sharing your actual email address.
- When you install an App or log in to any website from your Safari browser, in the signup process, choose Sign in With Apple.
- Then, select Hide My Email.
- Generate a new random email address to sign in.
You can only generate these random email addresses on your device if you have an iCloud+ subscription.
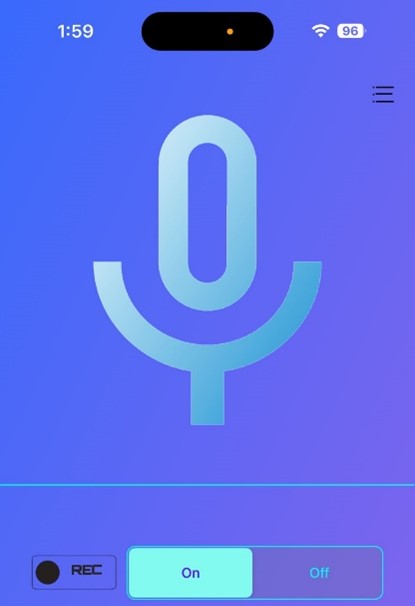
5. Track the Recording Indicators
Recording indicators inform an iPhone user when an app is using the device’s microphone or camera. The Dynamic Island on your iPhone, shows an orange indicator when an app is using the microphone and a green indicator when an app is using the camera.
6. Turn off Precise Location
iPhone users can also choose to share approximate location with apps by turning off Precise Location in their Location Services settings. This gives them control over which apps get their exact location or just an approximate location.
To turn off precise location:
- Go to Settings > Privacy & Security > Location Services.
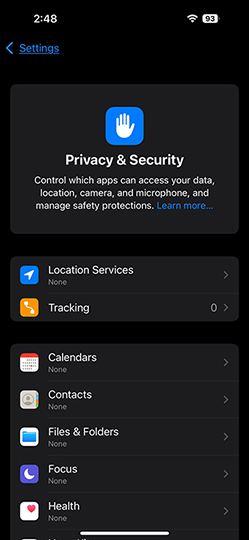
- Find the list of apps that have your device’s location access.
- Click on the app to access its location permission and disable Precise Location.

This setting will disable the apps from viewing your exact location, and they’ll be only able to determine your approximate location.
7. Erase iPhone Data
While selling or giving away your iPhone device, you must ensure that data in it is completely erased and wiped clean. iPhones store a lot of our private and sensitive data, including photos, videos, audio, documents, accounts login, etc. You need to delete all your data before it reaches the wrong hands after you sell your phone.
Apple offers the Erase all contents and settings feature on iPhones. This functionality allows you to remove everything on your iPhone device and delete all your data while preparing it for sale. However, even after deleting all your data from an iPhone, the data can be recovered.
So, to get double assured and make your data 100% irrecoverable, you can use an iPhone Data Eraser tool, Stellar Eraser for iPhone. The tools wipe clean your iPhone device and prepare it for sell-off or giving away. The eraser tool not just deletes all files or folders but it wipes the data beyond recovery.
The steps to use the Stellar iPhone Data Eraser software are provided below:
- Download the software and install it on your computer.
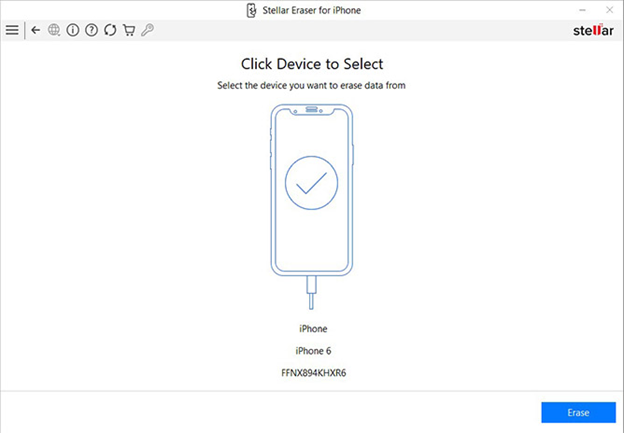
- Now run the software and connect your iPhone to the computer with the help of a lightning to USB cable.
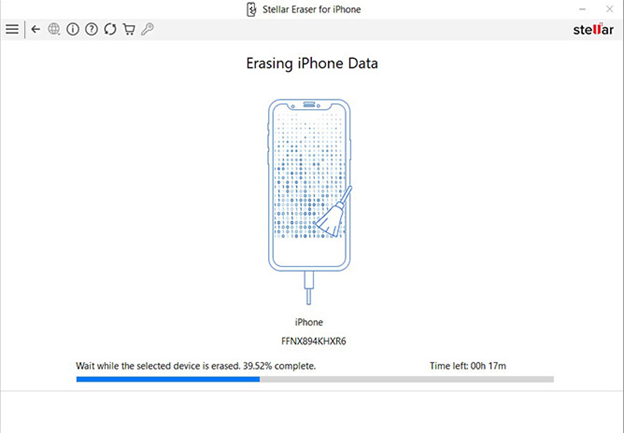
- Once the device is visible on the software interface, select it and then click on Erase.
- Allow the process to complete without disconnecting your device.
- Once the data is deleted and wiped clean, the dialog box with All data from the selected device erased successfully message will appear.
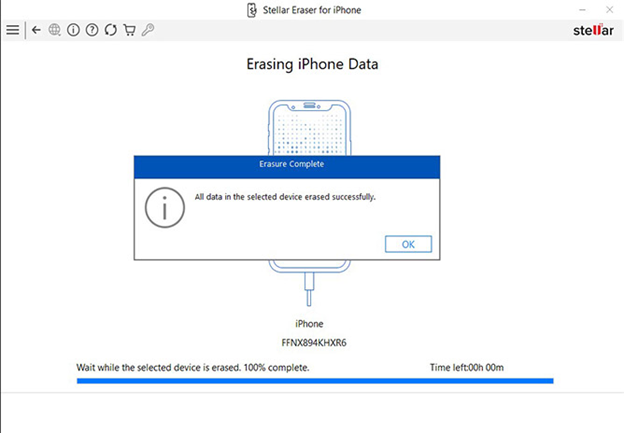
This means your iPhone data is deleted beyond recovery.
Conclusion:
You can protect your privacy on an iPhone or iPad by enabling the settings that limit access to your device and its data. The above list has all the necessary points to protect your privacy on an iPhone. But it's not the end of privacy settings on your iPhone, there are many other ways to protect your data on an iPhone and keep your identity secure. However, one thing that you should remember while selling, or giving away your iPhone is to erase your data beyond recovery, and Stellar Eraser for iPhone is the perfect tool for this task.


A tech enthusiast cum writer, transforming complex tech challenges into accessible guides for everyday users.
 4 min read