When you start Outlook or attempt to send/receive emails manually using the Update Folder or Send/Receive All Folders option in Outlook, you may encounter an error message that says,
“Your server unexpectedly terminated the connection. Possible causes include server problems, network problems, or a long period of inactivity.”
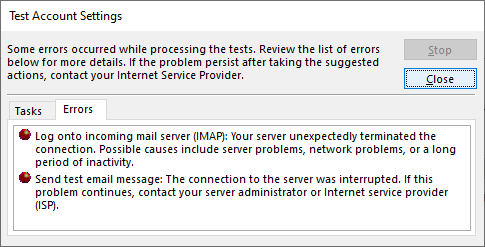
The error message indicates that there is something wrong with the Outlook client, server, system, or the Outlook data file (.pst). As a result, you can neither send nor receive new emails. You also cannot schedule or receive meeting invites. Below, we have shared some possible reasons that can trigger this error and the solutions to troubleshoot and resolve it.
Reasons for Your Server has Unexpectedly Terminated the Connection Error in Outlook
Below, we have listed some common reasons that can trigger this error in Outlook:
- Invalid, expired, or outdated credentials
- Scheduled server maintenance causing temporary interruptions
- No activity for a long time leading to a session timeout
- Temporary network-related issues or poor network connection
- Conflict with security apps, such as firewall and antivirus
- Damaged or corrupt PST file
- Sending large emails or attachments leading to server timeout and termination of connection
- Incompatible or faulty third-party add-ins
Solutions to Resolve Your Server has Unexpectedly Terminated the Connection Error in Outlook
Follow the below solutions in the given order to troubleshoot and resolve this error in Outlook.
1. Ensure Stable Network Connection
A stable network connection is crucial for Outlook to work without any interruptions or issues related to server connectivity. Therefore, make sure you have a stable network connection. To do so, follow these tips:
- Restart router.
- Reconnect the ethernet wire to the router.
- Check if DNS is set to public DNS, such as 8.8.8.8 and 8.8.4.4, and not to some custom DNS that may be blocking the connection (if changed recently in your router or system).
- Contact your ISP to help you fix the issue with the connection.
2. Check Server Status
It might happen that server is down for maintenance or updates. In such a case, you may temporarily experience such errors. To check whether the server is online or not, simply open the Outlook web app URL in the web browser and try to log in. In case the page does not load or login fails, it indicates the server is offline or under maintenance. To verify this, you can check your emails for any update from the administrator on this or contact them directly to know when the server will be back online.
3. Change Server Timeout Settings
Sometimes, the error appears due to server timeout, especially when sending an email with large attachments. In such cases, you can either share attachments via cloud or try increasing the server timeout value in Outlook to fix the issue. To increase the timeout duration, follow these steps:
- In Outlook, go to File > Account Settings > Account Settings.
- Choose your Outlook profile and click Change.
- Click More Settings and then click the Advanced tab.
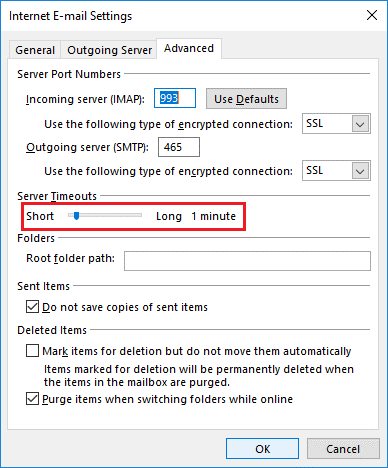
- Increase the server timeout duration for your POP email account.
- Once done, try sending the email and see if the error persists. In case it does, follow the next solutions.
4. Verify Login Credentials and App Password
Make sure the login credentials are correct and valid. Check for any typos or errors in the username and password. In case you have recently changed your system password, enter the new password. You can also reach out to the administrator to get your new updated password.
To add new password,
- Go to the Send/Receive tab in Outlook.
- Click Update Folders.
- This will open a login pop-up if Outlook fails to connect to the server.
- Enter your updated password to log in.
There could also be a problem with the app password. To check and update it, follow these steps:
- Go to File.
- Under Account Information, click the dropdown and select the IMAP account.
- Select Account Settings > Server Settings.
- On the IMAP Account Settings, enter the new App Password in the Password box.
- Click Next then click Done.
5. Disable TLS 1.3 on Windows
TLS 1.3 may also lead to POP server-related errors in Outlook on Windows 10. You can disable TLS 1.3 to resolve the error. Follow these steps:
- Press Windows +R keys, type regedit and press the Enter key or click OK to open the Registry Editor window.
- Navigate to this path in the registry:
Computer\HKEY_LOCAL_MACHINE\SYSTEM \CurrentControlSet\Control\SecurityProviders\SCHANNEL\Protocols - Now, check if TLS 1.3 is listed under Protocols.
- If it is, right-click on Protocols and select Export. This will save a backup of the configuration.
- Now, if TLS 1.3 is present, delete that key and all its subkeys.
- Once done, restart your system and start Outlook.
6. Disable Antivirus and Firewall Settings
Conflict with security apps, such as firewall and antivirus programs can also result in such errors. You can disable them temporarily to check if they’re causing the error. If this is the case, make sure to:
- Add Outlook as an exception in the security apps.
- Replace the security apps with Outlook-aware apps to avoid such conflicts.
7. Create a New Profile
Corrupt Outlook profile can also cause errors related to connectivity as it contains information related to establishing a secure server connection. You can create a new profile and replace the old corrupt profile with the new one to resolve the error. The steps are as follows:
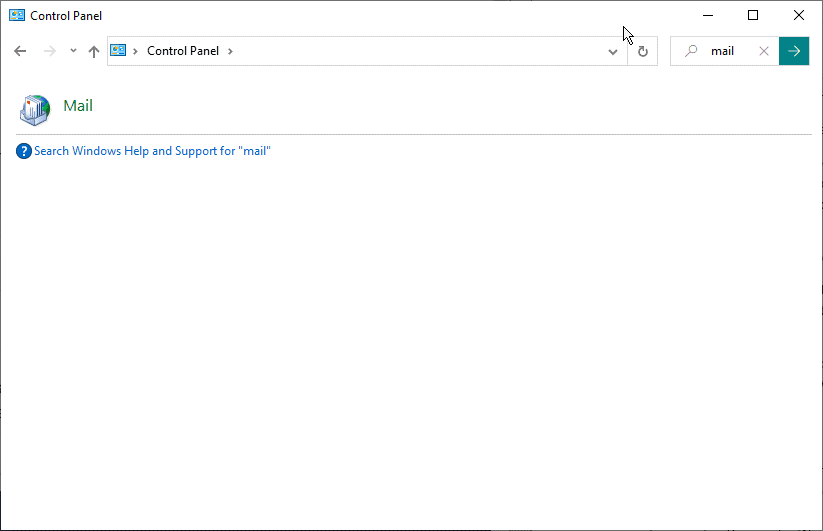
- Open the Control Panel and go to User Accounts > Mail.
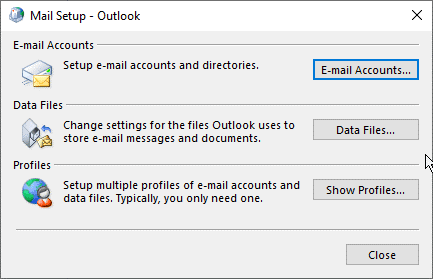
- Click the Show Profiles button and then click Add.
- Type a new profile name and click OK. This will create a new profile and launch a sign-in wizard.
- Follow the sign-in wizard and prompts to configure your email account in the new profile.

- Once setup is complete, make sure to choose “Always use this profile" and click Apply > OK to make it the default profile. At this stage, you can also remove the old profile.
- Restart Outlook and check if the error is resolved.
8. Repair the Outlook Data File (PST)
Corrupt, damaged, or large (oversized) PST file can also trigger such errors as Outlook fails to read/write any new information to/from the file. However, you can repair the PST file using the built-in SCANPST.exe or Inbox repair tool to solve this error. The steps are as follows:
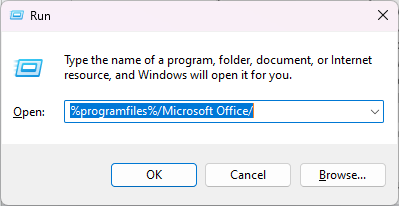
- Close Outlook and open the default location where the SCANPST file is stored. It is located at %programfiles%/Microsoft Office/ or %programfiles(x86)%/Microsoft Office/. You can paste or enter this path in the Run dialog box (press the Windows + R keys) to open the location.
- Then, open the Officexx folder or root/Officexx folder based on the Outlook or Windows version installed on your PC.
- Find and launch the SCANPST.EXE program.

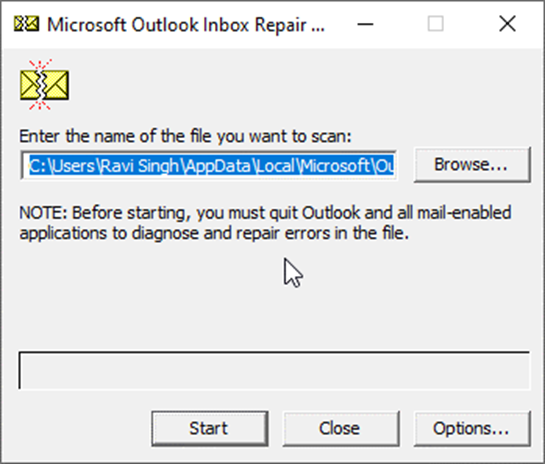
- Then, click Browse to choose the PST file. It is located in the C:\Users\YourUserName\AppData\Local\Microsoft\Outlook folder.
- Once the PST file is selected, click the Start button.
- The tool scans the PST file thoroughly. If any errors and inconsistencies are found, click the Repair button. This may take a while to complete based on the size and corruption level.
- After the repair, start Outlook.
In case the SCANPST stops responding, crashes, or fails to repair the PST file, you can download and use an advanced Outlook PST repair tool, such as Stellar Repair for Outlook. This advanced Outlook PST repair tool can quickly repair large (up to 50 GB), damaged, corrupt, or encrypted PST file and save all the mail items to a new PST file with complete integrity and precision. The software also provides advanced options to export all the recovered mail items from corrupt or damaged PST files directly to Microsoft 365 or live Exchange Server.
Conclusion
The error message "Your POP server has unexpectedly terminated the connection" can prevent you from sending and receiving new emails. By understanding the reasons behind the error, you can easily troubleshoot and resolve the error. One of the common causes of the error is damaged or corrupt PST file. Although you can repair PST file using SCANPST, the tool has several limitations. You can use an advanced Outlook recovery software, such as Stellar Repair for Outlook when the SCANPST fails to repair your PST file. This software can repair severely corrupt, large-sized, and encrypted PST files with complete integrity and precision. It can also export all the mail items from the repaired PST file to a new PST file and live Exchange or Microsoft 365 mailbox.


 4 min read