Microsoft Outlook provides a built-in repair utility, Inbox Repair tool (SCANPST.EXE), to diagnose and repair corrupt Personal Folders (.pst) and Outlook Offline Data (.ost) files. However, users have reported that the Outlook Repair Tool crashes (i.e. freezes or stops responding) when trying to fix PST file corruption.
Occurrences of Outlook Repair Tool Crashes
Let's look at some user instances:
Occurrence 1: Outlook Repair Tool crashed after checking the folder structure
In this instance, a user copied the corrupt PST to a different machinewhen he received MicrosoftOutlook Inbox Repair tool error. Once the PST file was copied, heran the repair tool.After completing all the phases, SCANPST returned a message saying that the tool failed to complete the task. On checking the rebuild process LOG, it shows that the repair process was completed up to the point of checking the folder structure. But, thenthe repair tool crashed without further explanation.
Occurrence 2: Outlook Repair Tool crashes after saving backup and before repair
In this instance, a user reported that he ran SCANPST.EXE twice to repair his Outlook 2007 application. But, the tool was only able to create backup and then the Microsoft Outlook inbox repair tool not responding error pops up.
Why the Outlook Repair Tool Keeps Crashing?
Some reasons why the Outlook PST repair utility behaves this way are as follows:
Reason 1 –Missing or Damaged Scnpst32.dll File
Outlook Repair Tool (i.e. SCANPST.EXE) will crash, and in some cases won't even start, if the DLL file (Scnpst32.dll) required by SCANPST is missing or damaged.
Reason 2 – Corrupt Office Installation
Outlook comes as a part of Microsoft Office suite. If your Office program has turned corrupt, it may cause Outlook Repair Tool to crash.
Reason 3 – Large-sized PST file
A PST file exceeding its permissible limit can become corrupt. The size limit of .pst file depends on the Outlook version you are using.
- In Outlook 2007 and 2003, the PST file can grow as large as 20 GB.
- In Outlook 2019, 2016, 2013 and 2010, the maximum file size limit can be 50 GB.
The Outlook Repair Tool will repeatedly crash,if it is used to fix an oversized PST file (that has exceeded its maximum size limit).
Reason 4 –Outlook Data File is Severely Corrupt
Inbox Repair Tool may crash when attempting to fix a severely corrupt Personal Folders (.pst) File.
What Can You Do If Outlook Repair Tool Crashes?
When Outlook Repair Tool crashes (i.e. freezes or stops responding), wait for some time – may be hours or even a day – till the tool shows you a "Repair Complete" message. But, if the tool still won't work, try the following solutions:
Solution 1: Download the Scnpst32.dll file
Solution 2: Repair Office/Outlook Program
Repairing Office (Outlook) program might help resolve the Outlook Repair Tool crashing issue. To do so, follow these steps:
NOTE: You will need administrative privileges to run these steps.
Step 1: Open Control Panel, and choose Programs and Features.
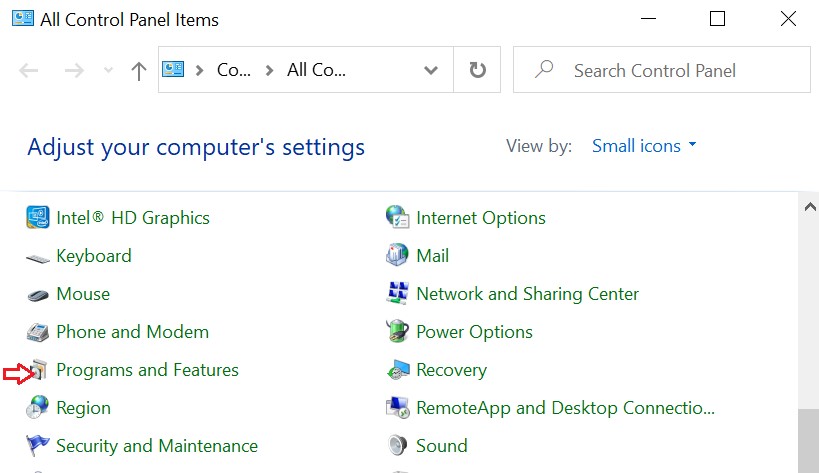
Figure 1: Program and Features
Step 2: Select Microsoft Office installation (choose Outlook if it used as a standalone application). Click Change.
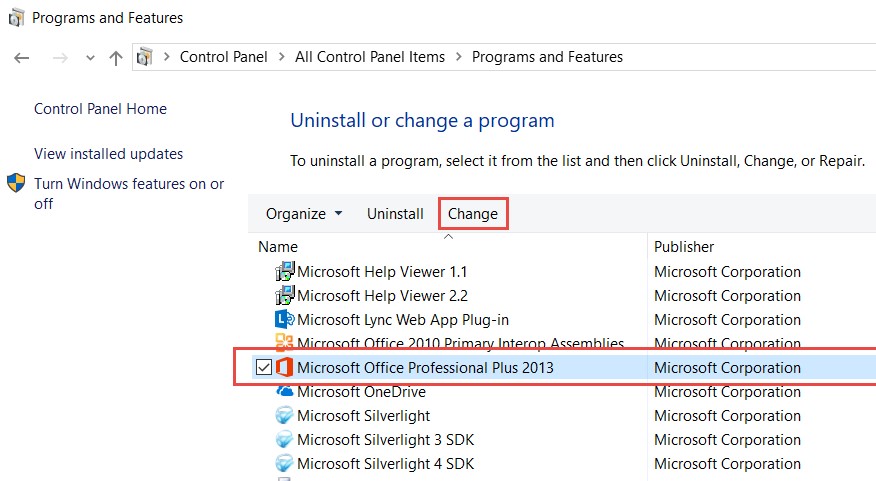
Figure 2: Microsoft Office in Control Panel
Step 3:Select Quick Repair or Online Repair, and then click Repair.
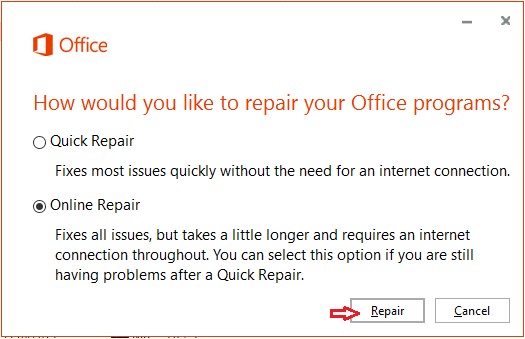
Figure 3: Repair Option
After completion of the repair process, restart Outlook and run the built-in repair tool again. If the tool crashes again, proceed with the next solution.
Solution 3: Reduce the Size of PST File
NOTE: You can execute these steps if Outlook is accessible. If you cannot open Outlook, split the data file to reduce its size by using a Splitter tool.
If you're trying to repair an oversized data file, use the Mailbox Cleanup tool to reduce your mailbox size. Here's how:
Step 1:In Outlook, click File.
Step 2:Click Info> Cleanup Tools>Mailbox Cleanup.
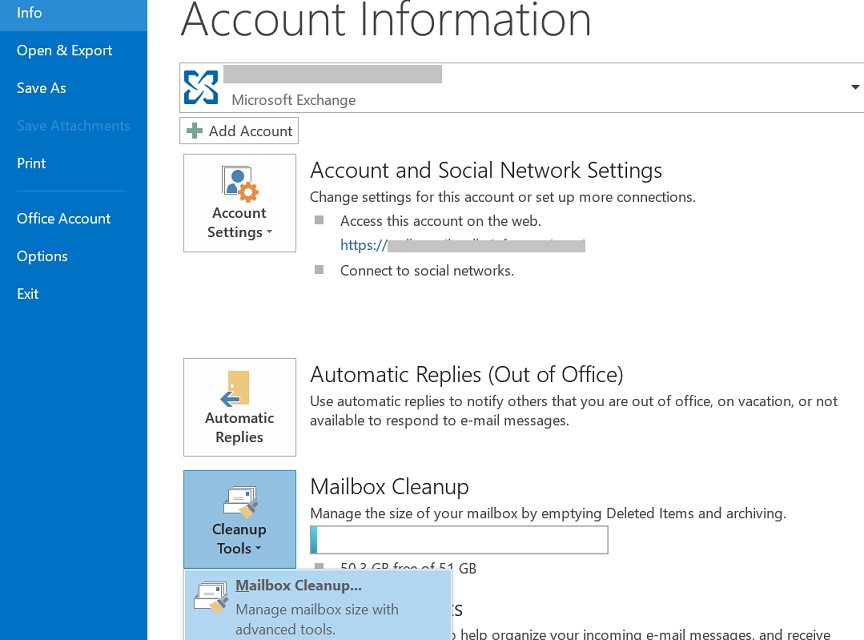
Figure 4: Mailbox Cleanup
Step 3: In Mailbox Cleanup window, perform the following tasks to reduce the mailbox file size:
- View Mailbox Size
- Find items older than or larger than
- View Deleted Items Size and Empty Deleted Items folder
- View Conflicts Sizeor Empty Conflicts
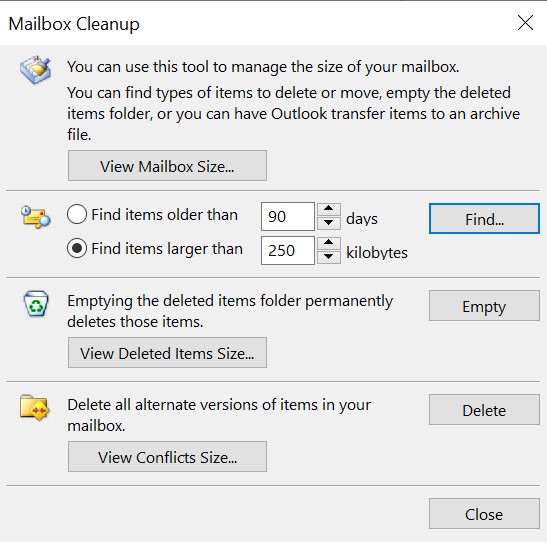
Figure 5: Mailbox Cleanup Options
You can also compact the PST file to reduce its size, by following these steps:
Step 1:In Outlook, click File.

Figure 6: Outlook File Menu
Step 2:From Info window, select Account Settings, and then click Account Settings.
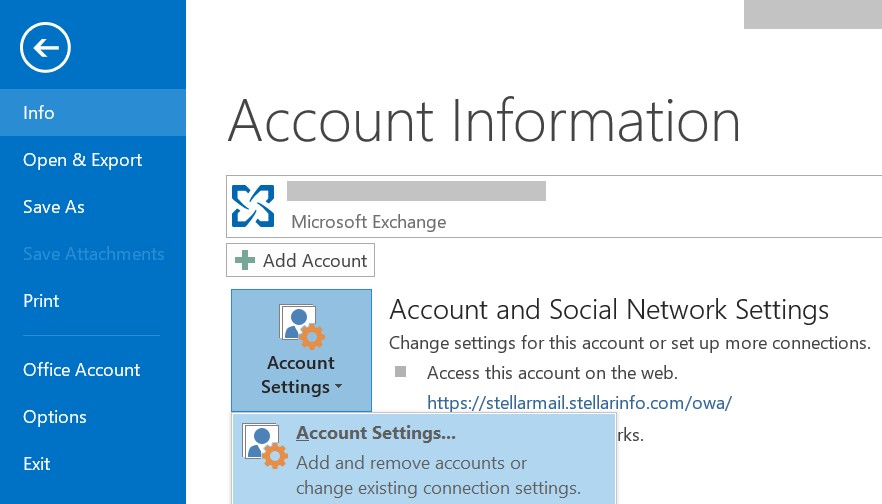
Figure 7: Outlook Account Settings
Step 3:In Account Settings window, click the Data files tab, and double-click the data file you wish to compact.
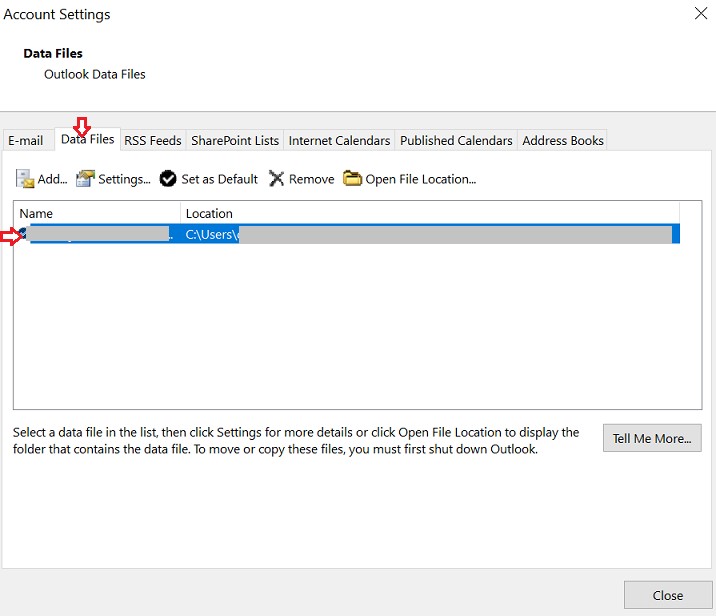
Figure 8: Select Outlook Data File (.pst)
Step 4:In the dialog box that appears, click Advanced, and then click Outlook Data File Settings.
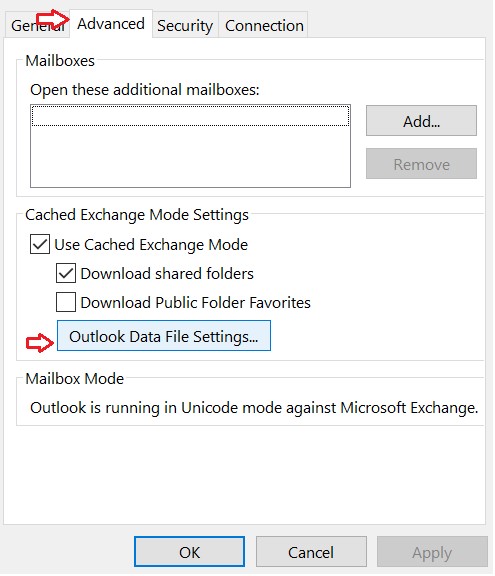
Figure 9: Outlook Advanced Settings
Step 5:In Outlook Data File Settings box,choose Compact now, and then hit OK.

Figure 10: Outlook Data File Settings - Compact Now
Once you've reduced the size of Outlook data file (.pst), run the repair tool again. If you're still experiencing the same problem, using a specialized PST file repair tool can help.
Solution 4: Use a Professional Tool to Fix PST File Corruption
Stellar Repair for Outlook is a professional and fast PST repair tool that can efficiently repair severely corrupt PST files. It also recovers all mailbox items like (deleted or missing) emails, attachments, contacts, calendars, etc. in just a few clicks.
The software provides an interactive user interface (UI) which can be operated by any user, without technical assistance. Further, the software can help fix the most common Outlook PST errors and can recover mailboxes from password-protected PST file.
The PST repair tool from Stellar® helps retrieve the mailbox data into a new or an existing PST file, which can be easily imported into Outlook.
Steps to Repair Corrupt PST File
Follow these steps to scan and repair a corrupt .pst file with 'Stellar Repair for Outlook' software.
Prerequisites:
Make sure that your system meets the following requirements:
Step 1: Download, install and run the software.
Step 2: In Select PST File for Repair dialog box,choose any option:
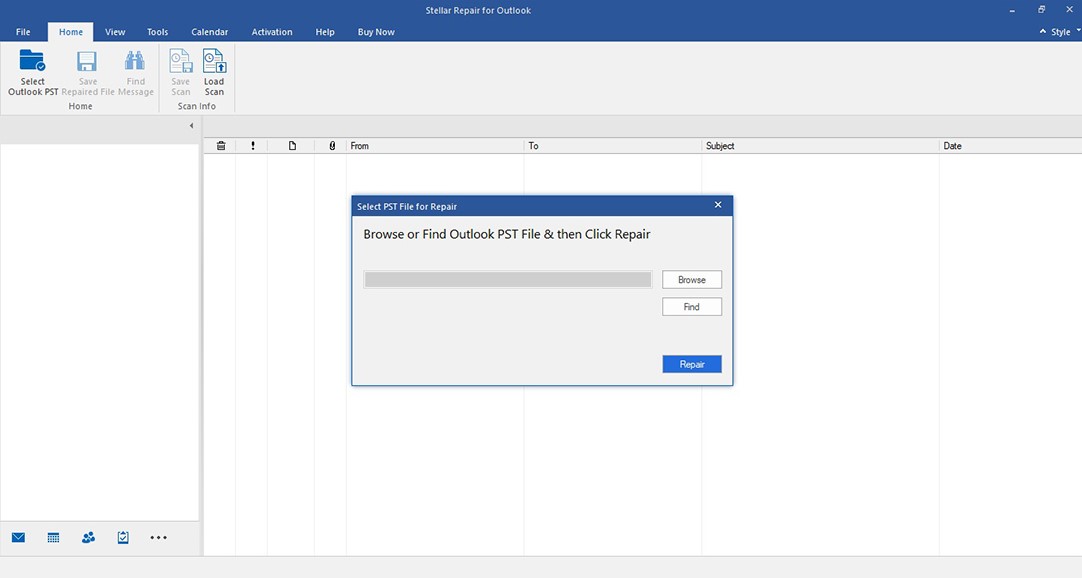
Figure 11: Select PST File for Repair Window
Step 3: Once the targeted PST file is selected, click Repair to begin the repair process.
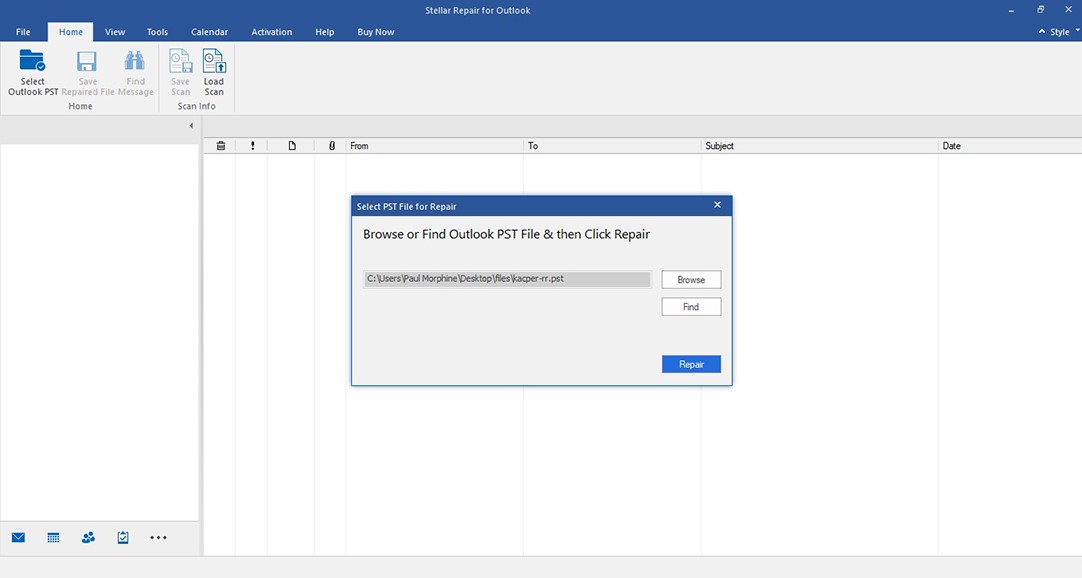
Figure 12: Initiate the Repair Process
Step 4: The software scans through the corrupt PST file and displays the progress of repair process.
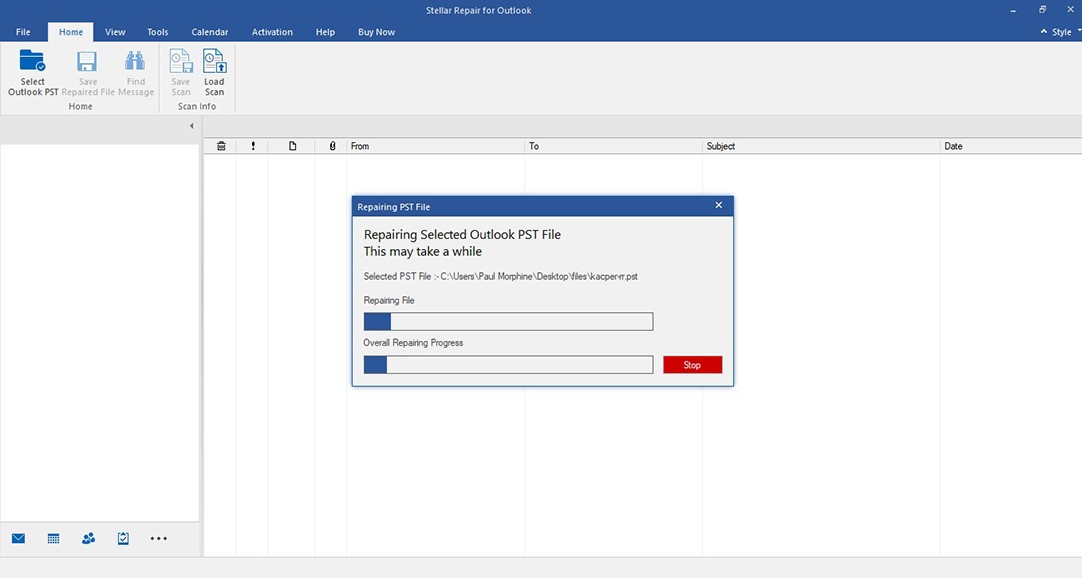
Figure 13: Repair in Progress Window
Step 5: After completion of the repair process, the software shows preview of the repaired file and its itemsin a three-pane window. The PST file folders and items are displayed in the first pane of the preview window. The recovered emails and other items are shown in the second pane. Click on any item to view its content in the third pane.
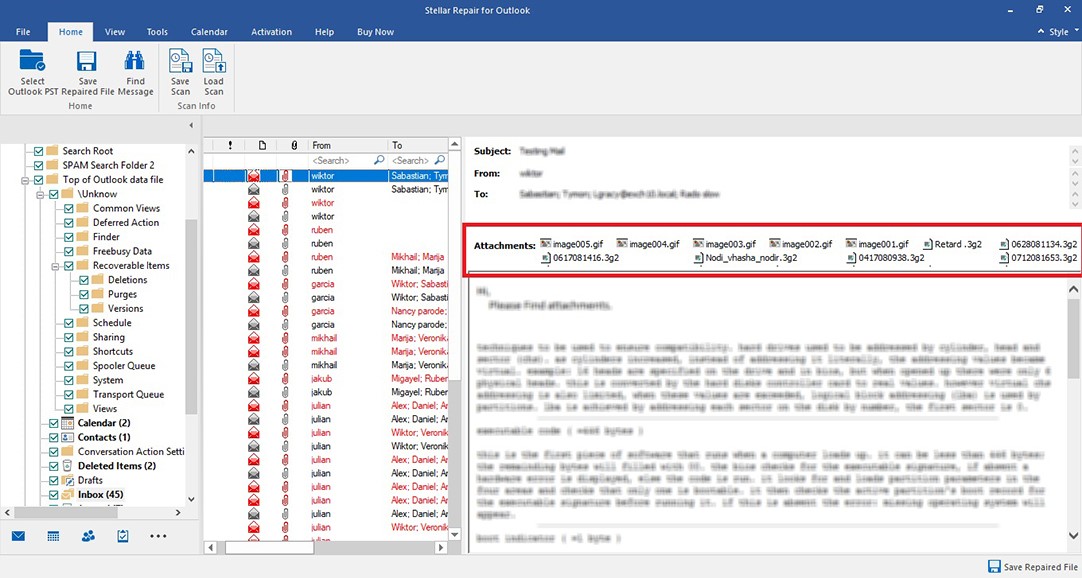
Step 6: Click Save Repaired File on Home menu for saving the repaired PST file.

Step 7: In Save As window, choose PST, and then click Browse to select the location where you wish to save the repaired file.
NOTE: If you do not want to recover deleted items, make sure that the 'Do not recover Deleted Items' checkbox is unchecked.
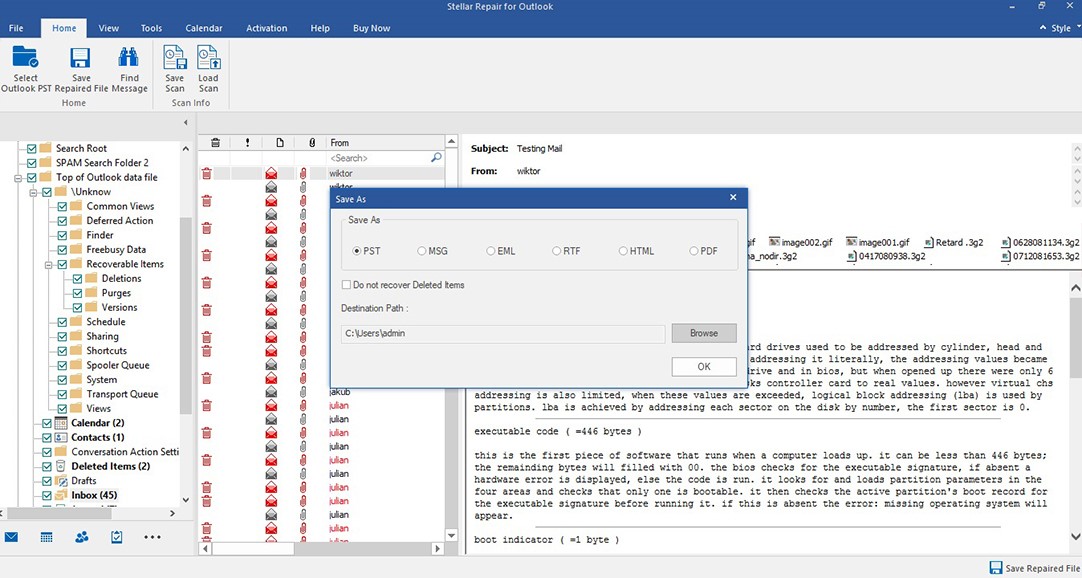
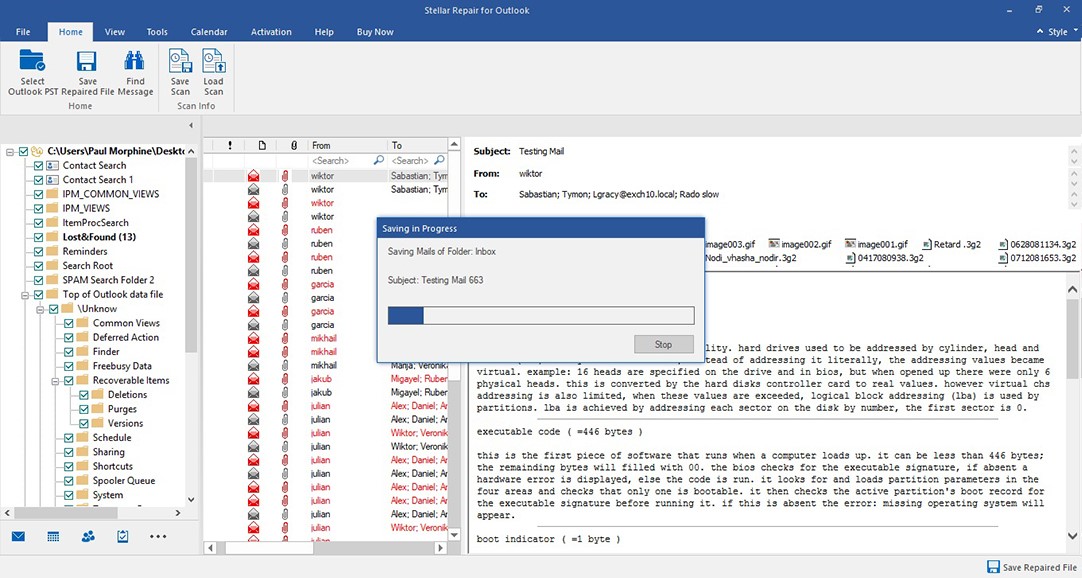
Step 8: Click OK.The Saving in Progress window is displayed.
Step 9: After completion of the saving process, the Saving Complete message box is displayed.
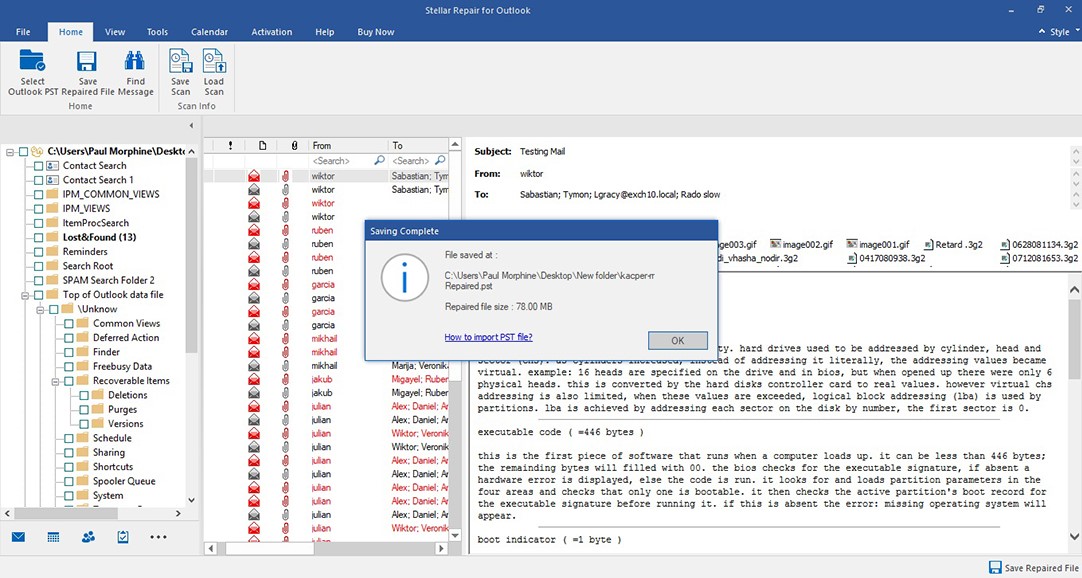
The file will be saved at your selected location.



 7 min read