?&media=https://www.stellarinfo.com/public/image/article/How-to-migrate-Outlook-PST-to-Office-365-716.jpg&url=https://www.stellarinfo.com/article/migrate-outlook-pst-Office-365.php)


If you’re switching to Office 365 (O365) or Microsoft 365 (M365), you also have to migrate the mailbox items, such as emails, contacts, attachments, etc., from the current on-premises environment to Microsoft 365. This can be done by importing or migrating Outlook PST files to the targeted Microsoft 365 mailboxes. In this article, we have shared different ways that can help you to quickly transfer Outlook PST files to Office 365 (Microsoft 365) while maintaining the original mail folders hierarchy and structure.
Methods to Migrate Outlook PST Files to Office 365
Below, we have mentioned different methods to migrate Outlook PST files to Microsoft 365. Depending on the number of Outlook PST files you need to migrate to Microsoft 365, you can choose any of the methods.
Method 1: Network Upload using AzureAZCopy Tool
You can use the Network Upload method, when you need to import large or multiple PST files into Microsoft 365. However, before using this method, you should remember the following things:
- You (or the user profile you’re using) must have the Mailbox Import Export Role and the Mail Recipients Roles assigned in Office 365.
- PST files should not be larger than 20 GB as they may impact the performance of the import process.
- You will also require to download the AzureAZCopy tool.
Here are the steps to use this method:
Step 1: Assign Roles
- Log in to Office 365 using any web browser. Open the Exchange Admin Center and click Roles > Admin Roles.
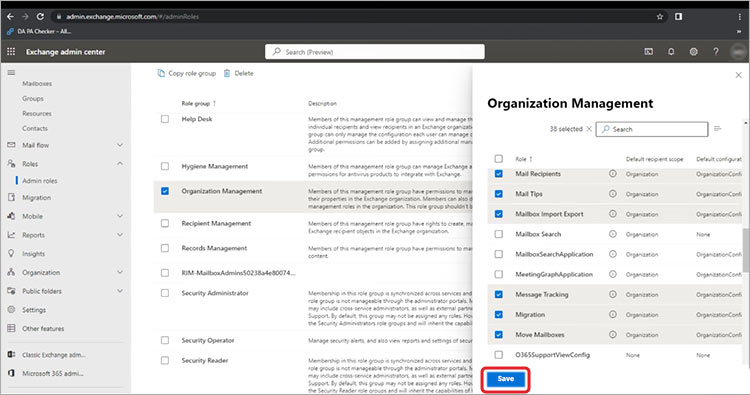
- Next, search for Organization Management and select it.
- It will open the Organization Management screen. Select the Permission tab and scroll down to the Mailbox import export option. Select it and click Save.
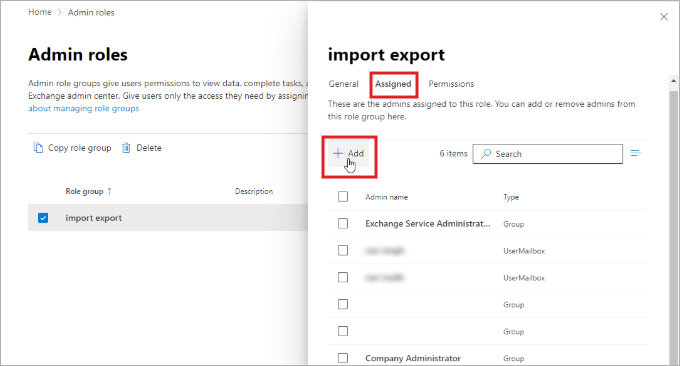
- Click Add under the Assigned tab and choose the user you want to assign the role for importing the Outlook PST file.
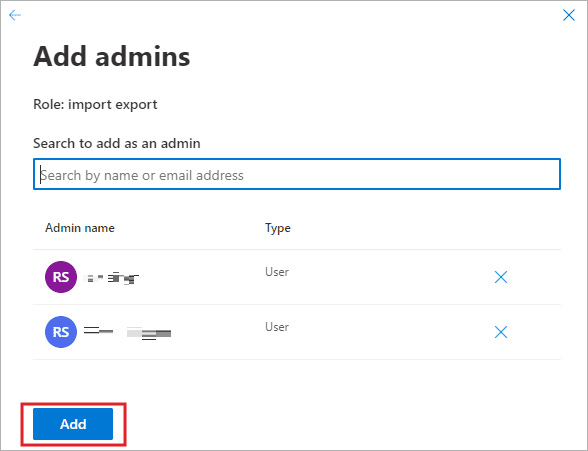
- Search and select the user and click Add.
Step 2: Create PST Import Job in Microsoft 365
To create an Outlook PST to Office 365 import job for uploading PST files to Azure Storage, follow these steps:
- Click on Microsoft 365 admin center in the left panel to go back to the admin center.
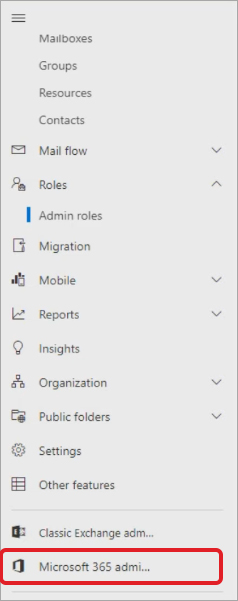
- On the Microsoft 365 admin center, click on Show all in the left panel and click on Compliance under the Admin centers section.
.jpg)
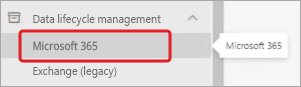
- In the window that opens, click on Data lifecycle management in the left panel and select Microsoft 365.
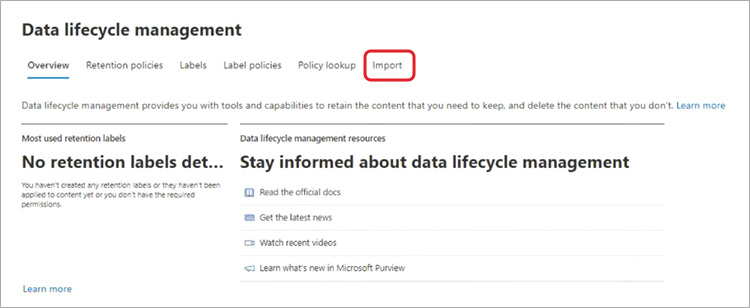
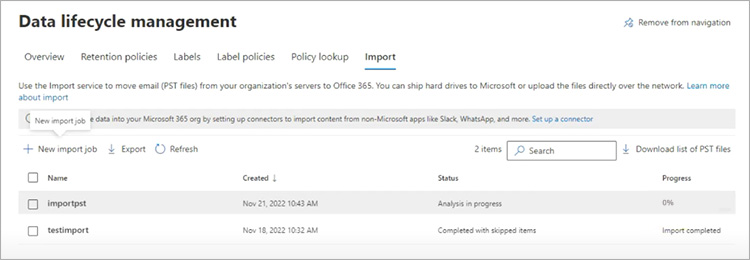
- In the Data lifecycle management window, click on the Import tab at the top to add an import job.
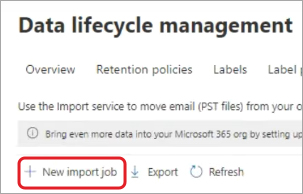
- Now, click on + New import job.
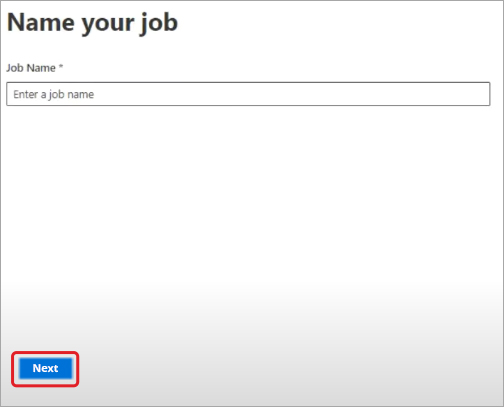
- Enter the job name and click Next.
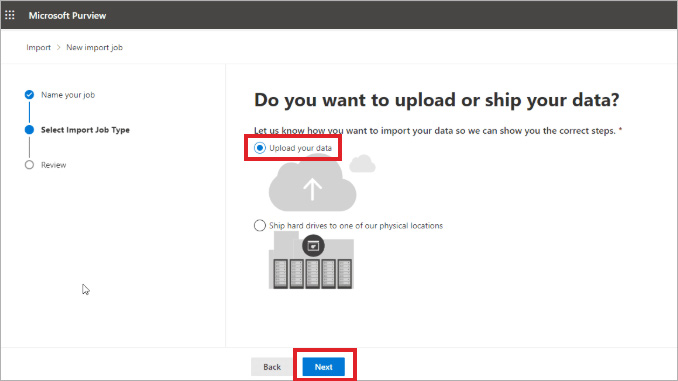
- In the Select Import Job Type window, select the Upload your data option and click Next.
- Click Show network upload SAS URL.
- Next, click Copy to clipboard to copy the SAS URL. Paste it in a Notepad file and save it.
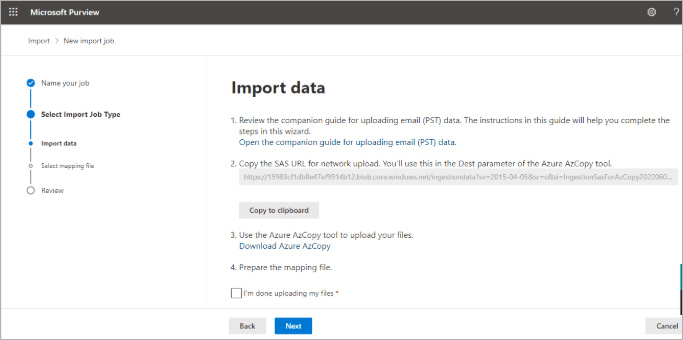
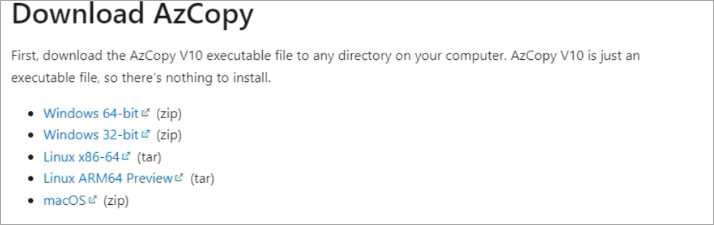
- Click Download Azure AzCopy to download the tool. The Azure AzCopy tool is available for Windows, Linux, and macOS. It will open the Download AzCopy window with various versions of the software available. Select and download the version that is compatible with your system.
Note: Do not close this window until the PST files are uploaded to Azure Storage.
Step 3: Upload PST Files to Office 365 Azure Storage
To upload the PST files to Office 365 Azure Storage, follow these steps:
- After downloading the Azure AzCopy tool, extract the tool from the downloaded zip file.

- Open the extracted folder, copy its path, and paste it in a Notepad file.

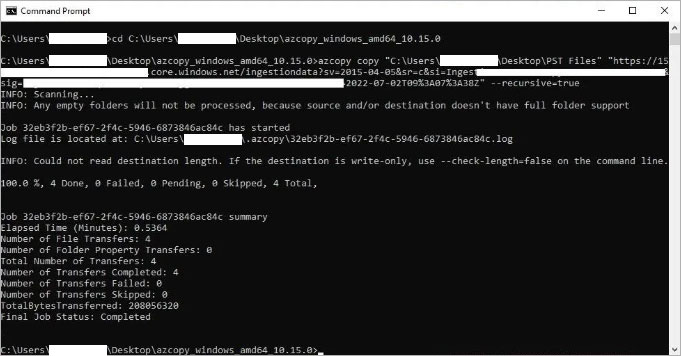
- Now, launch Command Prompt and type cd followed by the path of the AzCopy tool copied in the previous step. Press Enter.

- Then, run the following command to upload the PST files to Azure Storage:
Azcopy copy “Folder/FilePathContainingPST” “SAS URL” --recursive=true
Replace the Folder/FilePathContainingPST with the path of your PST file. Similarly, replace SAS URL with the SAS URL you copied earlier.
Notes:
- In case you want to upload multiple PST files, simply add the path of the folder containing PST files.
- In case the PST files are in a subfolder, then use --recursive=true at the end of the command.
Wait for the PST files to upload. This may take a while, depending on your network speed, bandwidth, and size of the PST files.
Step 4: Verify Uploaded Outlook PST Files
To verify that the PST files are uploaded successfully on the Azure Storage, you can use the Azure Storage Explorer. The tool is available for Windows, macOS, and Linux. Follow these steps:
- After downloading the tool, launch the installer and click Install for me only.
- Complete the installation and then launch the Azure Storage Explorer.
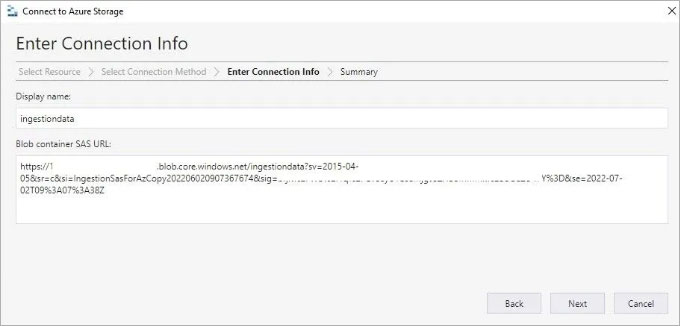
- Select Blob container > Shared access signature URL (SAS) and paste the SAS URL you had copied in the Blob container SAS URL: field.
- Click Next > Connect.
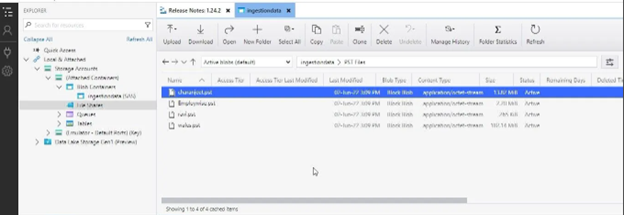
- Under File Shares, you can see the PST folder. Open it to check if the PST files are there.
Step 5: Map Outlook PST Files
The next step is to map the PST files with the user mailboxes. This is critical as you need to ensure that PSTs are correctly imported into user mailboxes on Microsoft 365. For reference, you can download a copy of the PST Import Mapping file from the Microsoft website.

Enter the FilePath (folder name), Name, Mailbox, and TargetRootFolder where mail items will be imported. You may leave other fields empty. Save the .CSV file.
Step 6: Start PST Import Job
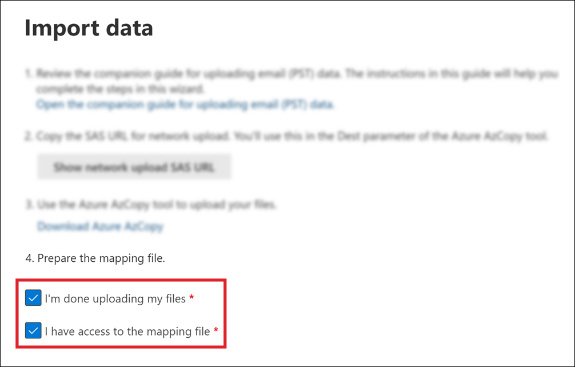
To start the PST import, go back to the Office 365 Import data wizard and follow these steps:
- Tick on the I’m done uploading my files and the I have access to the mapping file checkboxes and click Next.
- Click +Select mapping file and then click Validate.
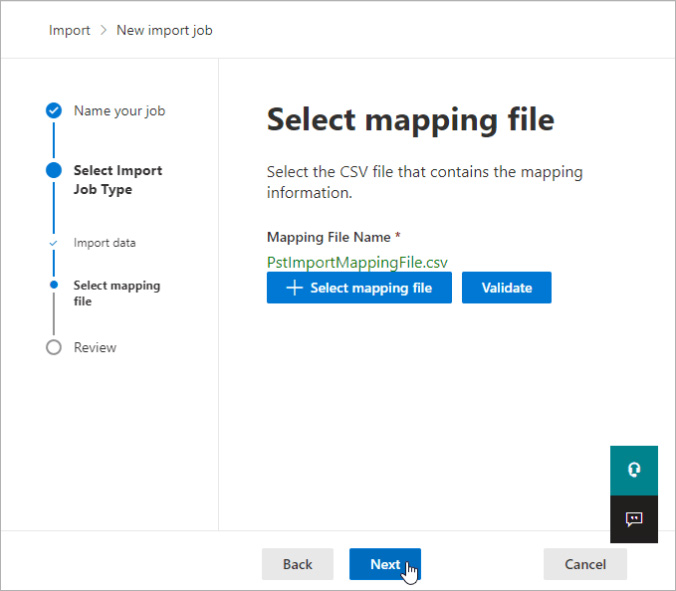
Note: If validation fails, download the logs and check the issue.
- Once validated, click Next to review the PST import job.

- After reviewing the details, click on Submit and then click Done.

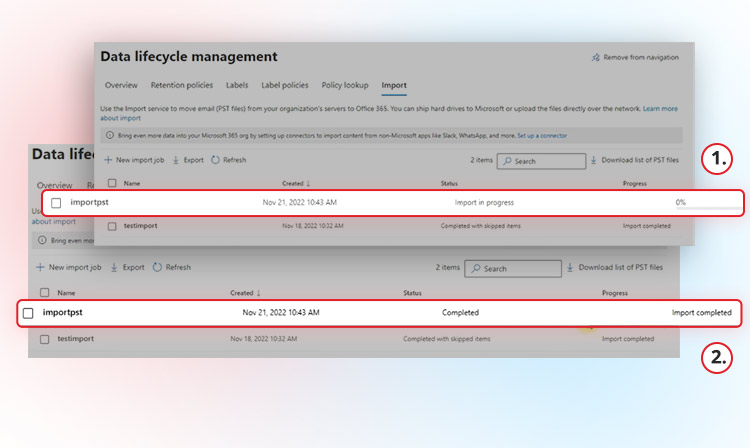
- Once done, it will create an import job. You can check its status in the Progress column under the Import tab on the Data lifecycle management window.
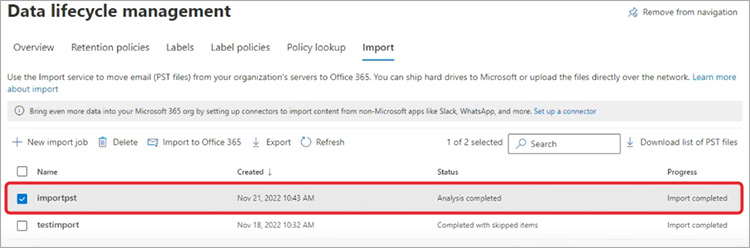
- Once the import process is complete, the status will change to Import completed.

- Now, select the item and click on Import to Office 365.
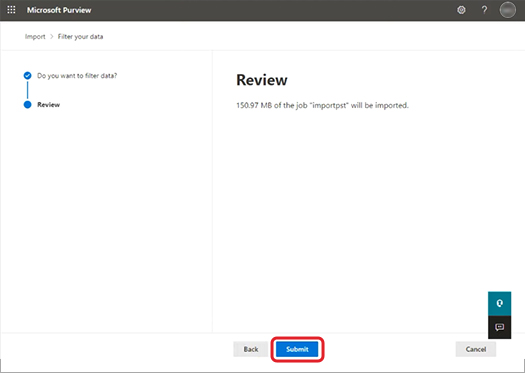
- It will ask if you want to filter the data or not. Choose a suitable option and click Next.
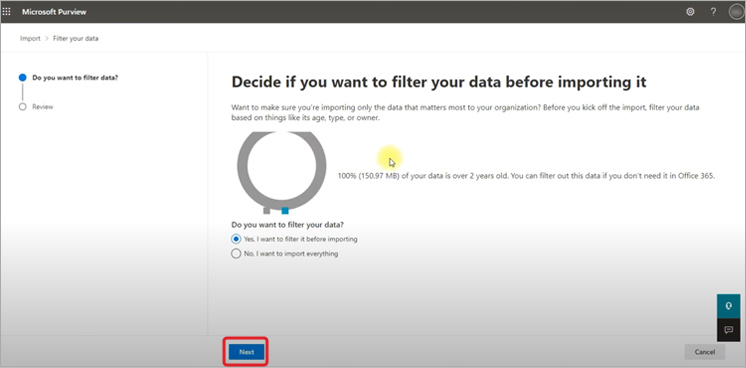
- Now, review the PST file transfer. If everything is fine, click on Submit.
You can see the status of import job on the Data lifecycle management window as Import in progress. Wait for some time and refresh the page. It will update the status to Completed.
Once the wizard has completed importing PST files into Office 365, you will receive an email from Microsoft in your Outlook account for the same. You will also see a newly created Imported folder in your mailbox indicating that you have successfully imported PST files into Office 365.
Method 2: Migrate PST Files to Office 365 using Drive Shipping Method
Another way to migrate PST files to Office 365 is by using the Drive Shipping method. For this, you need to first transfer all your PST files to a BitLocker-encrypted hard drive and then physically ship this hard drive to a Microsoft data center. A professional at Microsoft will upload your PST files to the Azure Storage.
After they have successfully uploaded all the PST files to Azure Storage, you will have to create PST Import Job, create CSV mapping file, and start the PST import process to import PST files into Microsoft 365 (as mentioned in Method 1).
Before you proceed with this method, you must know that Microsoft charges $2/GB or $2000/TB of data. Make sure that each PST file you add to the hard drive is not larger than 20 GB as it can impact the PST import performance.
Method 3: Use an Outlook PST to Office 365 Migration Software
The methods explained above are tedious, time-consuming, and resource-intensive. You can simplify the process of migrating PST files to Office 365 by using a powerful PST to Office 365 migration software. One such tool is Stellar Migrator for Outlook. It is a simple and efficient Outlook PST migrator tool that lets you select, scan, and upload PST files directly to Office 365. The software securely connects to Office 365 using the Microsoft Modern Authentication and starts uploading the mail items from the selected Outlook PST files to the mailboxes on Office 365.
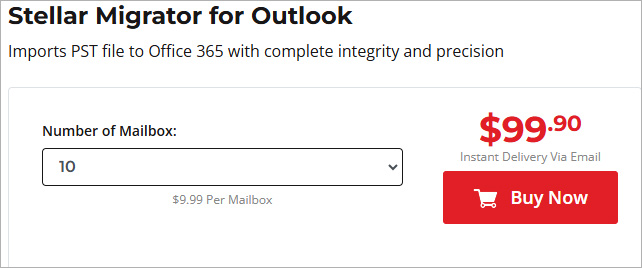
During the migration process, the software preserves the original folder structure and hierarchy. It also offers option to merge the mail items in existing folders, such as Inbox, Sent Items, etc. to avoid duplicate mail folders. This software is available in a pay-per-use plan. This means you will have to pay only for the number of PST files or mailboxes you want to migrate to Microsoft 365.
Here is the stepwise process to use this software to migrate PST files to Office 365:
- Purchase Stellar Migrator for Outlook from the official website and install it on your system.
Notes:
- Select the number of mailboxes you want to migrate at the time of purchasing.
- Configure Office 365 profile/s in Outlook before using the software.
- Launch the software.
- Click on the Profile List to see all the PST files configured with your profile. You can also use the Choose Mailbox Manually option to select the PST file.
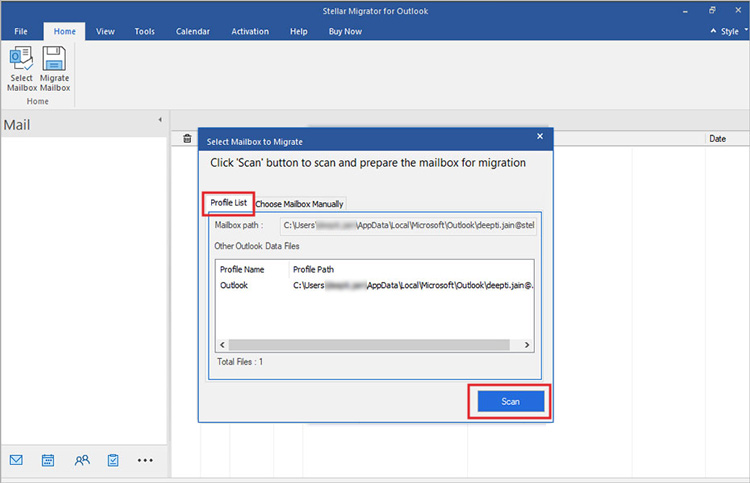
- After selecting the PST file, click on Scan.
- It will show you all the items in the selected PST file when the scan process is finished. Choose the items that you want to migrate to Office 365 and click the Migrate Mailbox button.
- The software will ask you to enter the software licensing credentials. Enter them and click Connect.
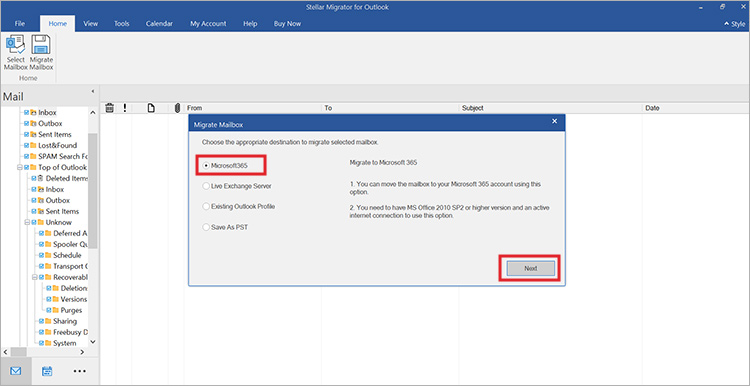
- Then, select Office 365 and click Next.
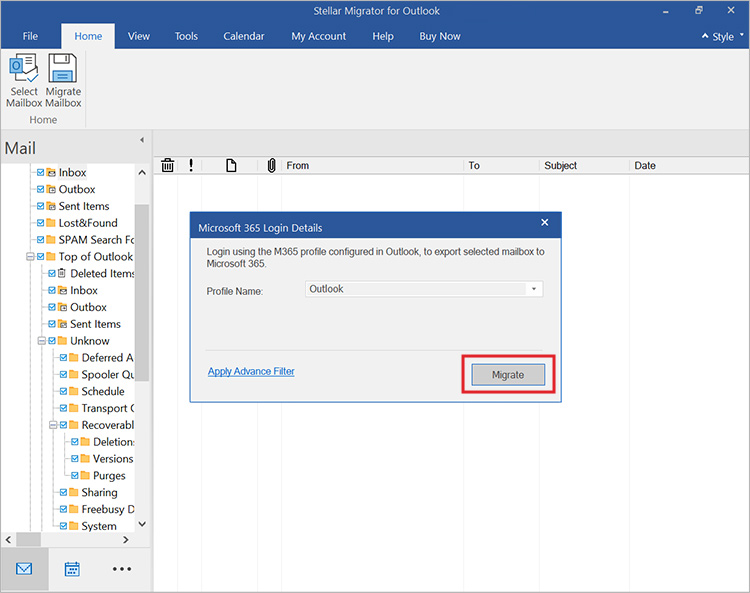
- You will see the Microsoft 365 Login window. Select the Office 365 profile configured in Outlook and click on Migrate.
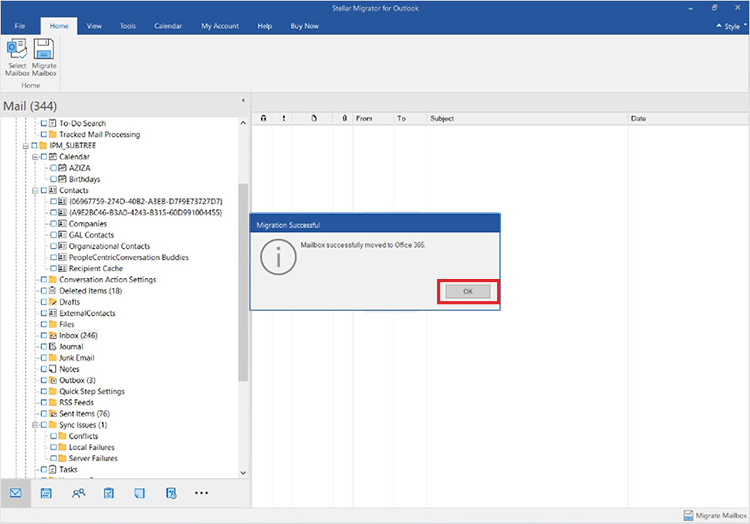
- The software will start migrating the PST file data to Office 365 account. Once the process is complete, click OK.
You can also use this software to migrate multiple PST files to different Office 365 profiles. For this, you need to configure different Office 365 profiles in the Outlook client on your system. The software will automatically detect and list all the Office 365 profiles configured in Outlook. You can then select the user profile where you want to migrate the selected PST file.
How to Migrate PST File from an IMAP/POP3 Account to Office 365?
If you need to migrate a few mailboxes configured with IMAP or POP3 to Office 365, you can first export the mailbox data to PST file using the Outlook’s Import/Export wizard. Once exported, configure your Office 365 account in Outlook and again use the Import/Export wizard to import the PST file into it. Follow the stepwise process given below:
Step 1: Add Credentials for the Account Configured with IMAP/POP3 in Outlook
- Click on File > Add Account to add your email account in the Outlook client.
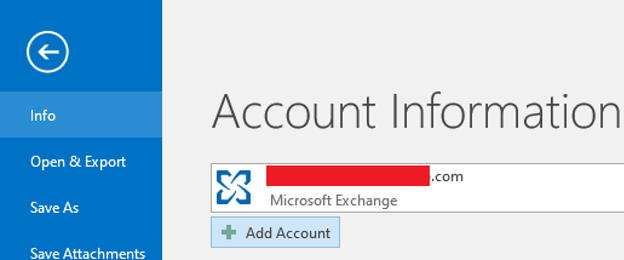
- Add the credentials and click Next.
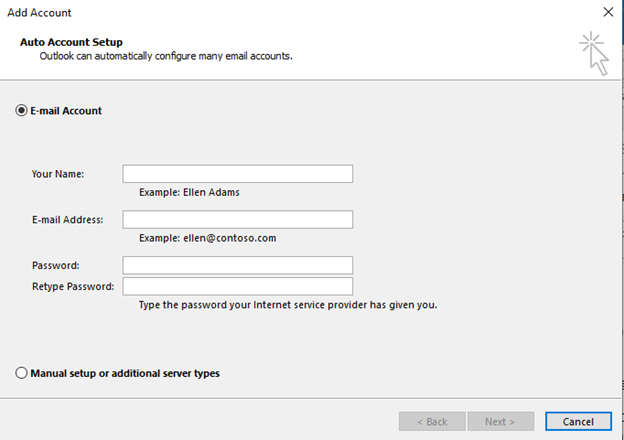
- Follow the onscreen prompts to complete the process.
Step 2: Export the Mailbox Data to PST File
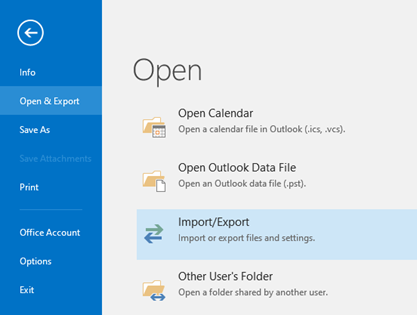
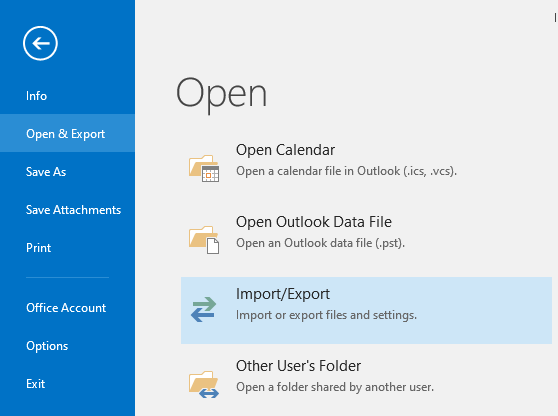
- Go to File and click on Open & Export > Import/Export.
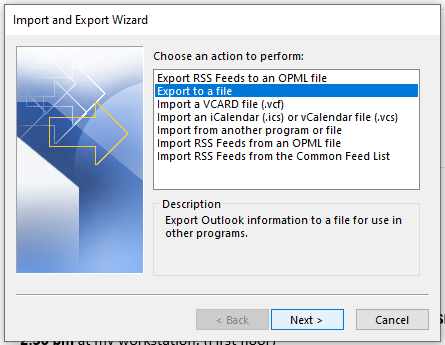
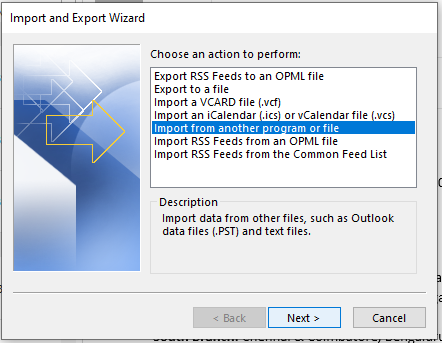
- You will see the Import and Export Wizard. Select the Export to a file option from the given list of actions and click Next.
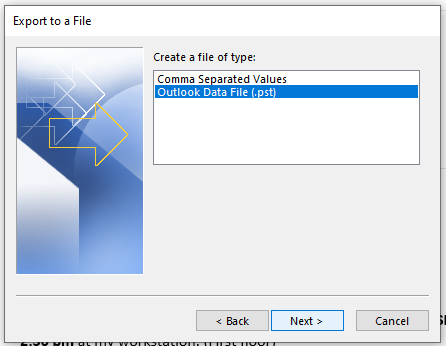
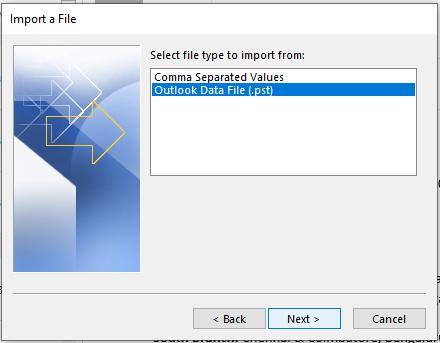
- Choose the Outlook Data File (.pst) option and click Next.
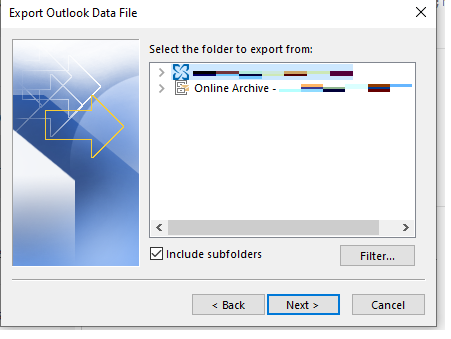
- Select the folder (mailbox) from where you want to export the data. Click Next.
- Go to the location where you want to save the exported PST file.
- Select the required option for duplicate items. Click Finish.

Follow the steps given in Step 1 again to add your Office 365 account in Outlook.
Step 3: Import the PST File into Office 365 via Outlook
- After adding the account, go to File > Open & Export and select Import/Export.
- Select Import from another program or file and click Next.
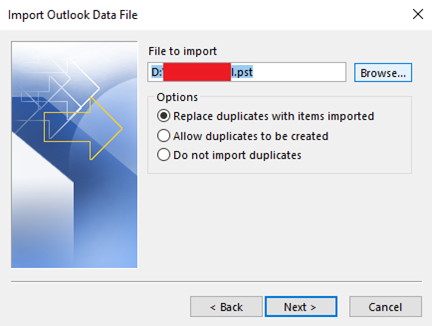
- Select Outlook Data File (.pst) and click Next.
- Click Browse to choose the PST file and click Next.
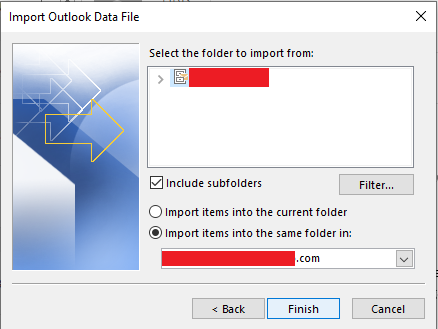
- Choose the Microsoft 365 email account and click Finish.
Repeat these steps to import other PST files into Microsoft 365.
Conclusion
Above, we have mentioned different methods to migrate Outlook PST to Office 365. Migrating PST files using manual methods is cumbersome and tedious as you need to perform multiple steps. To save time and efficiently transfer PST files to Office 365, it’s recommended to use a specialized PST migration software, like Stellar Migrator for Outlook. It is a GUI-based software which simplifies the PST to Office 365 migration process.


An experienced Senior Content Developer with a deep interest in technology.
-1193.jpg)
 5 min read