Windows Updates are required to enhance safety, functionality, and overall user experience on the system. Such updates often carry bug fixes, new features, and security patches to keep the computer working flawlessly. However, these updates can also cause different problems, such as system freezes, performance degradation, BSoD errors, OS crash, data loss, etc. Stressing about such situations is natural. But don’t worry! You got this. You can uninstall the problematic Windows update from your system and get it back to its normal functioning.
Types of Windows Updates
Quality updates (also called cumulative updates) and feature updates are the two primary types of Windows Updates. The quality or cumulative updates include new fixes, improvements, previously available patches, security patches, and other small tweaks. On the other hand, the Feature Updates are quite larger. They were previously referred to as ‘Upgrades’ including upgrading Windows to the latest version with improved security, quality revisions, and other significant feature changes and additions.
How to Uninstall a Windows Update?
If installing Windows Update disrupts your computer, your first call of action must be uninstalling that problematic update. In Windows 10 and Windows 11, you can uninstall a Windows update through Settings. However, for Feature updates, you’d need to roll back through recovery options. Here’s how to do it!
Important: If your system is acting up and you feel it might cause issues while uninstalling the updates, we’d advise you to boot your PC in safe mode. Once you’re in Safe Mode, read the instructions against the methods carefully and apply them accordingly.
Uninstall Quality Updates
As mentioned earlier, you can uninstall Quality Updates from the Settings app. To do so, follow the given steps:
- Go to Start, find Settings there and double-click on it.

- You can also press Windows + I to open Settings.
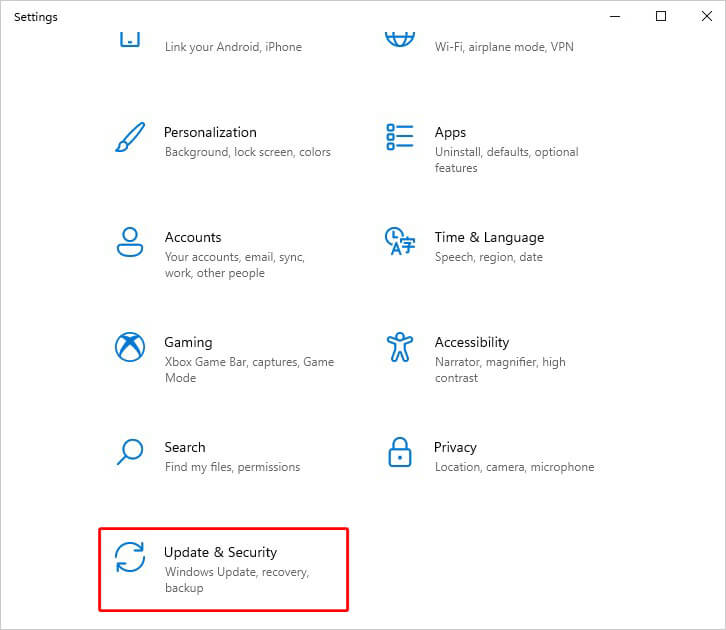
- Next, click Update & Security.
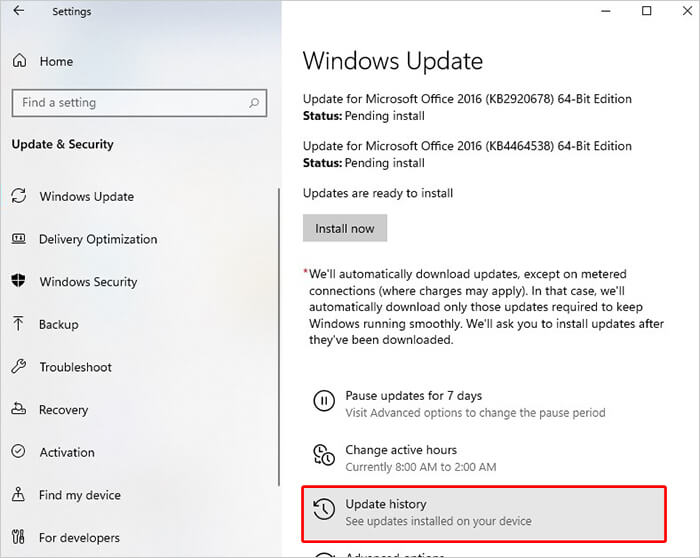
- Now, click Windows Update > Update history.
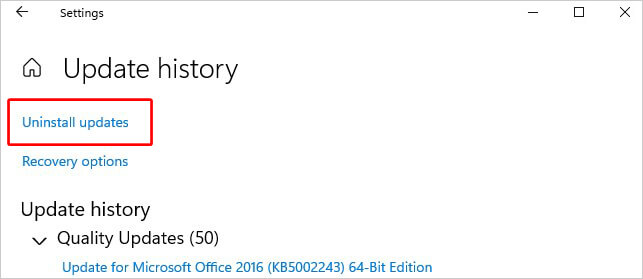
- On the next prompt, click Uninstall updates.
- And, if you want to remove more than one update, select them and click Uninstall beside the Organize option.
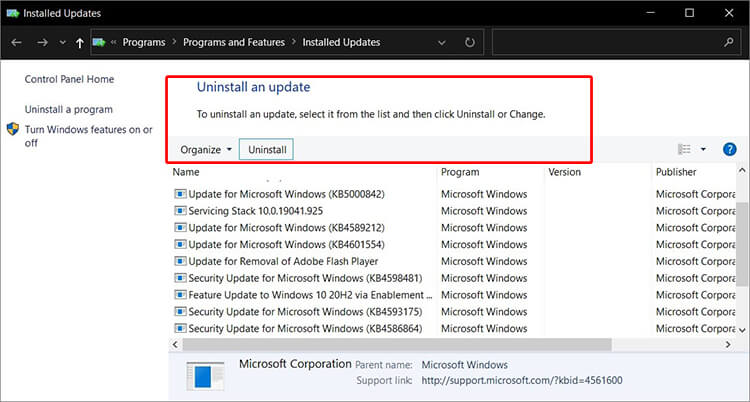
- Once the process is done, you can consider if the problem is resolved.
Note: Windows 10 users must follow Settings > Update & Security > Windows Update > View update history. There click Uninstall updates and follow the instructions given on the screen.
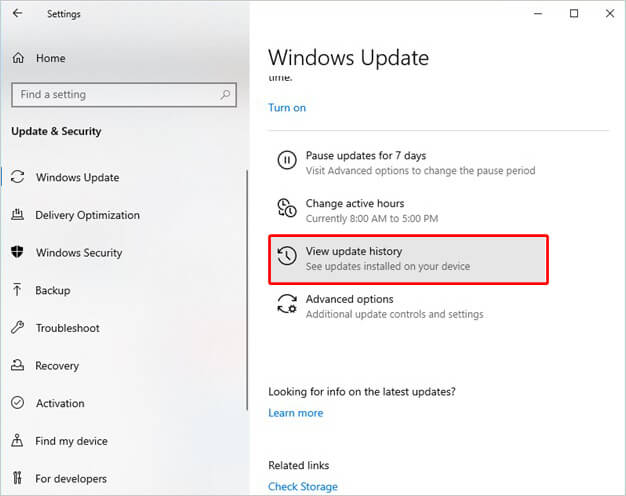
If you don’t see the Uninstall option, you’d need to use System Restore to roll back your system to a previous, error-free stage.
Uninstall Feature Updates
Microsoft thoroughly tests the feature updates on different hardware configurations and releases these updates once a year when your system setup is compatible. You can uninstall a Windows update (feature update) by rolling them back to the older version.
Important: Microsoft only gives you ten days to choose between staying with the latest update or rolling back to the older one. After that, Microsoft removes the old files to free up space on the hard drive, and you won’t be able to roll back.
Quick action is required here. If your system breaks or starts acting up after installing a new feature update or upgrading your system, don’t delay. Follow the given steps:
- Open Settings from Start or press Windows + I to access it.
- There, follow Update & Security > Recovery.
- On the right panel. Scroll down and click Go Back to start the process
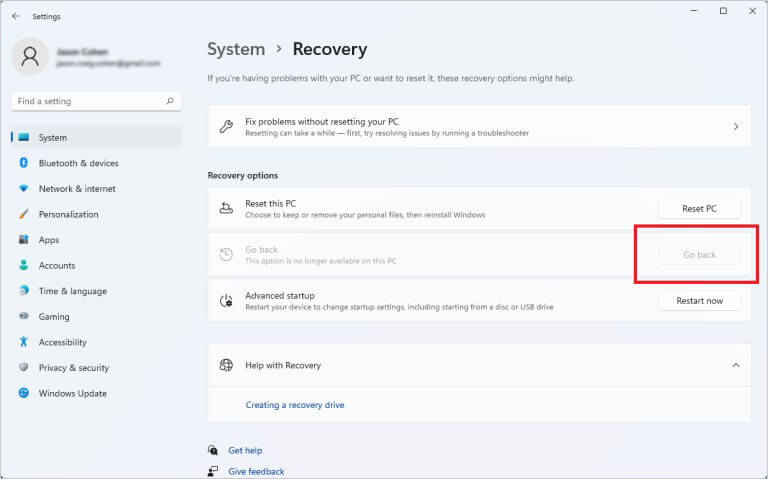
When rolling back or downgrading from Windows 11 to Windows 10, Microsoft will ask you why and offer you a chance to update to Windows 11 in the hope of fixing issues for you. However, if you are firm with your decision, continue with the wizard to uninstall a Windows update.
If you find that the Go back option is greyed out, the duration of 10 days is completed already. Now you can only restore to Windows 10 through system backup (if you have any).
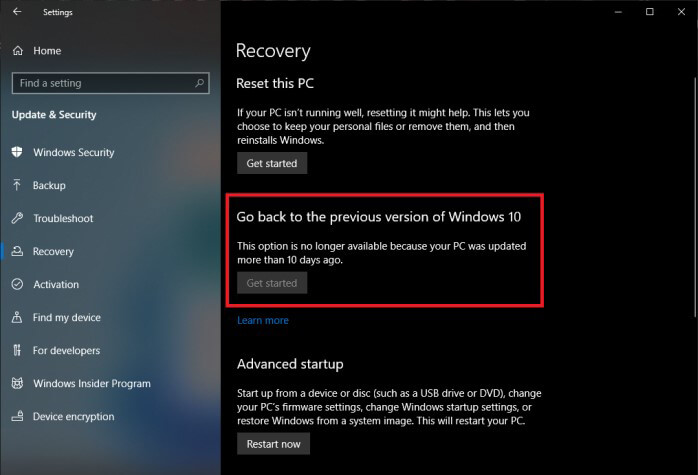
Note: Windows 10 users will see Go back to the previous version of Windows 10 option on following Settings > Update & Security > Windows Update. Click Get started mentioned below. Go back to the previous version of the Windows 10 option to initiate the process.
Can’t Boot into Windows at All?
Sometimes, after installing a Windows update, you may not be able to boot into your system at all. In that scenario, you can try uninstalling updates in WinRE (Windows Recovery Environment).
Uninstall Updates in WinRE
To uninstall the problematic Windows Updates, you’d need to access WinRE.
- You can enter the Windows Recovery environment by holding the Power button for 10 seconds until your system shuts down completely (if turned on).
- Now, reboot your system with the Power button and turn it off again.
- Repeat this step thrice, and you will enter the Windows Recovery Environment.
- Now, click Advanced options > Troubleshoot > Advanced options > Uninstall Updates.
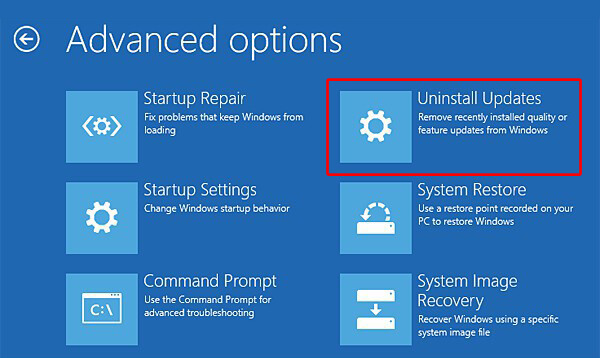
- On Uninstall Updates page, choose between ‘Uninstall quality update’ and ‘Uninstall latest feature update,’ whichever you want to remove.
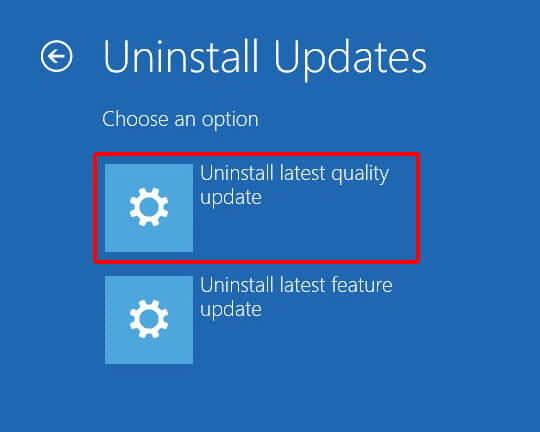
- After removing the problematic update from your system, you should be able to boot into your system normally.
What About My Data?
If your system is malfunctioning after installing Windows Update and you’re worried about your data, recover it using dedicated data recovery software, such as Stellar Data Recovery Software. It is a powerful software that can restore all types of files, folders, documents, emails, etc. In addition, it can retrieve your data from Windows systems and supported storage drives, such as HDDs, SSDs, USB drives, and more.
Final Thoughts
Windows Updates are necessary to fix various vulnerabilities and errors in Windows and associated software. Additionally, these Windows Updates may add new features. However, these updates can even be problematic sometimes, leading your system from malfunctioning to a complete crash. In such a case, recover your data and proceed with uninstalling updates with the methods shared in this article. Hopefully, that would sort out the issue.


 9 min read
-1505.jpg)
