In certain situations, like database corruption and data loss, moving the database to another server, etc., you may need to restore your MySQL database from backup. Also, in situations like accidental deletion of the database or overwriting an existing database, you will need to perform the restore process.
Methods to Restore MySQL Database in Linux
You can try to restore your database manually or by using a MySQL repair tool. But, before initiating the restore process, you must meet the following requirements.
Prerequisites
- Make sure you have sufficient rights on the database.
- An updated backup file exists for the database.
- You must have MySQL installed on your machine.
Use Backup to Restore MySQL Database in Linux
You can restore your database from the backup file (i.e., mysqldump) by following these steps:
Step 1: Use the “mysqladmin” utility to create an empty database
On the Linux machine that hosts the MySQL database, create a new database by using the following mysqladmin command:
mysqladmin -u root -p create database_name
Make sure to change the ‘database_name’ with the same as the database you want to restore. After changing the database name, execute the above command. Enter the password when prompted. The mysqldump utility will create a new database.
Step 2: Restore the mysqldump file
Now, restore your original database from the backup file into the new database (created in step 1). To do so, execute the following command:
mysql -u [user] -p [database_name] < [filename].sql
Use MySQL Recovery Tool to Restore MySQL Database in Linux
If implementing the manual solution fails to restore the database, using a professional MySQL recovery tool such as Stellar Repair for MySQL may help. The software helps repair MyISAM and InnoDB databases on Linux and Windows systems.
Steps to restore a MySQL database created on a Linux-based OS are as follows:
Step 1: In your Linux machine, copy the MySQL database folders and ibdata1 file from the default location, i.e., \var\lib\MySQL.
Step 2: Now paste the copied folders and ibdata1 into the Windows system drive.
Step 3: Run Stellar Repair for MySQL on the Windows system, and the following window will open.
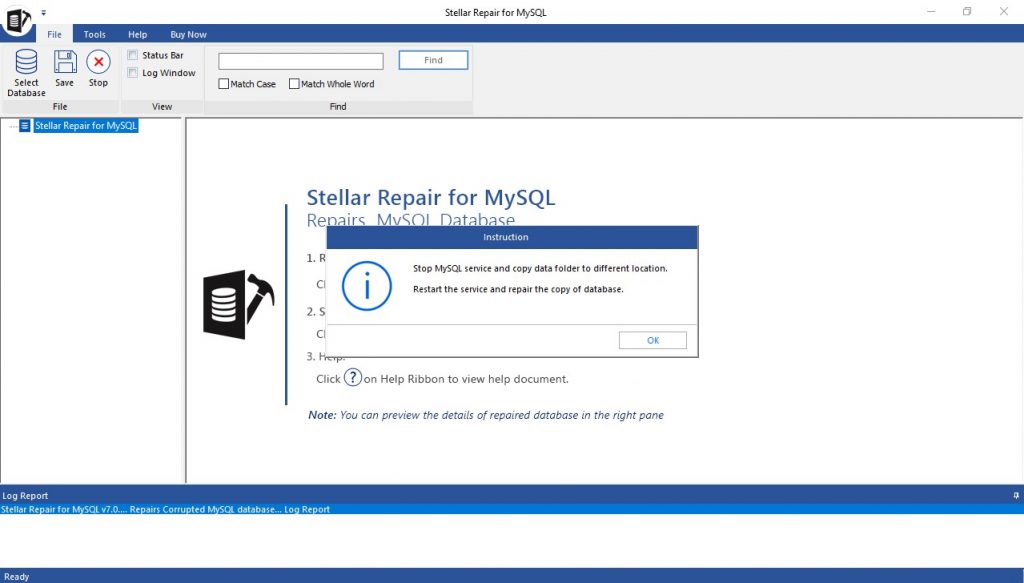
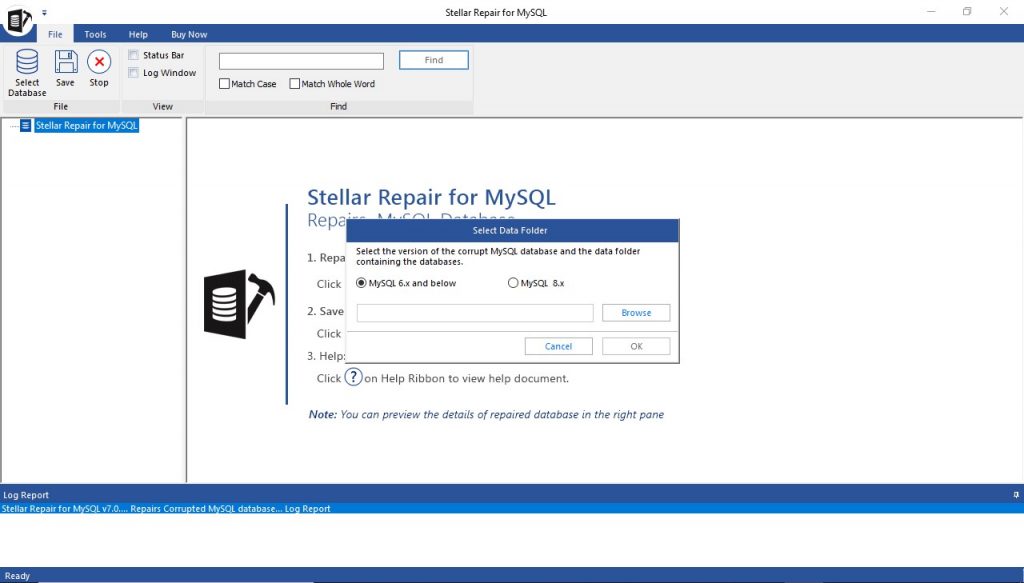
Step 4: Click OK. In the ‘Select Data Folder’ dialog box that appears, choose the MySQL version supported by your system. Next, browse and select the data folder you have copied from your Linux machine, and hit the OK button.
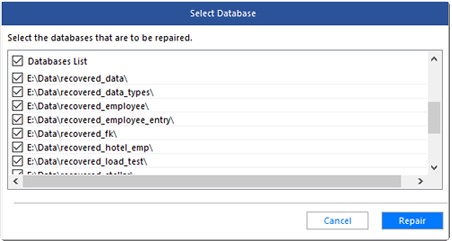
Step 5: A window with a list of databases will be displayed. Select the database you want to restore, and then click Repair.
Step 6: The repairing process will start. Click OK when the repair complete message box pops-up.
Step 7: You can see a preview of all the recoverable MySQL database objects. Select all or the specific objects you want to restore, and then click the Save button on the File menu.
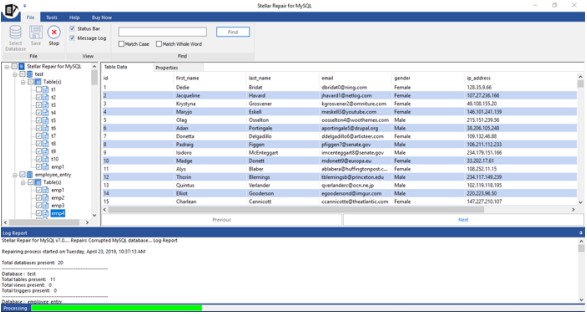
Step 8: Select the options to save the repaired MySQL database, and click Save.
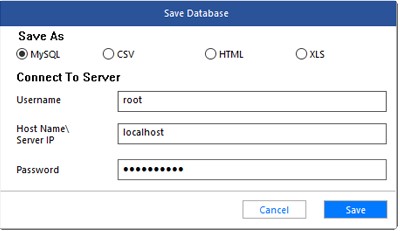
Step 9: Click OK when the ‘Saving process completed’ message appears.

Step 10: Navigate to the folder where the repaired file is stored. And then, copy the repaired database folders and ibdata1 folder from the default location, i.e., C:\Program Files\MySQL\MySQL Server 6.0\data.
Step 11: Paste the repaired database folders and ibdata1 file in the Linux machine.
End Note
Restoring a MySQL database manually without backup may result in data inconsistency. Also, the manual procedure to perform the database restore may take a lot of time, increasing the database downtime. A better alternative is to use Stellar Repair for MySQL software. The software helps repair severely corrupted MySQL database without any risk of data loss. Check out the software user guide for more information about it.


-in-MySQL-to-Restore-Corrupted-Databases-1746.jpg)
 5 min read