Transitioning from a hard disk drive (HDD) to a solid-state drive (SSD) is a great choice when you want to upgrade your PC's overall performance and efficiency. However, there are a few challenges you might consider, including:
- Migrating or moving from HDD to SSD requires you to freshly reinstall the Windows OS, meaning the creation of new drive partitions, causing total system data loss (if there’s no backup available).
- The process seems quite trickier since SSDs have usually smaller storage capacity than their HDD counterparts.
However, you can bypass these challenges and move Windows to another drive. In this article, we’ve discussed the methods that will help you move Windows to another drive without performing Windows reinstallation and keep your data as well. So let’s start with the basics!
What all do you need?
- Connect both HDD and SSD on your PC with SATA data cables
- A spare storage media to store System Backup
- Bootable installation media drive
How to Move Windows to another Drive?
There are two ways to transfer Windows OS to a new hard drive.
- Cloning HDD to SSD through System Image option or dedicated Cloning App
- Performing a clean Windows Installation using bootable installation media
Method 1: Clone your HDD to SSD to Move Windows OS to another Drive
There are two ways to clone HDD to SSD - (I) Cloning hard drive to another drive with System Image option and (II) Cloning hard drive to a new drive with a dedicated Cloning App.
1. Cloning hard drive to SSD with System Image tool
You can use Windows built-in system imaging tool ‘System Image’ to create a clone of your original hard drive and then transfer data to SSD within a couple of minutes. Here are the steps:
Create a system image of your original HDD
- Connect an external storage drive to your PC.
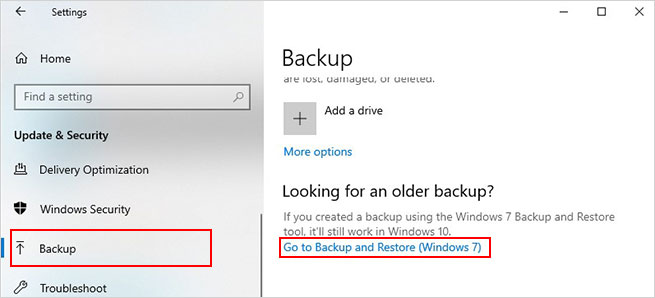
- Open System Settings and go to Update & Security.
- Next, move to Backup and click Go to Backup and Restore (Windows 7).
- Now, click Create a system image.
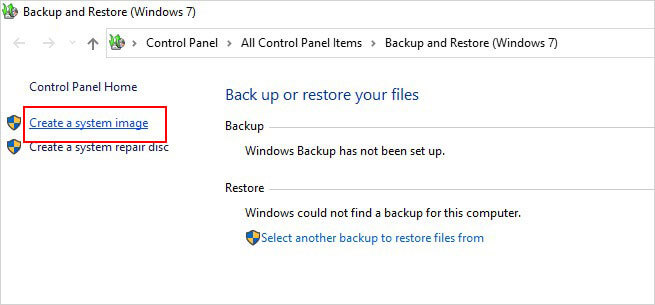
- The system will start looking for backup devices.
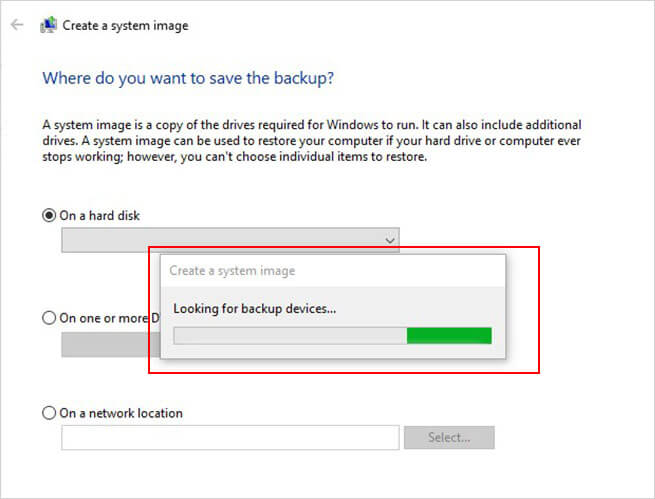
- Choose the backup drive from the available options and click Next.
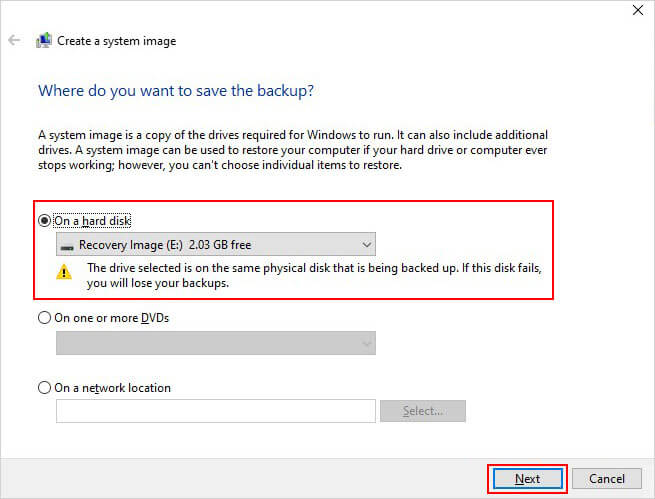
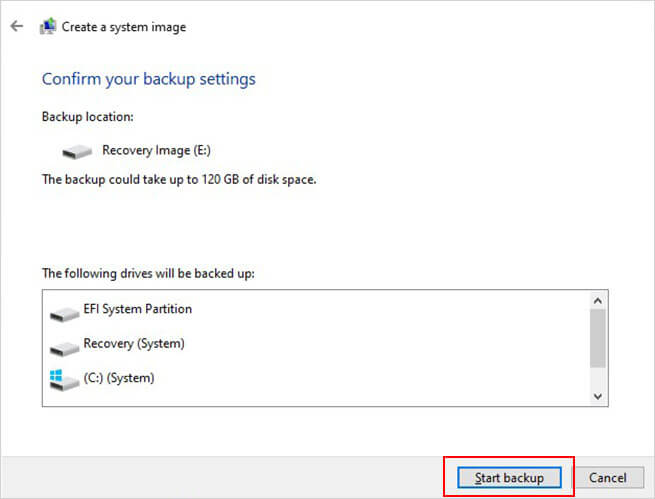
- Now, choose the drive partitions of which you want to take the backup and click ‘Next’.
- All your selected partitions will show up on the list. Click Start backup.
- Wait until the process is finished. The method may take a while, depending on the size of the drive partitions.
- After that, you can choose to close the wizard or start creating a system repair disc, which may be a good idea, especially when you don’t have a physical copy of Windows for reinstallation.
Note: Windows 10 users may refer to this guide to learn how to create a system image in Windows 10.
Now that you’ve created the system image of your original HDD, use it to move Windows to SSD drive.
Use System Image to transfer Windows from HDD to SSD
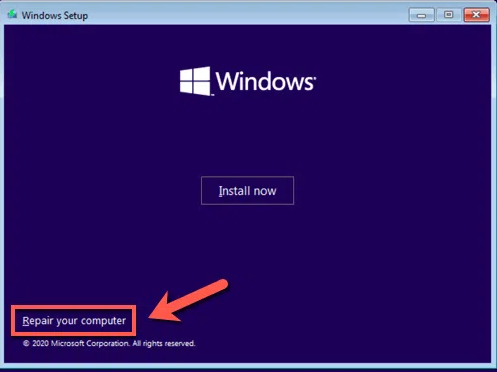
- Connect SSD to your computer and choose to boot your PC from USB Installation Media created using the Windows media creation tool.
- Now, click Repair your computer.
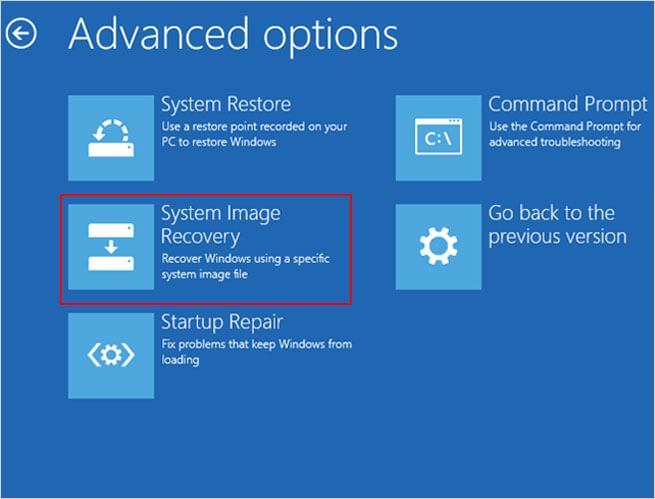
- Next, click Advanced options and choose Troubleshoot.
- Click System Image Recovery from available options on the next prompt.
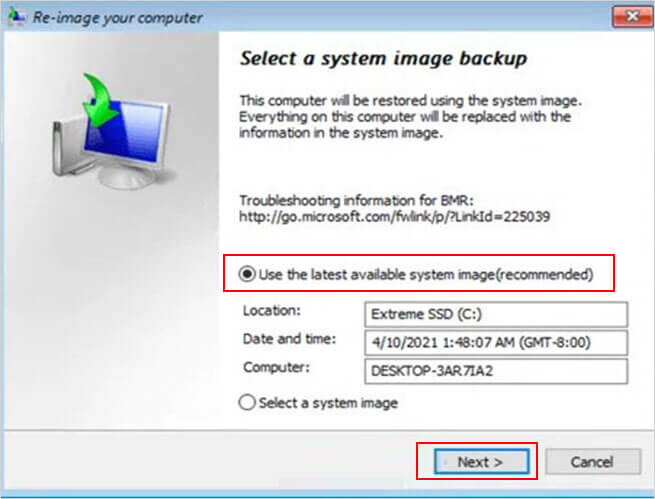
- Windows will automatically detect the system image on your external hard drive in the Re-image your PC menu.
- Else, choose the ‘Use latest available system image (recommended)’ option and after that, click Next to proceed.
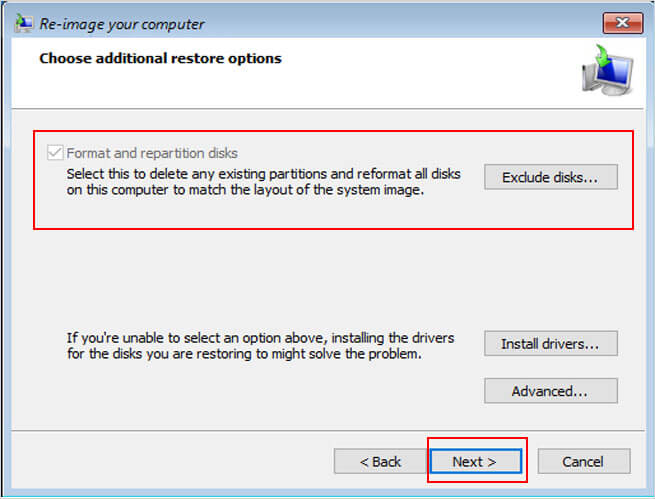
- Your SSD will be formatted with the same partitions as the original HDD. If you want to exclude any drive partition, click Exclude disks and deselect them.
- If not, click Next to proceed further.
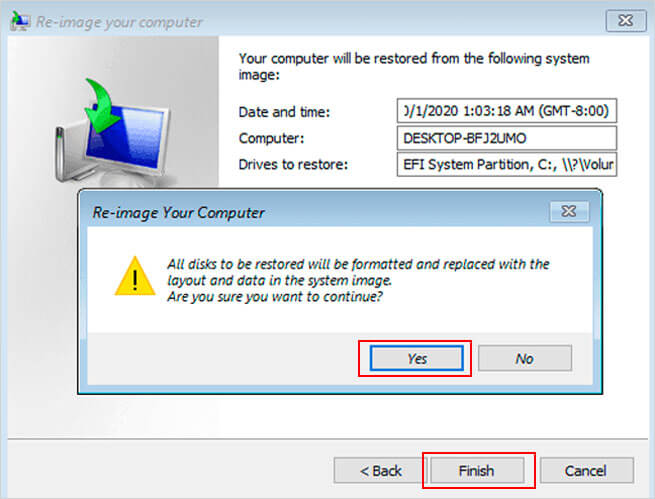
- Now, click Finish and then click ‘Yes’ to start the disk imaging process. It will take some time to complete. Once done, click Restart Now to boot your system.
- Now, remove the Windows installation media (USB drive) and change the BIOS/UEFI settings to ensure that SSD is currently selected as the first boot disk.
If the files are copied to the SSD of the same size, you don’t need anything else to do. You’re all set with your new PC with SSD installed on it. The system will boot normally, and you will be able to resume using your system.
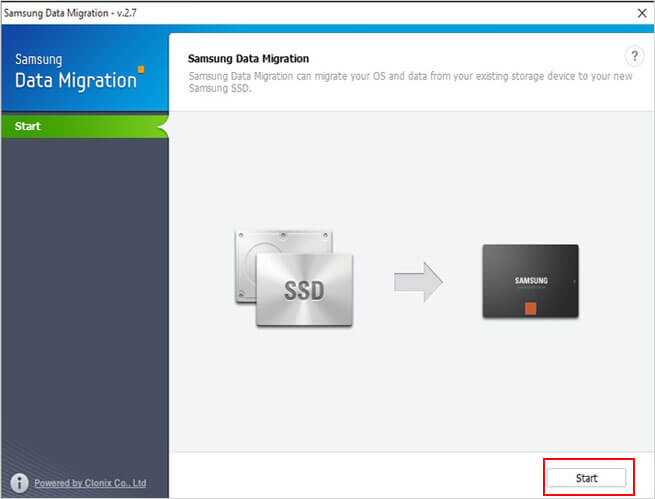
2. Cloning HDD to SSD with dedicated Cloning App
Migrating Windows to a new hard drive can also be done using a dedicated cloning application or software. Plenty of cloning apps are available in the market, such as Acronis True Image 2020, Samsung Data Migration, AOMEI Backupper Standard, Macrium Reflect, Clonezilla, etc. You may also try the drive cloning utility of Stellar Data Recovery Professional. Hard drive cloning helps creating a complete copy of your hard drive, including data, drive partitions, and Windows OS.
You can use the cloned hard drive to move Windows to another drive easily. Using such cloning software/application to clone a hard drive won’t require you to have a backup of your data as it can be used as a local backup. Thereby not requiring Windows reinstallation.
Note: Cloning the entire HDD to the SSD is only possible if the space used on HDD is less than the SSD size.
Method 2: Perform a Clean Windows Installation
Before you start, take a backup of your system data on an external storage media. Once you’re done taking the system backup, you may insert the SSD drive into your system and perform a clean install of Windows on your system.
Follow the given steps:
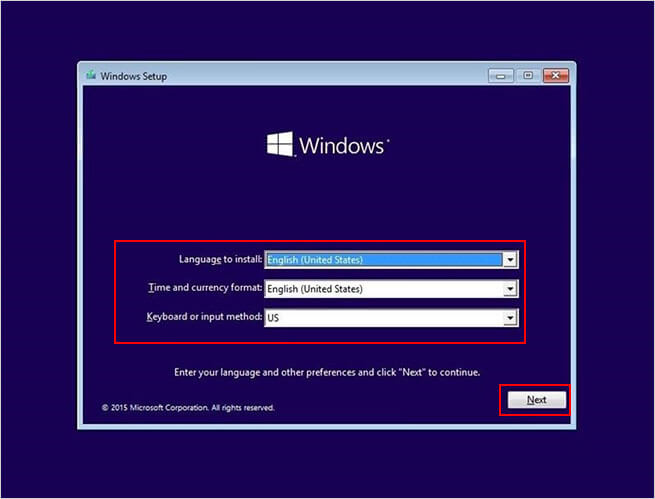
- Use a Windows installation media and choose to boot your system from it.
- After that, the Windows logo appears on the screen.
- Select your language, time, and keyboard. Click Next to proceed.
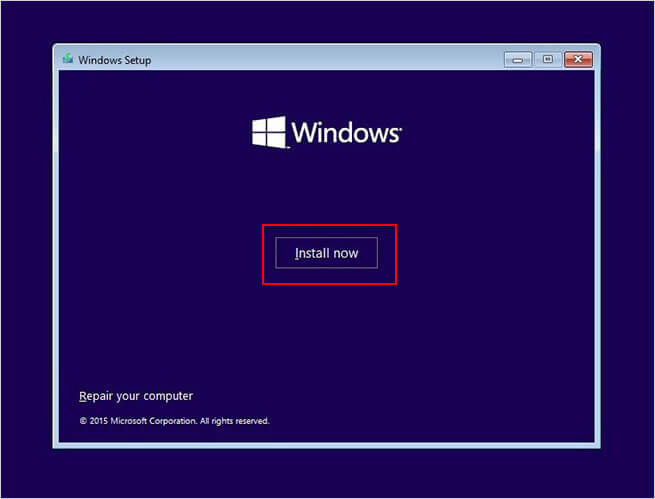
- On the next prompt, click Install now.
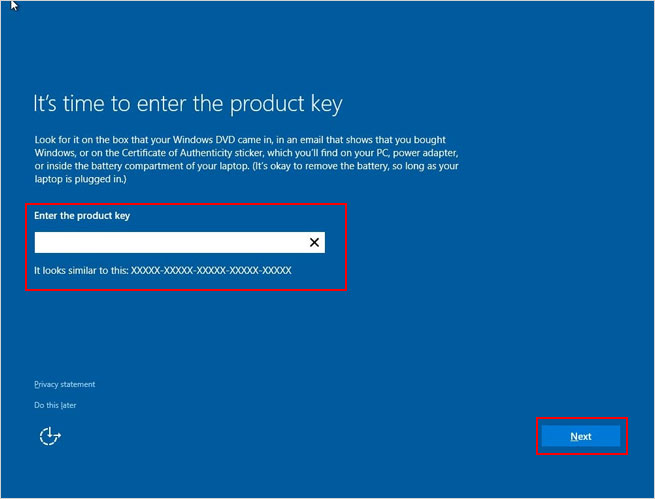
- Now, the Windows setup will prompt you to enter the product key.
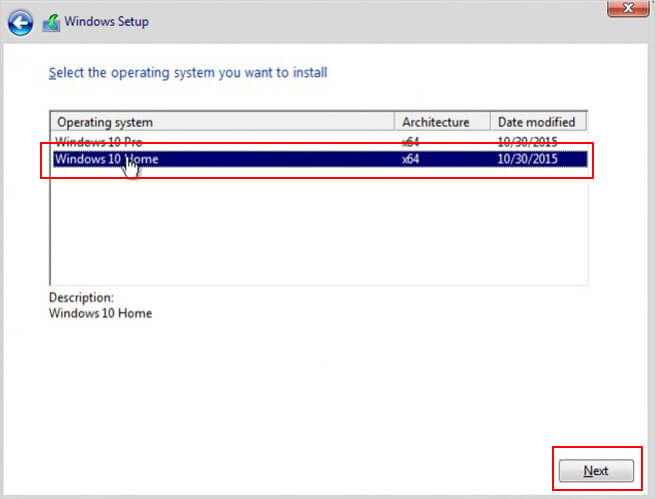
- It will also prompt you to choose the edition, i.e., Home or Pro.
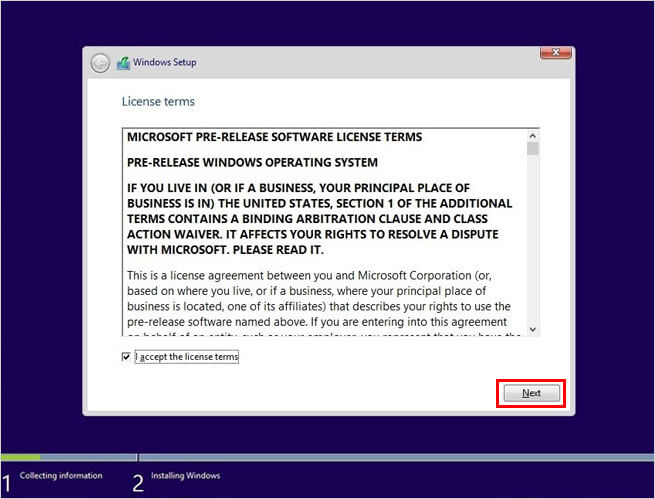
- Wait until the setup prepares to copy files. After that, accept the license terms and click Next.
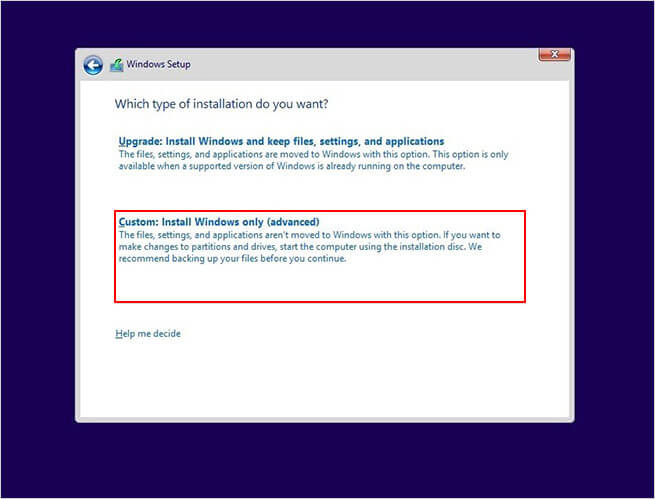
- Now, select Custom: Install Windows only (advanced) to proceed.
- Choose the SSD and then click New.
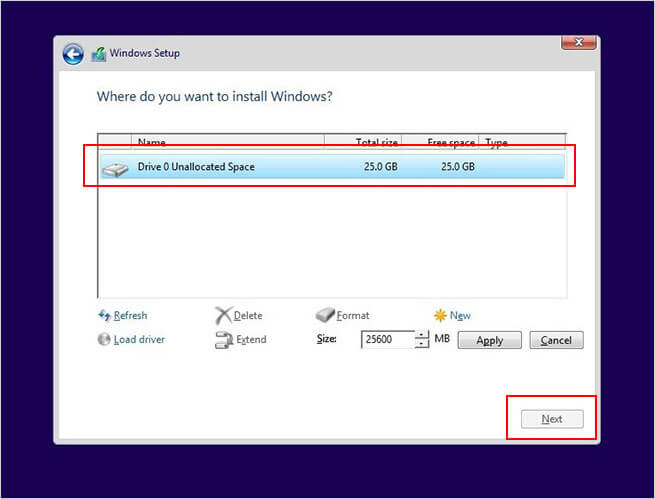
- Choose the unallocated drive listed and then click New > Apply > OK.
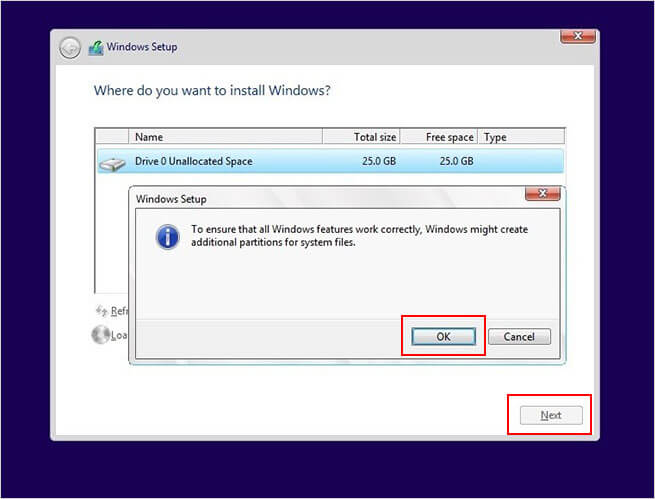
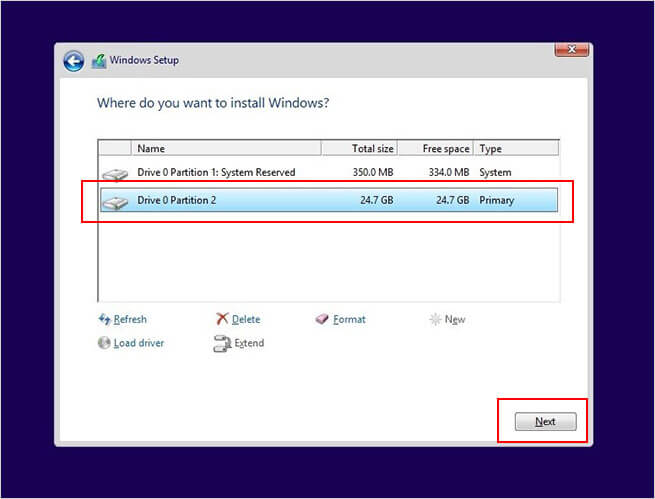
- It will split the hard drive into multiple partitions. Choose the primary partition.
- Click Next to proceed.
- Wait until the Windows installation process completes. Once the process is finished, the system will reboot automatically.
- Once done, you can connect the backup drive and restore your data to your system now.
What if you forgot to take a backup before Windows Installation?
A few users have reported about installing Windows without taking a backup of their data. Refer to the following query:

In such a case, you will lose all your data permanently. But worry not! You may try recovering data using a data recovery tool, such as Stellar Data Recovery Professional. It’s an easy-to-use yet powerful tool that can efficiently restore deleted or lost files, photos, documents, videos, audio files, etc. It supports recovery from formatted, corrupted, RAW, or even BitLocker-encrypted drives.
To Wrap Up
Migrating or moving Windows to another drive consists of two methods, i.e., cloning HDD to SSD and performing a clean install of Windows OS. Cloning a hard drive will require you to use a similar or large-sized SSD. Cloning the hard drive may take longer, but you can be stress-free as it copies everything from your original HDD to SSD. Another way is to install the Windows OS after installing SSD freshly. It’s recommended to take a backup of your data before Windows installation. If you forgot to take backup and reinstalled OS, you’d lose data. But there is no need to concern as you can recover data using Stellar Data Recovery Professional, a powerful DIY data recovery tool that efficiently restores all data from formatted, corrupted, or even BitLocker-encrypted drives.


A seasoned technology writer and tech enthusiast with keen interest for everything in technology.

 3 min read