Prior to Outlook 2013, for IMAP accounts, two data files were created to store the mailbox items. There was an OST file, which stored the mail items that were synchronized with the server, and a PST file to store items locally, such as calendar, contacts, and notes. However, starting with Outlook 2013, only a single Outlook data file (OST) is used for storing all the mailbox items. But it stores the aforementioned local items in folders marked as “This computer only.” If you want to remove these folders, this guide will take you through the steps that you need to perform to get rid of such folders.
Steps to Remove “This computer only” Folders in Outlook
Since the local mailbox items are not backed up when they are in “This computer only” folders, it is critical to first backup this data before removing them. Below, we will explain the stepwise process to remove these folders, which involves creating a backup PST file, moving all these local items to this PST file, and then recreate OST file.
Step 1: Create a Local PST File
You need to first create a local PST file for backing up the mail items in ‘This computer only’ folders. Follow these instructions:
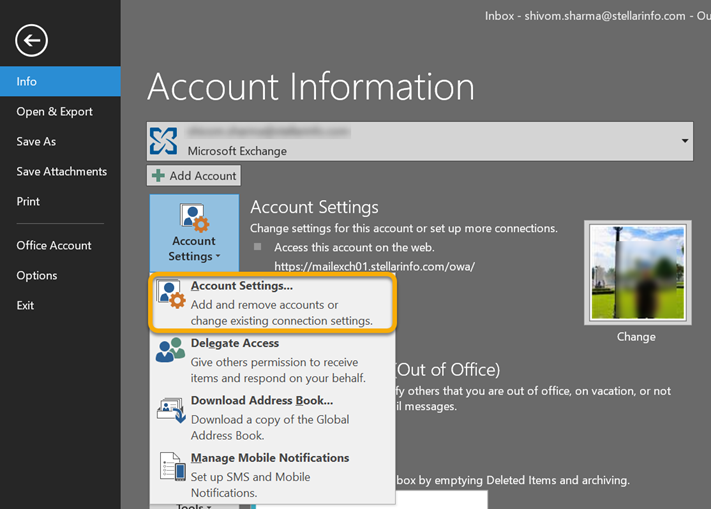
- Open Outlook and go to File > Account Settings > Account Settings.
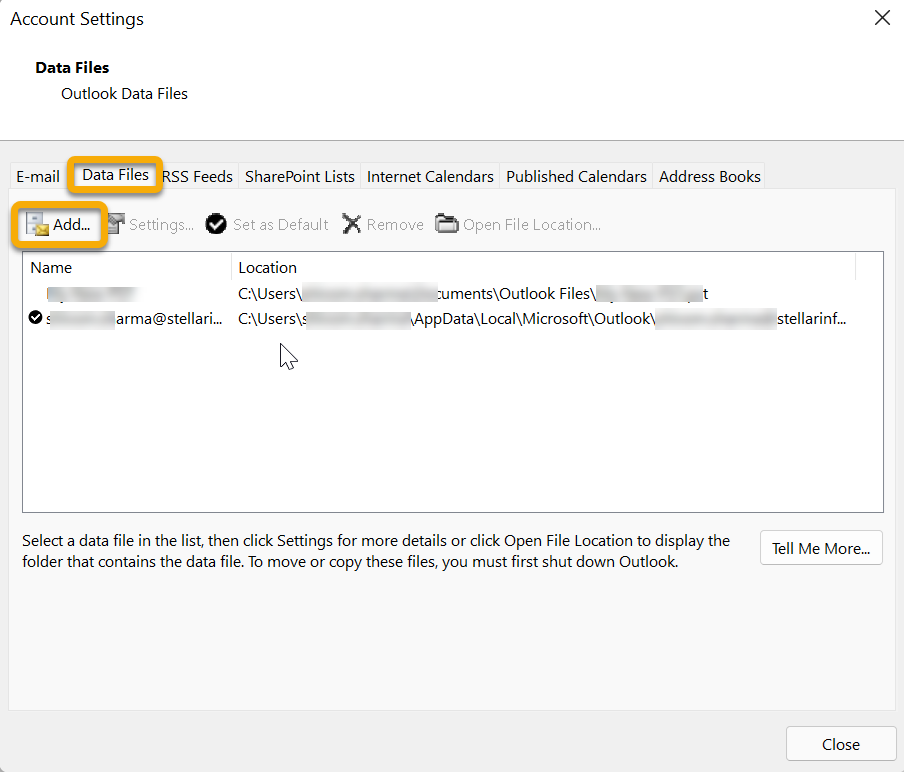
- In Outlook Account Settings, select the Data Files tab and click Add…
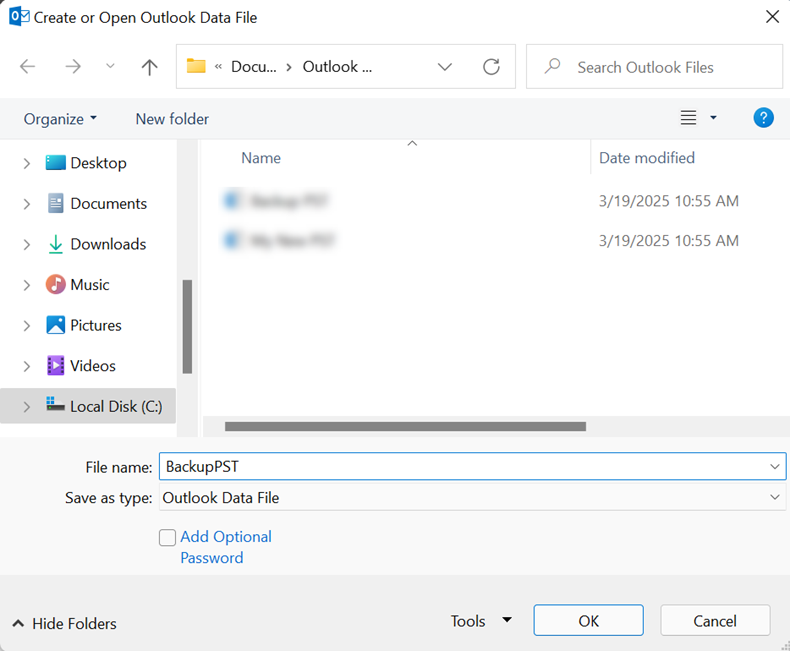
- Choose a name for the new PST file and click OK.
- Then, select the newly-created PST file and click Set as Default.
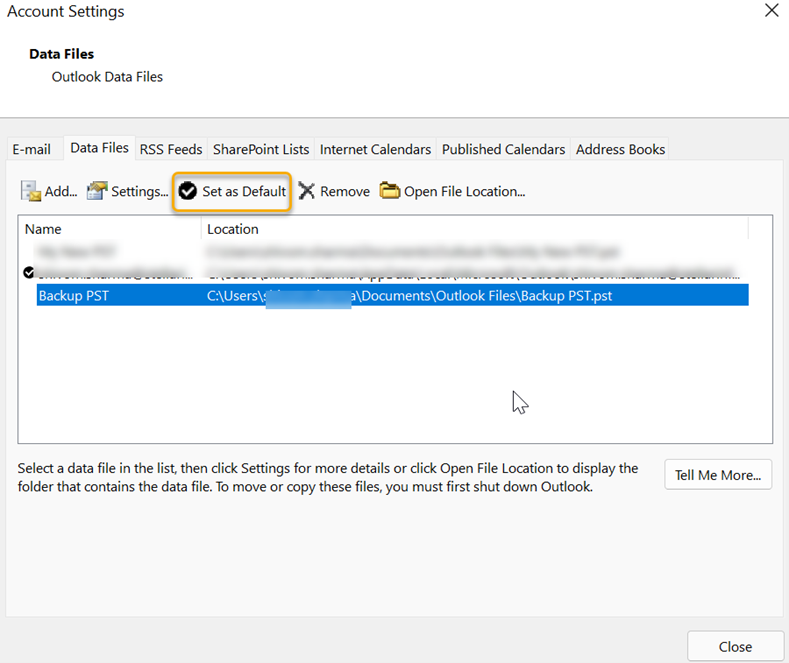
Now that you have set the newly-created PST file as default, you have to move your offline mail items to it.
Step 2: Move Items from ‘This computer only’ Folders to PST File
The purpose of moving the offline items from ‘This computer only’ folder to the new PST file is to create a backup of these items. You can start with the calendar items. Follow these steps to move calendar items to the PST file:
- Restart Outlook and go to the Calendar (This computer only) folder.
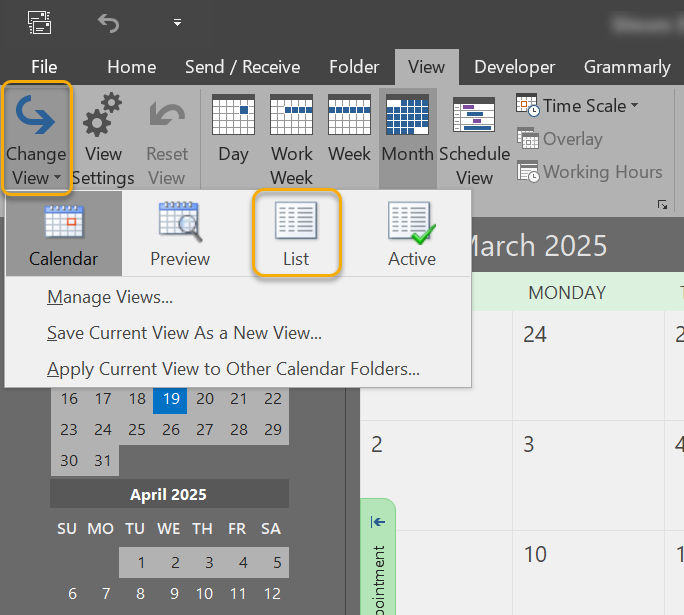
- Change the View Settings to List View. This would make it easier for you to select all the entries.
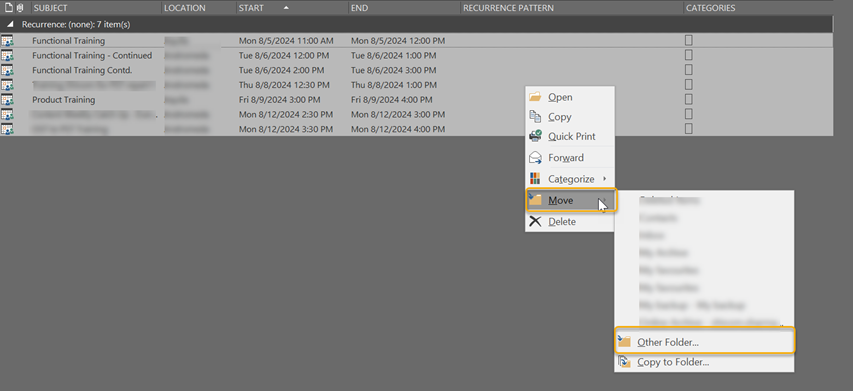
- Select all the appointments listed in the calendar folder, right-click on them, and select the Move option.
- Select Other Folder from the dropdown menu, select the corresponding folder in the new PST file, and move all the appointments in that folder.
You can repeat the above process to move other folders that are marked as ‘This computer only,’ such as contacts, journals, and notes.
Once you’re done moving the folders to PST, you need to recreate the Outlook data file (OST), linked to your IMAP account.
Step 3: Recreate the Outlook data File (OST)
When you recreate the OST file, Outlook will download all your mailbox data to a new OST file and remove the folders marked as ‘This computer only’. To do this, follow the below-mentioned steps:
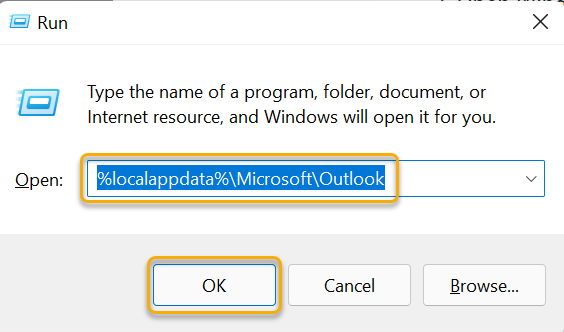
- Close Outlook and open the Run dialog box.
- In the Run dialog box, type %localappdata%\Microsoft\Outlook and click OK.
- In this folder, select the Outlook data file (OST) associated with your IMAP account, right-click on it, and rename it with .bak extension. This will create a backup OST file.
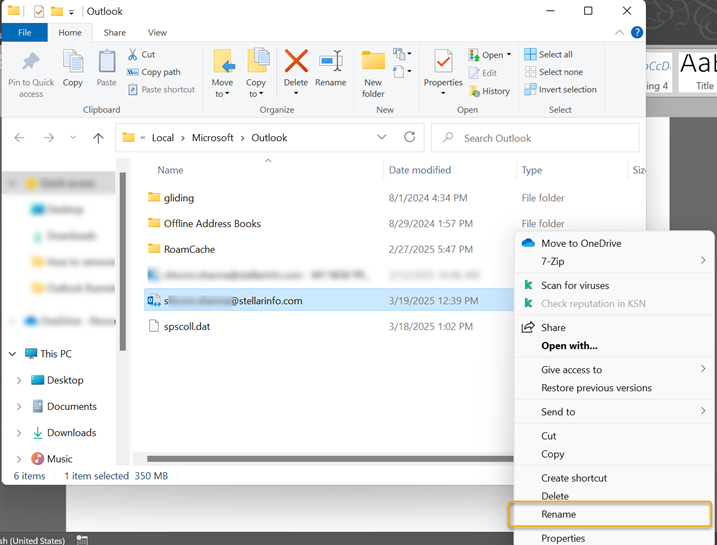
- Now, restart Outlook. Outlook will create a new OST file and download all your data to it from the mail server.
This should remove the folders marked as “This computer only.”
Conclusion
When using an IMAP account, you might have folders in your Outlook mailbox that are marked as “This computer only”. This guide explains the stepwise process to remove these folders. However, after performing this process, if you find any mailbox items missing from your Outlook mailbox, it implies that some of your mail items didn’t synchronize with the mail server. In this scenario, you can recover those items from the backup OST file using Stellar Converter for OST. This advanced OST to PST converter tool effectively extracts data from the backup OST and saves it in a PST file. You can then import this PST into your Outlook account.



 7 min read