CHKDSK command is a great Windows built-in tool that checks and repairs drive errors and bad sectors. You can also use this command to check issues on a slow or frequently freezing computer.
However, even CHKDSK can cause problems while running. Sometimes, CHKDSK gets stuck at 11%, 12%, 20%, or even 100%, or the progress is stalled for a long time. This occurs due to damaged file systems or the presence of too many fragmented files on the drive.
Go through this article to understand what causes the CHKDSK issue and what you can do to resolve it.
What is CHKDSK?
CHKDSK, or check disk utility program, is a Windows command which checks various storage devices for errors and repairs them. This program ensures that your computer file system is in order; checks the hard disk for any bad sectors and fixes them.
Let's say your Windows hard drive is a file cabinet. Sometimes, the drawers of the cabinet are damaged, or some files are placed in the wrong compartment. Or you randomly put some files in a drawer, and now they are just lying around. When you open the cabinet the next day, you see the mess those files have created and think "This is too much." You almost get an anxiety attack figuring out how to sort this clutter.
This is how your computer reacts when its file system is overloaded with a pile of unorganized data. To sort out an error-ridden system, you need a handy disk scanner tool like CHKDSK. CHKDSK is like your friendly coworker who volunteers to help you sort out your jumbled-up cabinet.
Why is CHKDSK stuck in Windows?
CHKDSK usually runs during the system startup, but if it runs during every startup and gets stuck while running, there might be a problem with your system. There can be numerous reasons why CHKDSK gets stuck and stops working. Some of them are:
- Incompatible and outdated device drivers.
- Corrupted/damaged file systems.
- Bad sectors on the hard drive.
- Too many temporary files.
- Hard drive malfunctions.
- Permanent physical damage to the hard disk drive.

What to do when the CHKDSK command gets stuck in Windows 10/11?
When the CHKDSK command gets stuck, wait for a while for the process to get completed. But if it takes unusually long to complete the scan, you need to resolve the problem using the following DIY methods.
1. Let the issue resolve itself first
There are times when the CHKDSK scan will continue even though you see no progress in the scanning bar. Other times, the scanning will resume automatically on rebooting your system.
It is impossible to figure out exactly how much time the CHKDSK command will take to complete. It simply depends on – the size and speed of the hard disk drive, speed of the processor, RAM, and the amount of fragmentation.
For a Windows system with a 1TB hard disk, the CHKDSK command may take up to five hours, and with the increase in the drive size, time also increases.
Sometimes, this command may take a few hours, so you need to be patient. It might be best to leave the CHKDSK scan to run overnight.
2. Clean boot your system
Performing a clean boot can fix the CHKDSK stuck error at Windows 10/11. Follow these simple steps to do so:
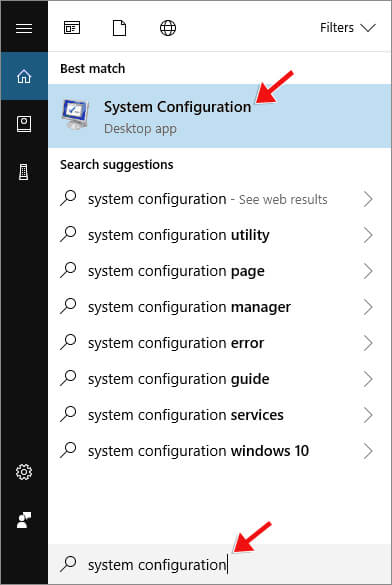
- Type' System Configuration' in the search box and select System Configuration from the search menu.
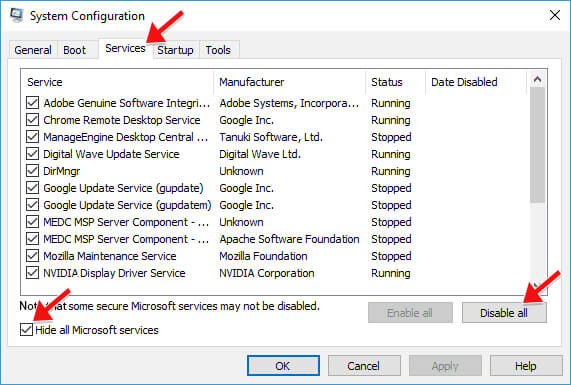
- Now, click on the Services.
- Check the box beside – Hide all Microsoft services.
- Click the 'Disable all'.
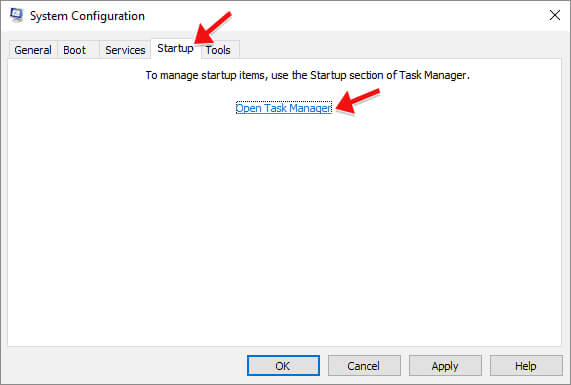
- Click on the Startup tab besides Services under the System Configuration.
- Click on the Open Task Manager.
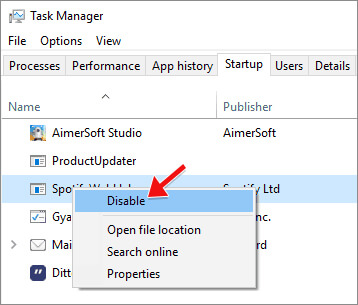
- Click to open the Startup tab and then right-click on all the items in the list one-by-one and Disable them.
- Go back to the Startup tab in the System Configuration dialog box.
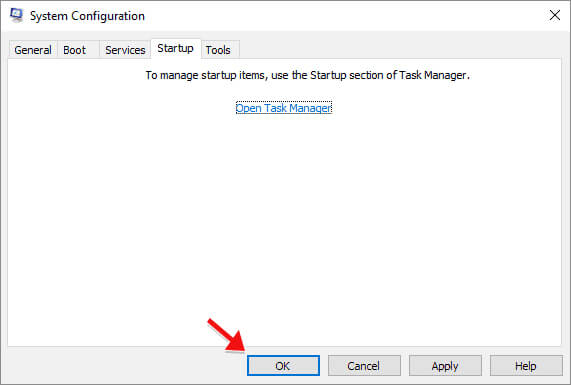
- Click OK and choose to restart your PC.
- Once your PC restarts, if the issue does not appear, enable all the disabled services again.
3. Perform Startup Repair
- First, shut down your PC and then turn it on.
- When your PC boots, press and hold the F8 key to boot the system in safe mode.
- In the Startup Options screen, click Troubleshoot.
- Click on Advanced, then click on Automatic Repair or Startup Repair.
- Choose the Operating System for which you want to perform Startup Repair.
- Select the account as an Administrator and enter the password and click Continue.

- The Startup Repair process will begin and restart the computer if the prompt appears.
4. Run Disk Cleanup
If CHKDSK is stuck on your system, it can be because of temporary files. Windows stores all types of temporary files on your system. If these files are the root cause of the problem, then removing them is better. Use the Disk Cleanup utility on your Windows for removing temporary files.
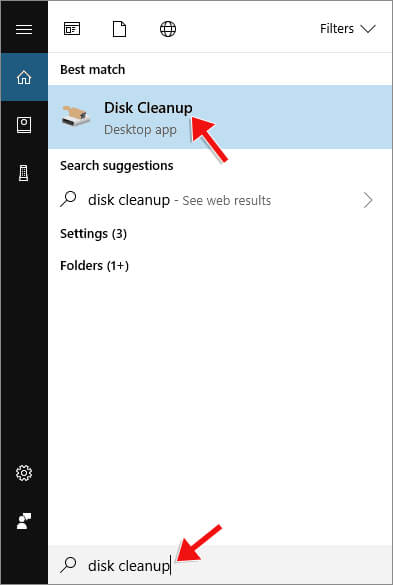
- Type disk clean in the Windows Search box.
- Select Disk Cleanup from the menu.
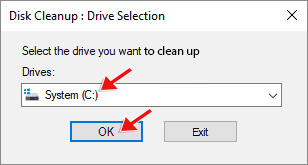
- From the drop-down menu, select the drive you want to clean and click.
- Under the Files to Delete, select the files like Temporary Files, Temporary Internet Files, and others you want to get rid of.
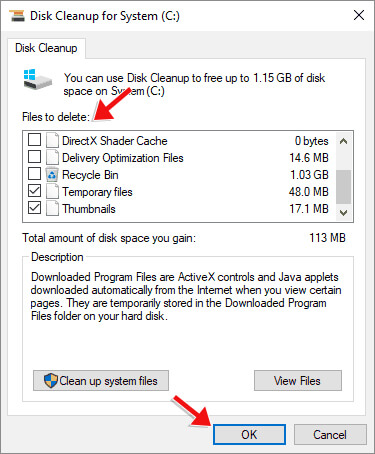
- Select OK.
- The selected files will get deleted within a few minutes.
Once the temporary files are removed from Windows, check if the problem is resolved or not.
5. Defragment Hard Drive
It can fix the CHKDSK stuck problem if a bunch of fragmented files causes it.
- Type "defrag" in the search bar at the bottom-left of your PC.
- Choose Defragment and Optimize Drives from the list.
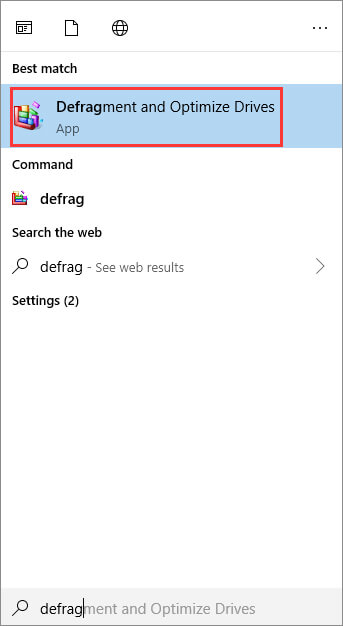
- Now choose the drive that you want to defrag.
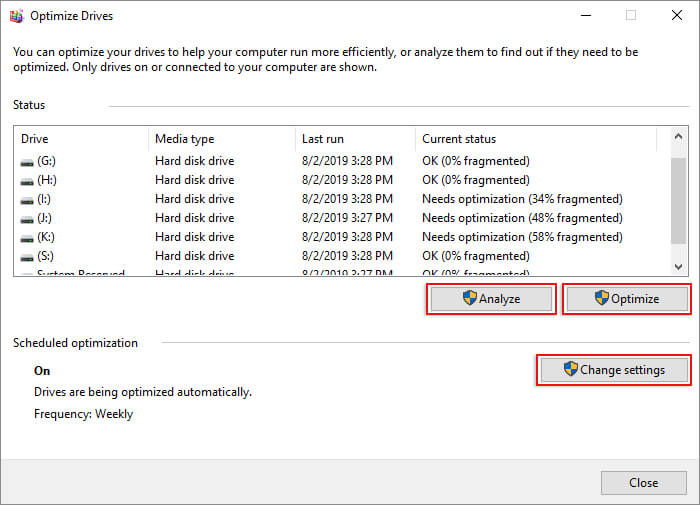
- Click Optimize button to start the process.
The de-fragmenting process takes a few minutes, and you are free to use your system during defragmentation.
6. Run System File Checker
System File Checker is the utility program in Windows that scans Windows system files for corruption and repairs the missing or corrupted system files.
- Type Command Prompt or cmd in the Windows search box.
- Run it as Administrator.
- Type sfc/scannow and hit the Enter key to start the system scan.
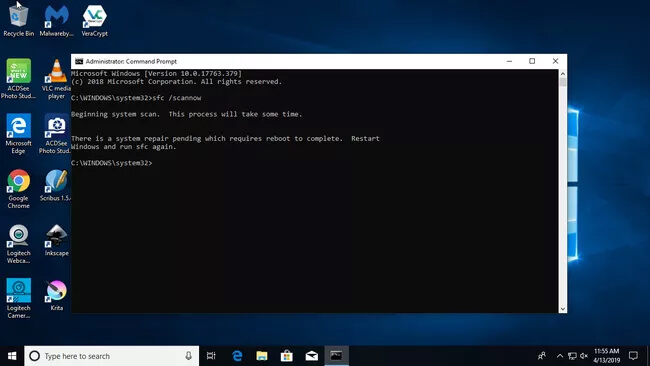
- After completing the checking, if you get this message: Windows Resource Protection did not find any integrity violation, then there is no problem with your system files.
- If something is wrong, type Dism /Online /Cleanup-Image /RestoreHealth and hit Enter to repair the Windows image.
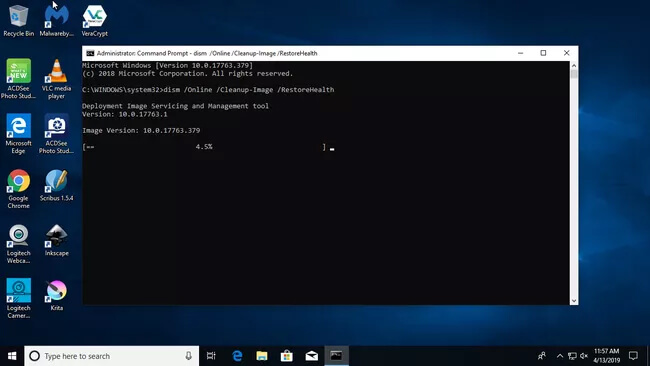
- Run chkdsk again to see if the scan gets carried out without any interruption.
7. Stop CHKDSK as a scheduled task
If CHKDSK starts automatically when you turn on your PC, you need to stop it before it starts.
- Type Task Scheduler in the search bar and click Open.
- Click on Task Scheduler Library and then click on Microsoft.
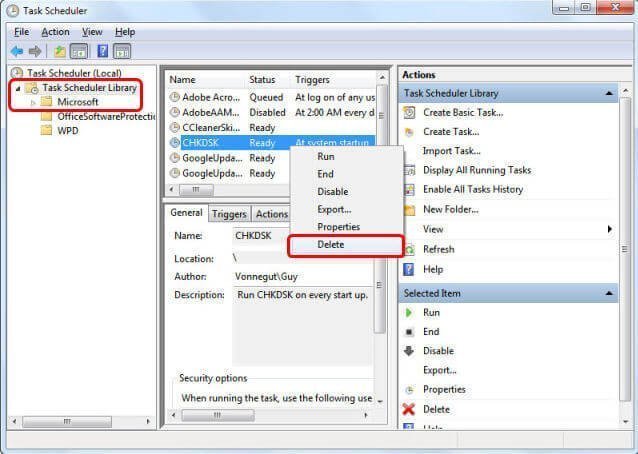
- Search for the CHKDSK command, and once found right, click to Delete
8. Stop CHKDSK from progressing
If none of the above methods work for you, you must try stopping the CHKDSK command using the command prompt.
- Type cmd.exe in the Windows Search box.
- Open the Command Prompt and Run as an administrator.
- Type chkntfs/x c:> and hit Enter.
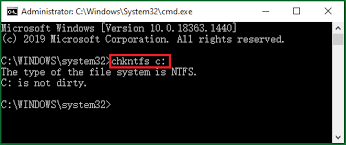
- This will stop the CHKDSK in progress in your system.
What to do when CHKDSK is not available for raw drives?
When your external storage file system goes RAW because of a missing or damaged file system, it becomes unusable and inaccessible. To prepare it for data storage, convert RAW to NTFS or any other Windows-compatible file system by formatting it. However, formatting can erase data on a storage medium, so follow these methods to fix the 'CHKDSK not available for RAW drive' error:
I. Recover Data from the RAW Drive
Although you cannot access the existing files on your RAW drive, you can try using Stellar Data Recovery Standard for Windows. This software not only helps in recovering deleted, formatted data but also helps recover data from inaccessible and RAW storage devices.
II. Convert RAW to NTFS/FAT32
- After recovering all the data saved on the RAW drive, format the drive.
- Open your system, right-click on the RAW drive, and select Format.
- Select a file system for your drive (FAT32, NTFS, or exFAT) from the drop-down.
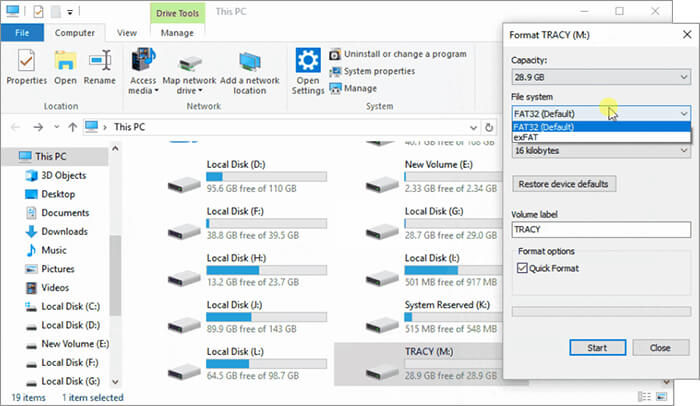
- Click Start.
- Select Yes to start formatting your drive.
Conclusion
'CHKDSK got stuck' issue often arises due to outdated or incompatible device drivers, corrupted hard drives, and RAW drives. To resolve the problem, you can defragment your hard drive, use SFC or DISM scan, run Startup repair, disk cleanup, or perform a clean boot. Different users prefer different solutions to resolve the CHKDSK issue, but the final goal is to let Windows 11 run smoothly and safely.



 3 min read