Popular external storage drives, such as Seagate, WD, LaCie, Toshiba, etc. have an LED indicator that suggests the device’s status. For instance, if the LED light is off, the drive is powered off. A steady white light indicates it is powered on and ready, while a blinking light suggests some activity.
But sometimes, the SSD or HDD’s status light might blink, but the drive won’t work on your Mac. Read on to know how to fix this issue on Macs running macOS Sequoia or earlier.
Methods to Fix External Hard Drive Light Blinking but Not Working Error
1. Restart Your Mac
A simple system reboot can often effectively fix minor issues with the external drive. To do this,
- Eject the drive and disconnect the USB or FireWire cable.
- Next, power off your Mac and wait for about a minute before turning it back on.
- Once on, reconnect the external drive to see if it works as usual.
2. Change the External Drive’s Cable
A faulty USB or Firewire cable could be another reason your hard drive is blinking light but not working. To fix this, simply change your external drive’s cable and you’re good to go.
3. Connect the Drive to a Different Port
Perhaps one of the USB ports on your Mac is not working, preventing the external storage drive from connecting to the Mac. To confirm, try connecting the drive to a different USB port. If the issue is resolved, you need to update the drivers on your Mac or get an external USB port for Mac.
4. Unlock the External Drive
If your password-protected WD external hard drive isn't recognized by your Mac, the light may still blink, but your drive won’t work. To unlock the drive, go to the WD support page and look for the WD Discovery software for Mac. Once you've downloaded and installed it, open the app and select the Unlock option. Enter your password and click Unlock Device, and your WD external drive will be ready for use Check the Drive Status
5. Check the Drive Status
Verifying the external storage drive status can help you fix issues with your hard drive. To check the status of the external drive, open spotlight, and search Disk Utility. From the top-left corner of the Disk Utility window, click View, and select Show All Device.
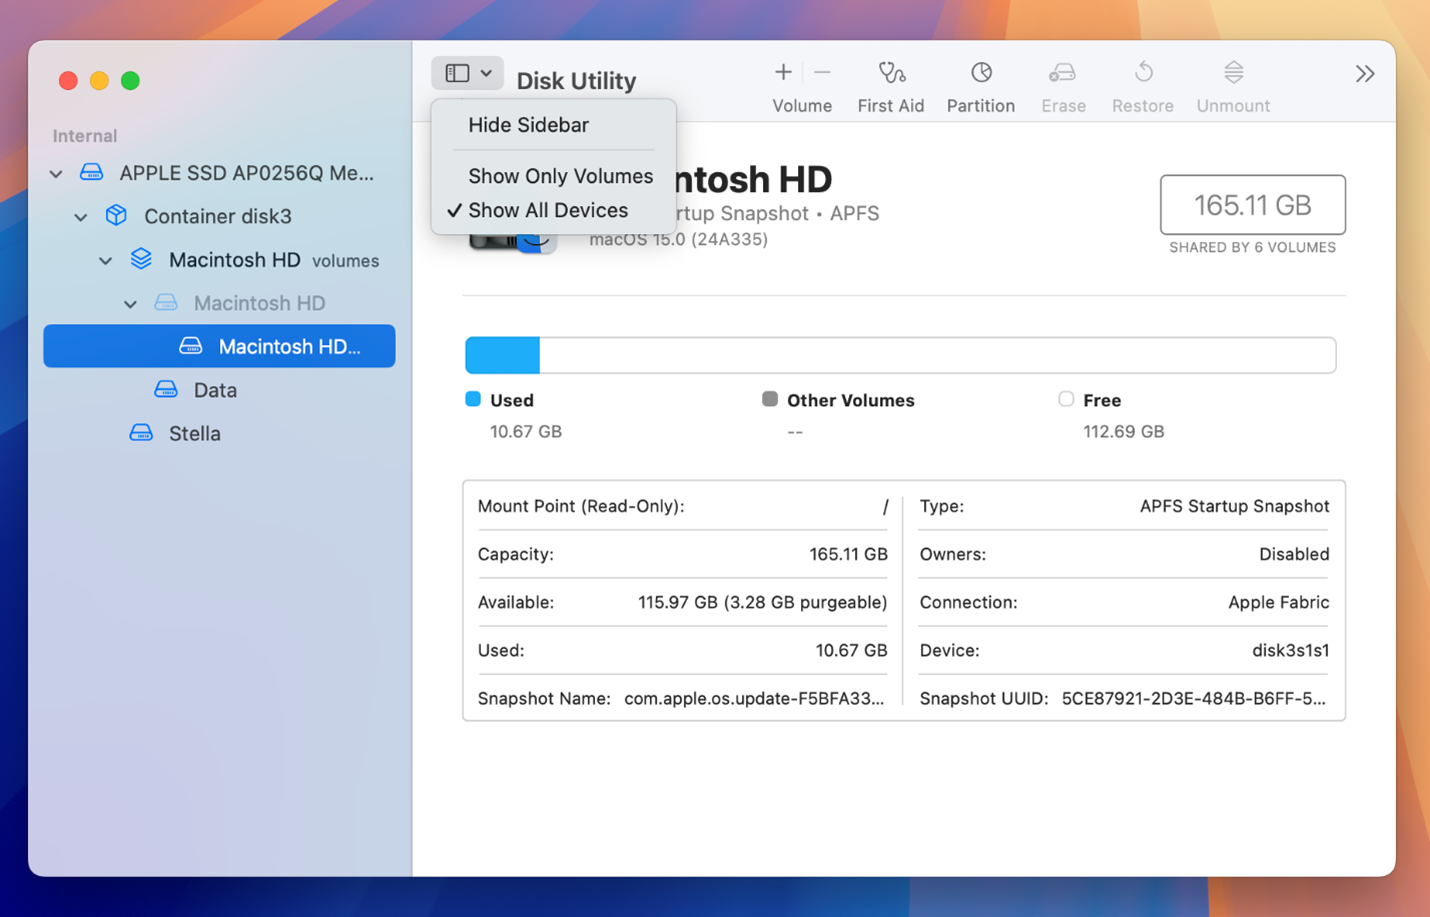
When the external drive is listed in the sidebar, even if it’s greyed out, it is detected on your Mac. Select the drive and click Mount to access the drive
6. Show External Disks in Finder and Desktop
If your hard drive is mounted and the light on it blinks, but you still can’t access the drive, this could be due to incorrect Finder settings. Follow the steps below to show external drive in Finder and Desktop:
- Navigate to Finder > Settings.
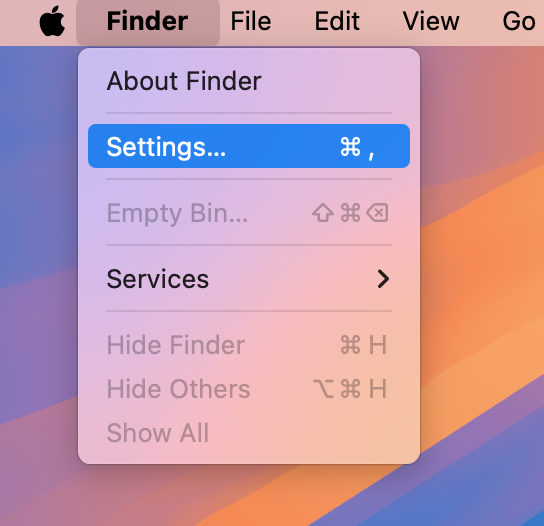
- In the Finder Settings window, the General tab is selected by default.
- Under Show these items on the desktop, select External Disks.

7. Update Incompatible Driver
The driver software of your external hard drive probably does not recognize the drive, is incompatible with the drive, or the software is corrupt. So, go through the following steps to update the incompatible driver:
- Go to the official website of the storage drive manufacturer.
- Search for the driver software that is compatible with the installed macOS.
- Download and install the software to get the latest updates.
Hopefully, by updating the incompatible driver, the external hard drive will be recognized on your Mac, and you will be able to access all the stored content.
8. Use First Aid to Repair the External Drive
If the above methods fail to resolve the issue, your external drive is likely corrupted. To fix this, use the First Aid feature in Disk Utility to repair it. Here’s the rundown:
- Press Command + Spacebar to open Spotlight and launch Disk Utility.
- Click View > Show All Devices.
- Select your external drive from the sidebar and click First Aid.
- In the First Aid dialog box, click Run and follow the prompts to start repairing.
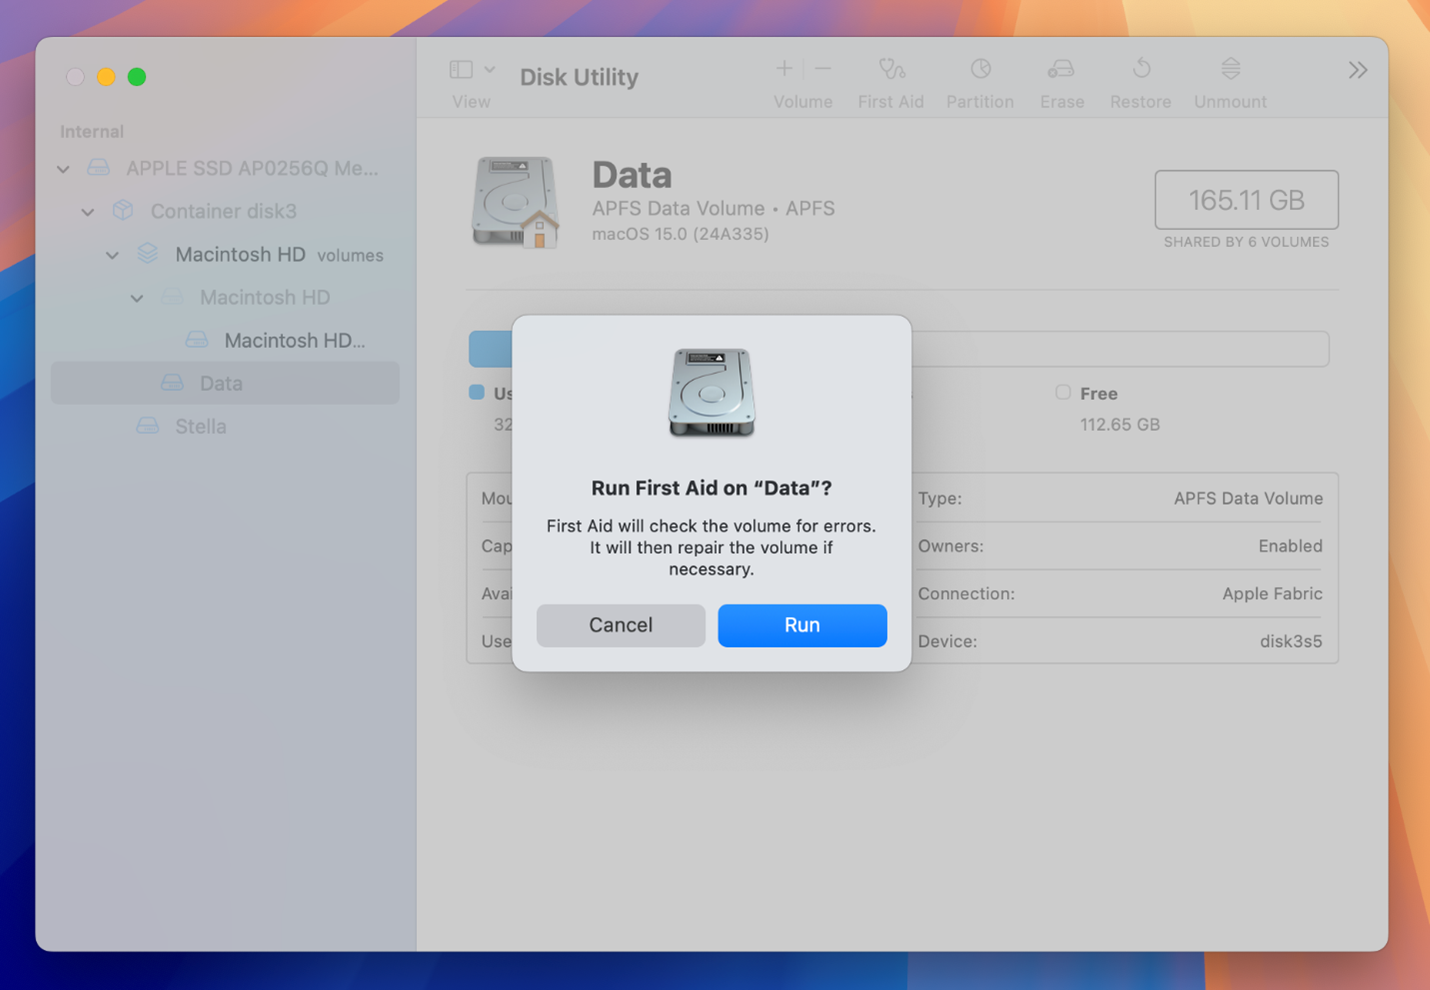
Once the process is complete, Disk Utility will report that your drive has been repaired.
9. Recover Data from the Non-Working External Drive
When the drive is about to fail, as suggested by Disk Utility’s S.M.A.R.T. status feature, you must recover your data from it immediately. To do so, download and install Stellar Data Recovery Free Edition for Mac on your MacBook Air/Pro.
- Launch the software. Select the type of file, then click Next.
- Select the external drive from the Select Location screen, click the Deep Scan switch located at the bottom-left corner, and click Scan. Wait till the scan completes.
- Now, preview files and select all the required ones. Click Recover. Click Browse to specify a distinct location in the message window to save the recoverable data, then click Save. Wait till the recovery process completes. Finally, view the recovered files from the specified location.
Stellar Data Recovery Free Edition for Mac retrieves up to 1 GB of files for free. If you need to recover data > 1 GB, we recommend upgrading the Free version to Professional, Premium, or Technician.
Summing Up
We hope the article helped you fix the ‘external hard drive blinking but not working on MacBook’ issue. Assuming you don’t have a backup of the external drive and the stored data is crucial. Use Stellar Data Recovery Free Edition for Mac to scan and recover your lost files, provided the drive is visible in Disk Utility.


 5 min read