Monitoring Exchange Server is one of the most critical tasks of the administrators that they have to perform every day to ensure email services are up and running. A corrupt or inconsistent Exchange database can lead to downtimes. It can disrupt email services and prevent users from accessing their mailboxes or sending or receiving new emails.
To prevent such a scenario, Microsoft Exchange Server requires periodic maintenance and testing to ensure that the server and its components, including the database, remain healthy and up-to-date.
In this post, we will be discussing the steps to check the Exchange databases’ health.
Steps to Check Exchange Database Health
Follow the below steps to check the database health and restore the Exchange Services and the database, in case of any issue.
Step 1: Check Exchange Services
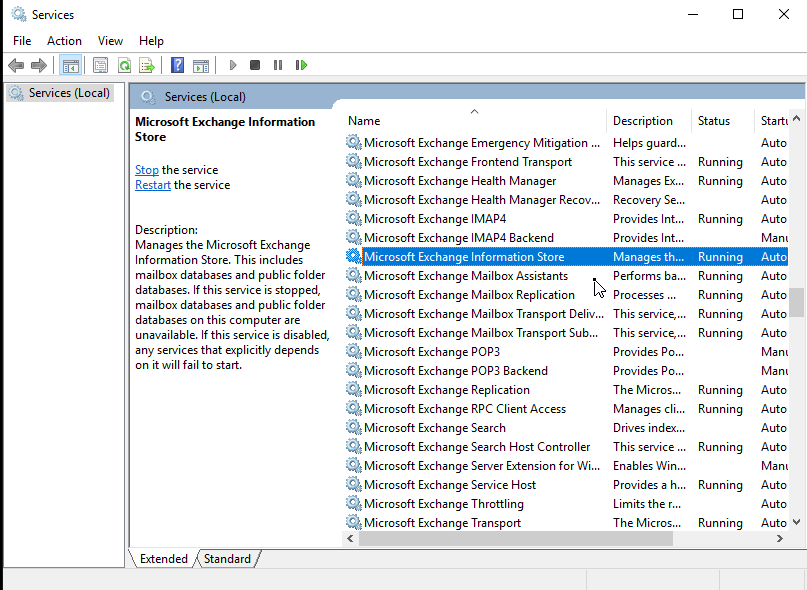
If there’s any disruption caused in your organization where users are not able to connect or access their mailboxes, a corrupt or damaged database could be a reason. However, before moving to any conclusion, it would be best to validate and check all Microsoft Exchange services on your Exchange Server are up and running. This can be done by opening the Services app on your Exchange Server. The steps are as follows:
- Press Windows + R keys on the keyboard, type services.msc, and press the Enter key or click OK.
- Check the Microsoft Exchange services and ensure the required services of the Exchange Server are up, along with other dependent services.
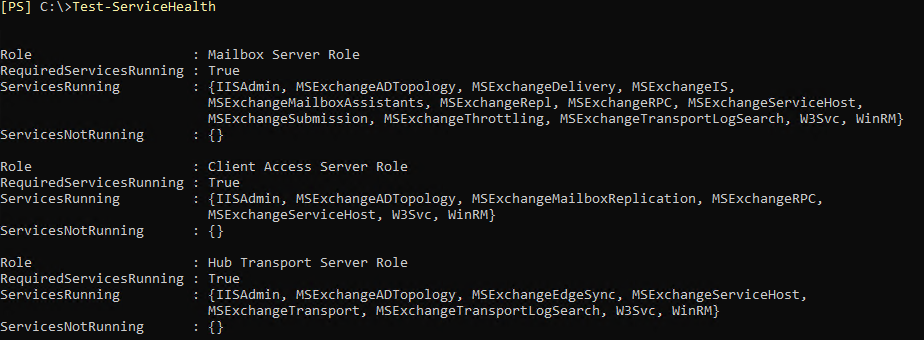
Alternatively, you can use the below PowerShell cmdlet. This will give you a complete overview of the Exchange Services status.
Test-ServiceHealth
Step 2: Check Database Status
If there are no complaints by the users, it does not mean that all is fine. After ensuring the Exchange Services are running, check if the databases are mounted. The database where the archives are stored may be down. To check this, you can use the Exchange Admin Center (EAC). The steps are as follows:
- Open the Exchange Admin Center (EAC) by browsing the Exchange Server and adding the /ECP at the end of the URL.
https://ex01/ecp
- Log in with the administrator’s credentials and click on the Servers section in the left pane.
- Click on databases.
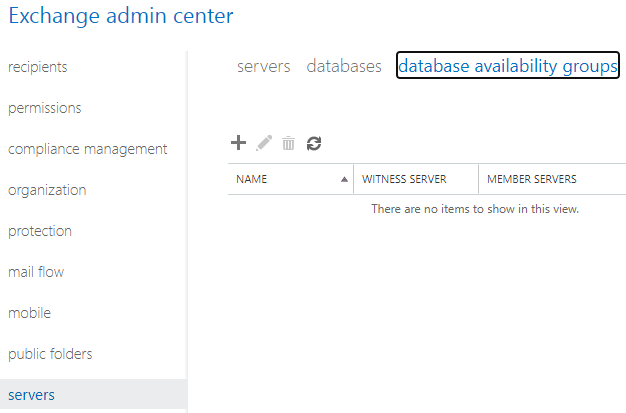
- Make sure that the databases’ status is showing as mounted.
Alternatively, you can use PowerShell to check the status of the database. Run the Get-MailboxDatabase cmdlet as given below.
Get-MailboxDatabase -Status | Format-List name,server,mounted

With this simple command, you can see all the databases and their mounting status. If the database ‘Mounted’ status is ‘False’, it indicates a problem. You can try to mount Exchange database by using the below PowerShell cmdlet.
Mount-Database -Identity DB2

If the database doesn’t mount, there could be some issues that need further investigation.
Step 3: Repair the Database
You can use the ESEUtil Command to identify the possible cause of the issue, along with two recovery options – Soft Recovery and Hard Recovery. First, you need to confirm the status of the database. You can use the /mh parameter to know the status of the database.
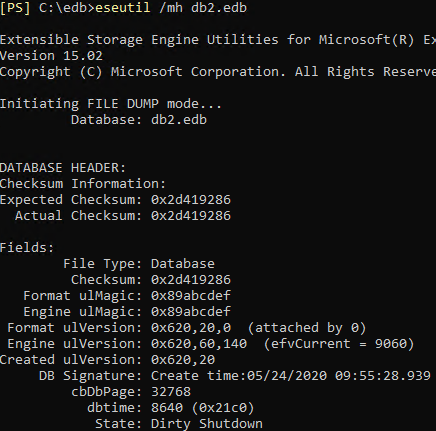
If the state is shown as Dirty Shutdown, it means that the database or logs are corrupt, or a log is missing (uncommitted). In this case, you can perform Soft Recovery by running the ESEUtil command with the /r parameter
.
EseUtil /r E00 /l C:\EDB /d C:\EDB\db2.edb
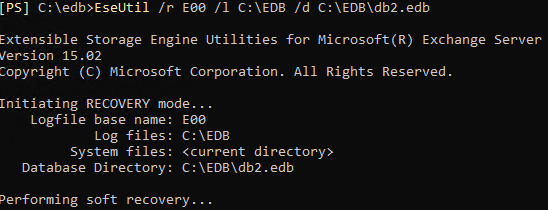
Depending on the size of the database, this may take some time. If the Soft Recovery is successful, you can try to mount the database. If it mounts, take a backup of the database to make sure that all is fine.
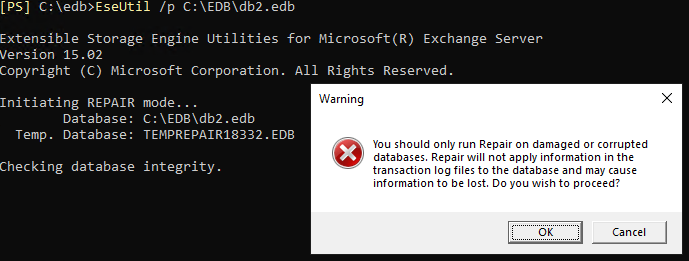
If it is not successful, you may need to perform ESEUTIL /P Hard Recovery. However, it is suggested to avoid Hard Recovery as it can lead to data loss. Hard Recovery purges all the data which is deemed corrupt. Apart from this, after Hard Recovery, the database is hardcoded and Microsoft will not provide any support if you face an issue. Also, there’s no guarantee that the database would mount after this process.
After successful recovery, it is highly suggested to perform defragmentation of the database. It is to be noted that the database will not be mounted during this process. The defrag process will remove all the white space to improve the performance of the database. Before running the defrag process, it is good to see the status, size, and free space of the database. This can be done by running the Get-MailboxDatabase with some parameters.
Get-MailboxDatabase -Status | ft name, databasesize, availablenewmailboxspace -auto

Here, you can see that DB3 has a size of 247MB, with 118MB of free space. So, it needs defragmentation to clear that space. To run the defrag process, it is best to have ample storage space as it will create a new EDB file to work on. To defrag a database, you need to use the ESEUtil with the /d parameter, as given below.
Eseutil /d "DB3.edb" /t "temp_db3.edb"
This will defrag the database. After that, you can again run the Get-MailboxDatabase to see the shrunk database.
 Case Study
See how Worktrainers Ltd used Stellar Repair for Exchange
Conclusion
In this post, we’ve shared the steps to check the health of Exchange databases. However, in a large setup, it is strongly suggested to have a monitoring system in place with alerts that constantly check the status of the Exchange Server, its services, and databases, apart from CPU, storage, and other resources.
If something fails, you will end up with a huge administrative effort to recover the data or end up with data loss as you would need to restore from the previous day’s backup. However, you can cut down on administrative effort and resources by using Stellar Repair for Exchange software that can open any version of the Exchange Server database - healthy or not. By using the software, you can repair and export mailboxes from the database to PST and other formats. You can also export directly to a new live Exchange database or Office 365 tenant. The software is easy-to-use, fast, and can reduce downtime and effort to the minimum.



 5 min read