It is now a common knowledge that simply deleting files on a Windows system doesn’t actually remove them from the storage drive. Even if you delete the files bypassing the Recycle Bin or empty the Recycle Bin folder, the traces of files still reside on the drive, unless overwritten. Such files are recoverable using a data recovery software. So, if you want to securely and permanently erase sensitive files and be sure that no one can access or recover the files, read this article to know the ways to permanently wipe or erase files on Windows 11 system.
Methods to Erase Files on Windows 11
Windows 11 provides an option to wipe an entire drive or only the free space. It completely wipes the data by overwriting it with zeroes to ensure it cannot be recovered by any means. If you want to erase only selective files or folders, there is no option available on Windows 11. For selectively erasing the files, folders, and other data, you need to use a reliable file eraser software.
Below, we’ll be discussing the detailed process of wiping data from entire drive and free space by using Windows in-built options and erasing selective files and folders by using the software.
1. Wipe Entire Drive using Windows 11 In-built Option
As per the Microsoft Document, the format command overwrites the existing data on a drive with zeroes when a full format is performed. However, this doesn’t work for Quick format. To erase a complete internal drive, external drive, or USB drive, follow the steps below:
- Open the File Explorer from Start Menu.
- Locate the drive you need to wipe.
- Right-click on the drive and select Format.

- Under the Format Options, uncheck the Quick Format checkbox.
- Click Start to wipe the selected drive completely.
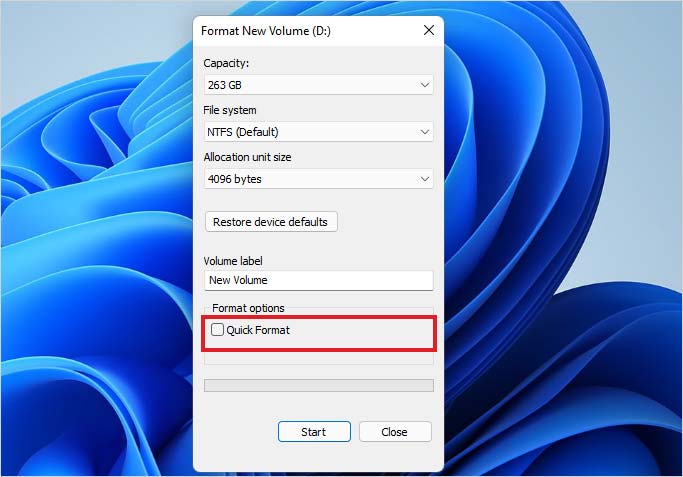
You can also select other options, for example, the file system format, etc., from the available options.
Caution: Once you click the Start button, there is no going back. The erased data cannot be recovered. So, check twice before wiping the drive. If you have any important data that you don’t want to erase, take a backup.
2. Wipe Free Space on Windows 11
As you know that deleted files can be recovered, it is better to wipe the free space created by deletion of the files. You can use the Windows Terminal option to wipe the free space. Steps are as follows:
- Click the Start Menu and type Windows Terminal.
- Launch the Windows Terminal. Alternatively, click Windows + X and select the Windows Terminal (admin) option.
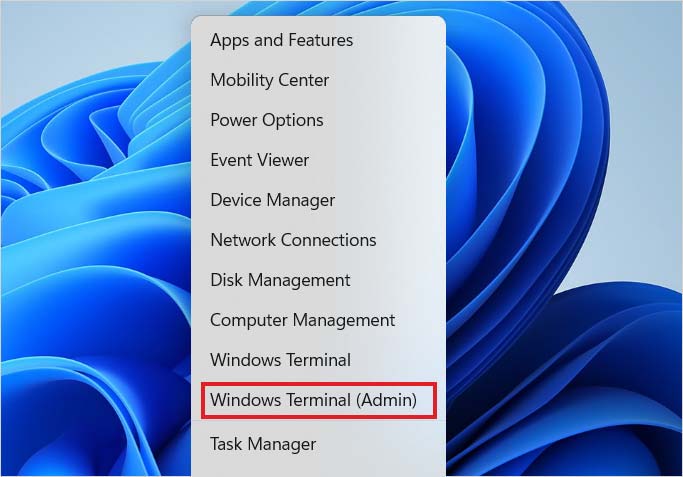
- Insert the command cipher /w:X:\ and replace X with the letter of drive you want to wipe for free space.
- Press Enter. The command will show progress in the Windows Terminal window.
Depending on the volume of free space and system configuration, the command will take some time to complete. Once completed, all the free space on the selected drive will be securely wiped.
3. Wipe Selected Files, Traces, and Deleted Data on Windows 11
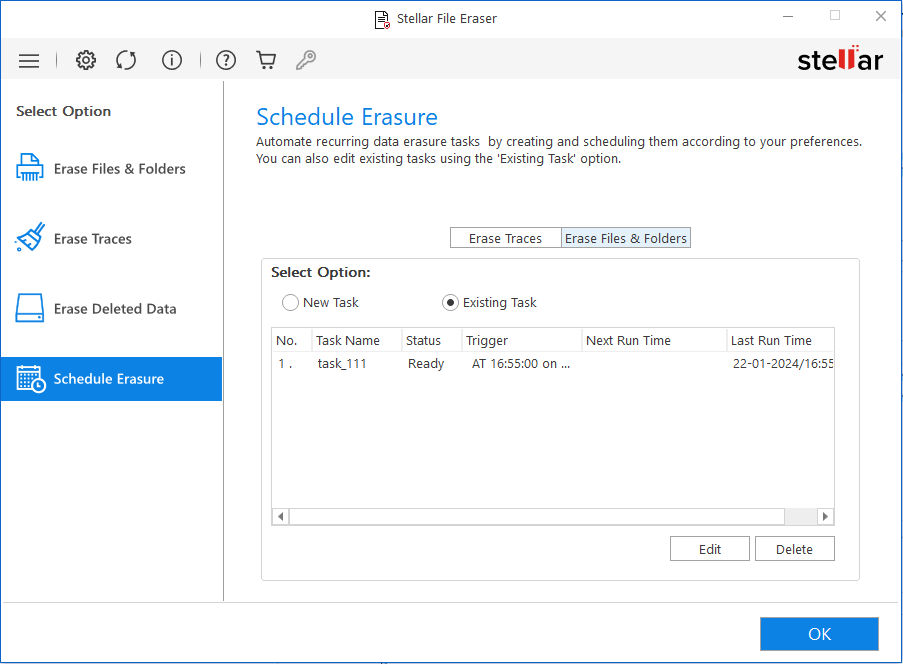
To permanently erase files selectively on Windows 11 system, you can use a file eraser software, such as Stellar File Eraser. The software securely erase the selected files, folders etc. by overwriting them with random data, thus making the recovery prospects practically nil. It allows you to erase files and folders, deleted data, and traces of applications, etc. The software also has a ‘Scheduler’ option that helps you to schedule the data eraser process as per your convenience.
Here’s the process to erase specific files or folders on Windows 11 by using the Stellar File Eraser software.
Step 1: Install and launch Stellar File Eraser.
Step 2: From Select Option (on the left pane of the software window), choose the Erase Files & Folders option.
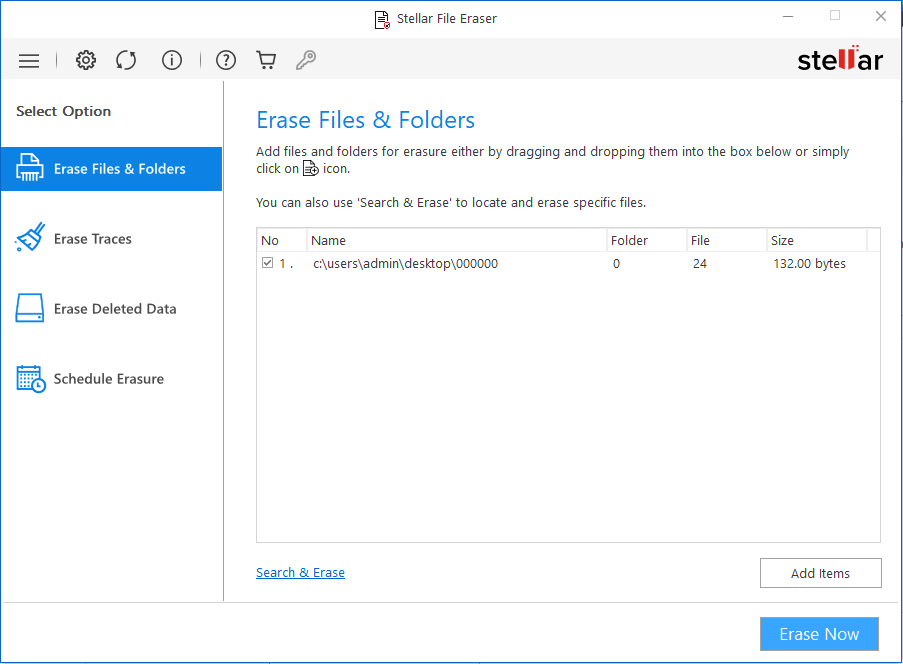
Step 3: The software provides the following three options to erase the files and folders:
- Manual Drag & Drop - You can select the file to be erased and drag and drop it in the right-hand section of the software window.
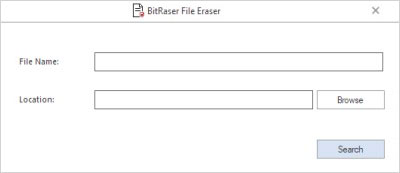
- Search & Erase - If you know the file's name, insert it in the Search & Erase dialog box. Browse for the file location and click Search.
- Add Items - Click the Add Items button at the bottom right and choose the files by navigating through the locations displayed.
Step 4: Once the selected file is displayed in the software window, click Erase Now.
Step 5: In the Confirm Erasure dialog box, click Proceed.
Step 6: Once the erasure is complete, you will see the Erasure Complete window. Click OK.
You can schedule the above process using the Scheduler option to complete it at a specified time. Similarly, the traces and deleted files data can be permanently erased using Stellar File Eraser.
Conclusion
Windows 11 OS refers to the process of wiping the drive as ‘cleaning the drive’. So if you want to use the first two methods and you see the above phrase, do not worry as it will not remove the partition of your computer. While Windows 11 has been laced with the option to erase a complete drive permanently, there is no option to select specific files and permanently erase them. You can use a file eraser software to permanently erase selective files, folders, etc. on your Windows 11 PC.


Tech Enthusiast and Senior Writer at Stellar®

 6 min read