Cached Exchange Mode is an Outlook-exclusive feature that creates a local Offline Storage Table (OST) file to store the mail items on local storage. This provides quick access to the mail items when a user opens Outlook, even if the network connection is poor or unavailable. If you add a Microsoft Exchange, Office 365, or Outlook.com account, the profile is set up in Cached Exchange Mode by default.
Although it’s recommended that you enable the Cached Exchange Mode for Exchange or Office 365 email accounts for consistent Outlook performance, you must disable it if your organization uses Roaming Profiles or Virtual Desktop Environment, such as Citrix virtual apps and desktops. This will prevent Outlook from creating an OST file every time a user logs in, which takes time and slows down the Outlook and system performance. This also helps prevent Outlook errors.
In this post, we will take you through the stepwise process to disable the Outlook Cached Exchange Mode using the Group Policy (GPO) template.
Steps to Disable Outlook Cached Exchange Mode using Group Policy
To enable or disable Outlook features, such as Cached Exchange Mode via Group Policy, administrators need to download and use the Group Policy Administrative Template (ADM, ADMX/ADML) and Office Customization Tool (OPAX/OPAL) files for Microsoft Office.
Based on the Outlook edition or version being used in the organization, you can download the relevant template using the following links:
- Administrative Template files for Office 2010
- Administrative Template files for Office 2013
- Administrative Template files for Microsoft 365 (Office 365), Office LTSC 2021, Office 2019, and Office 2016

After downloading the required template, follow these steps to disable Cached Exchange Mode via Group Policy (GPO):
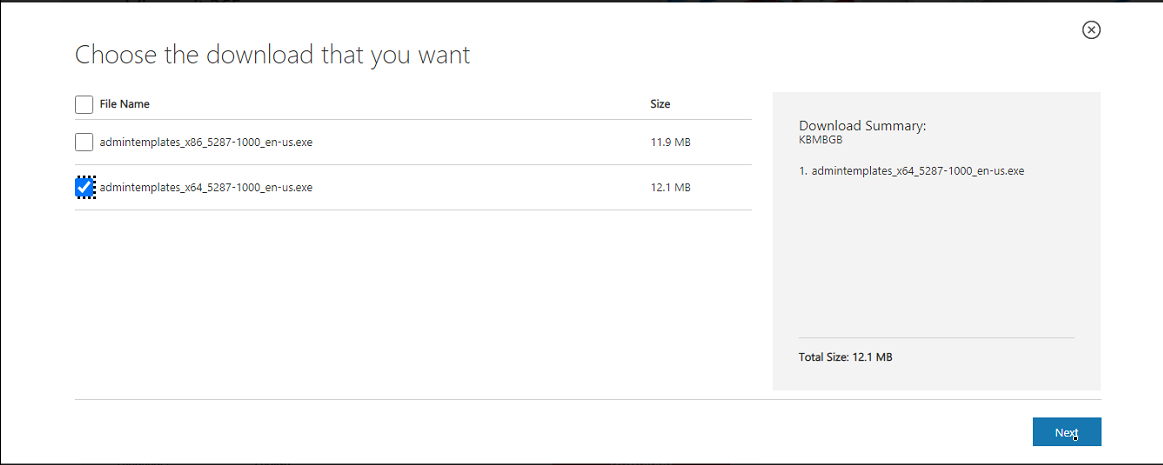
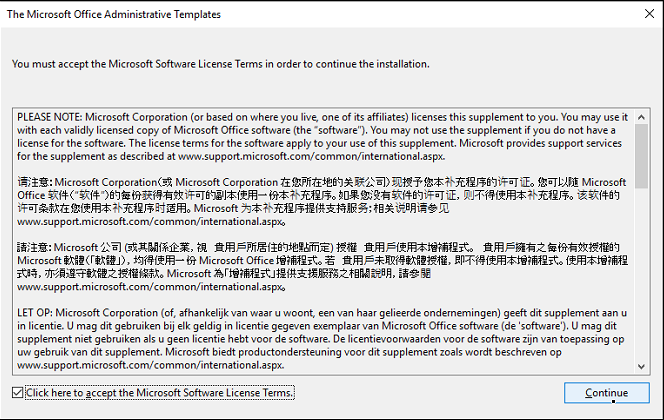
Step 1: Launch the downloaded template (executable) file. Accept the license terms and click ‘Continue.’
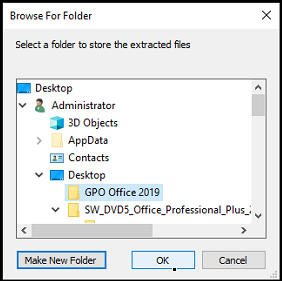
Step 2: Select a folder preferably on the Desktop and click ‘OK.’ For instance, we created a new folder ‘GPO Office 2019.’
Step 3: Go to the GPO Office 2019 to find the extracted files and folders — admin, admx, and an XLS file.
Step 4: Open the admx folder and copy all the outlkxx.admx files as shown below.
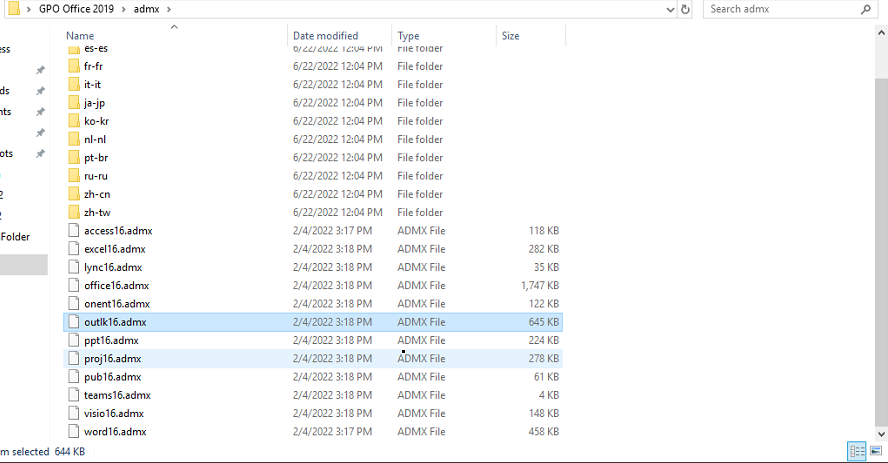
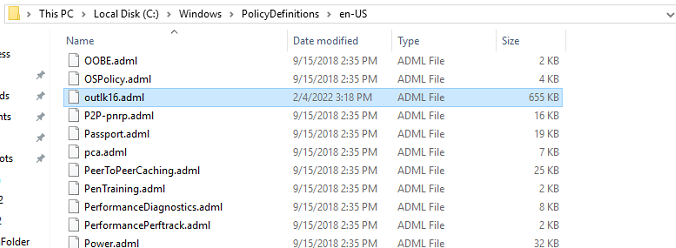
Step 5: Open File Explorer and navigate to C:\Windows\PolicyDefinitions. Paste the .admx files.
Step 6: Go back to the extracted folder location and copy the adml files from admx\en-us\ (for English) or other based on your language folder.
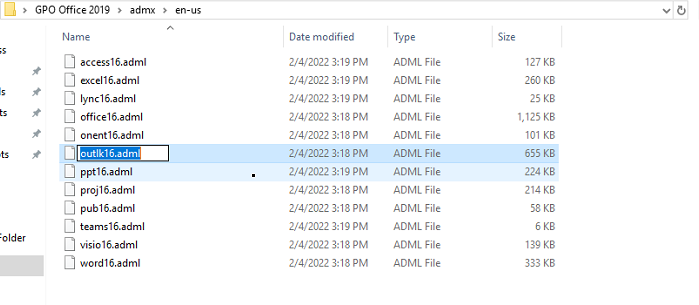
Step 7: Paste the outlkxx.adml files in C:\Windows\PolicyDefinitions\en-us\ or based on the folder from which you copied the .adml files.
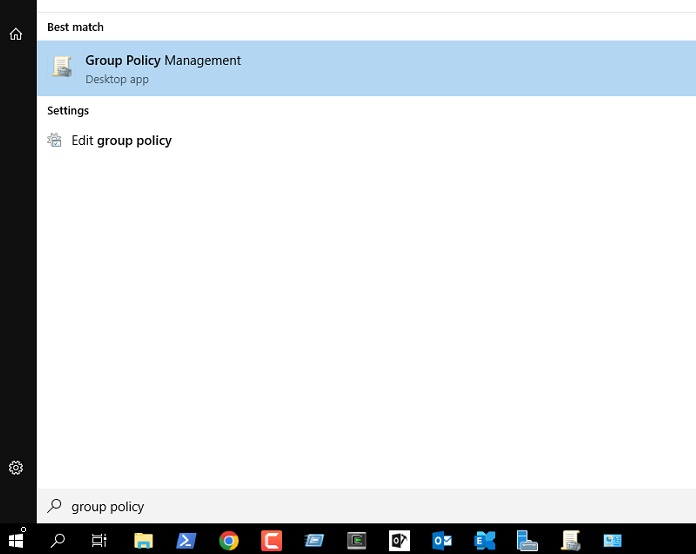
Step 8: Press the Windows button, search and open the Group Policy Management console.
Step 9: Right-click on the Administrative Templates under User Configuration or the Security Group where you want to apply the Group Policy, and choose ‘Create a GPO in this domain, and Link it here….’
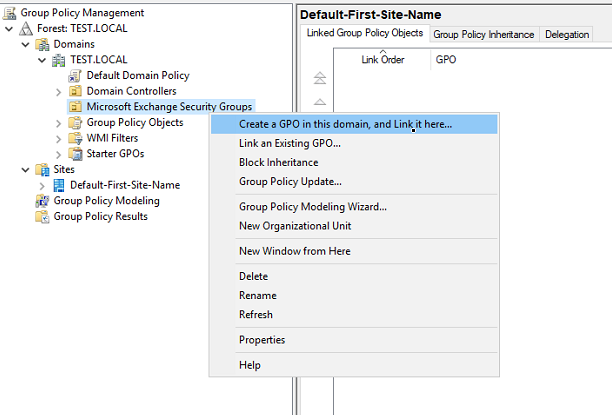
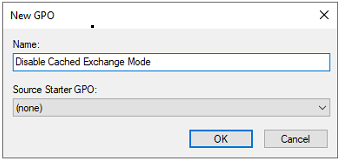
Step 10: Enter the GPO name, such as Disable Cached Exchange Mode, and click ‘OK.’
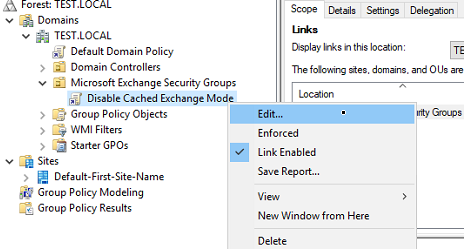
Step 11: Right-click the Disable Cached Exchange Mode policy and choose ‘Edit.’
Step 12: Go to User Configuration > Administrative Templates > Microsoft Outlook 20xx (based on the version) > Account Settings > Exchange > Cached Exchange Mode.
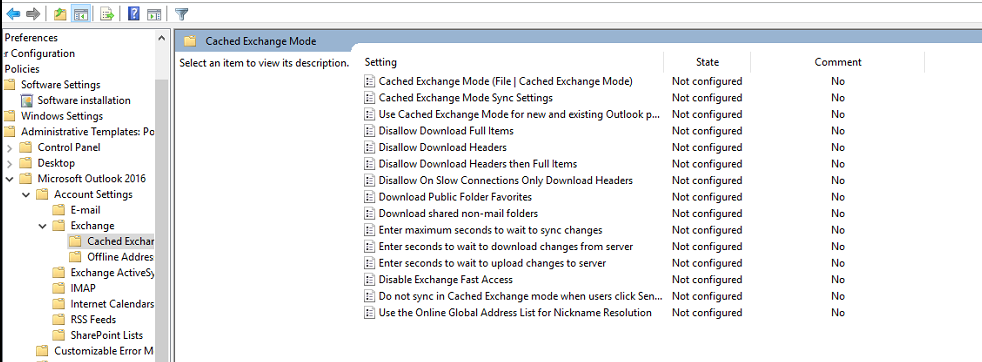
Step 13: Find and double-click on ‘Cached Exchange Mode Sync Settings’ to open the properties. Select Disabled from the settings.
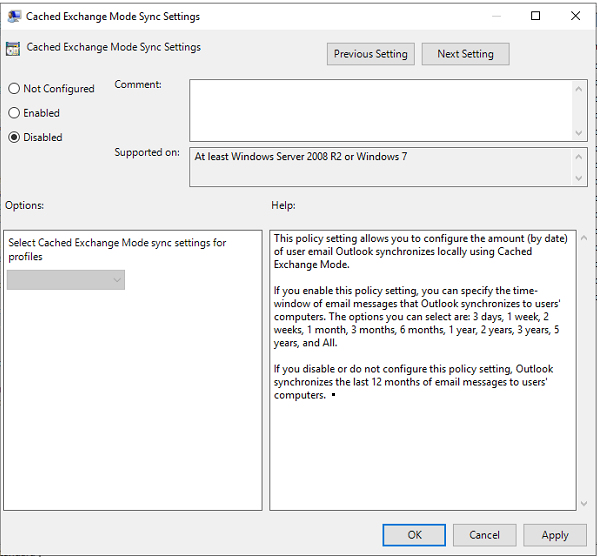
Step 14: Click Apply > OK.
The Cached Exchange Mode will be disabled for all the users connected to your domain.
The users must sign out and log in for changes to take effect. The policy will take effect immediately and prevent Outlook from creating OST files.
From now onwards, Outlook will start in Online Mode only and will require a stable network connection with the mailbox server to work without errors or issues. Any changes made will be updated immediately to the mailbox.
Read More, How to Switch from Working Offline to Working Online in Outlook?
Conclusion
Disabling the Cached Exchange Mode is not recommended unless your organization uses virtual desktop or Outlook roaming profiles. You should only disable the Cached Exchange Mode if you don’t want Outlook to create a new OST file every time user logs in to their account.
You can follow the above-mentioned steps to disable Outlook Cached Exchange Mode via the Group Policy template. However, you should ask users to check their mail items after the policy takes effect. If there are missing mail items, you may scan the orphaned OST files to extract and save the missing items to PST format using an OST to PST converter tool, such as Stellar Converter for OST. After the conversion, import the PST to the users’ Outlook profile to restore the missing mail items. You may also export those mail items directly to users’ mailboxes on live Exchange Server or Office 365 using the software.
Read more, How to Solve Roaming Profile and OST Problems in Outlook Mailboxes?


 9 min read