The simplest way to erase a Mac hard drive is by using Mac’s native app Disk Utility. But what to do when Mac Disk Utility can’t erase the hard drive? This may happen due to different reasons. If you find Disk Utility on Mac can’t erase a hard drive, this article will help you resolve the issue.
Methods to Resolve the ‘Disk Utility can’t Erase Mac Hard Drive’ Issue
You’re not able to erase or reformat the hard drive on your Mac when the Erase button turns gray. If this is the case, follow the methods given below:
1. Erase Mac Hard Drive by Enabling ‘Show All Devices’
The Disk Utility app in Mac shows the partitions or volumes on your system instead of the complete hard drive. The volumes or partitions are separate sections of the same parent hard drive created to facilitate data storage in an organized manner. To view and erase the Mac hard drive, follow the steps below:
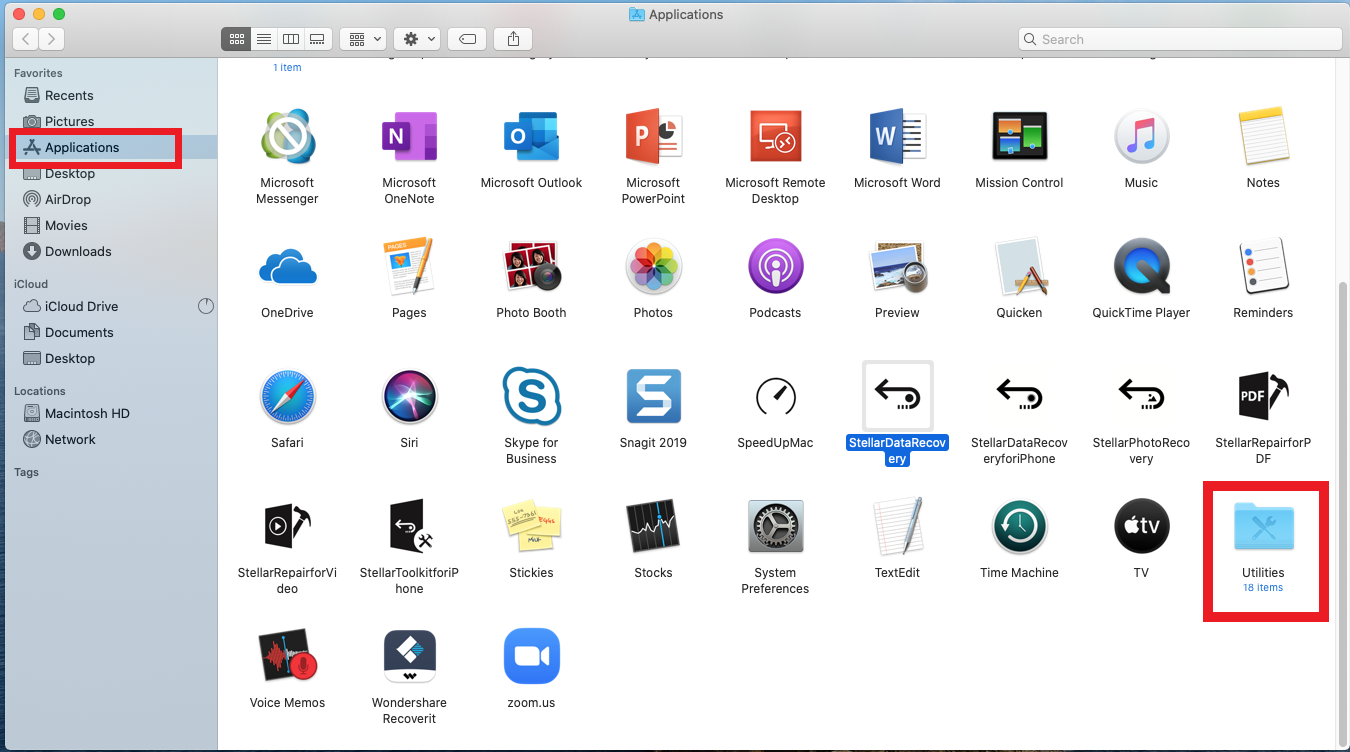
Step 1: Launch Finder, open Application from the Sidebar, and click Utilities.
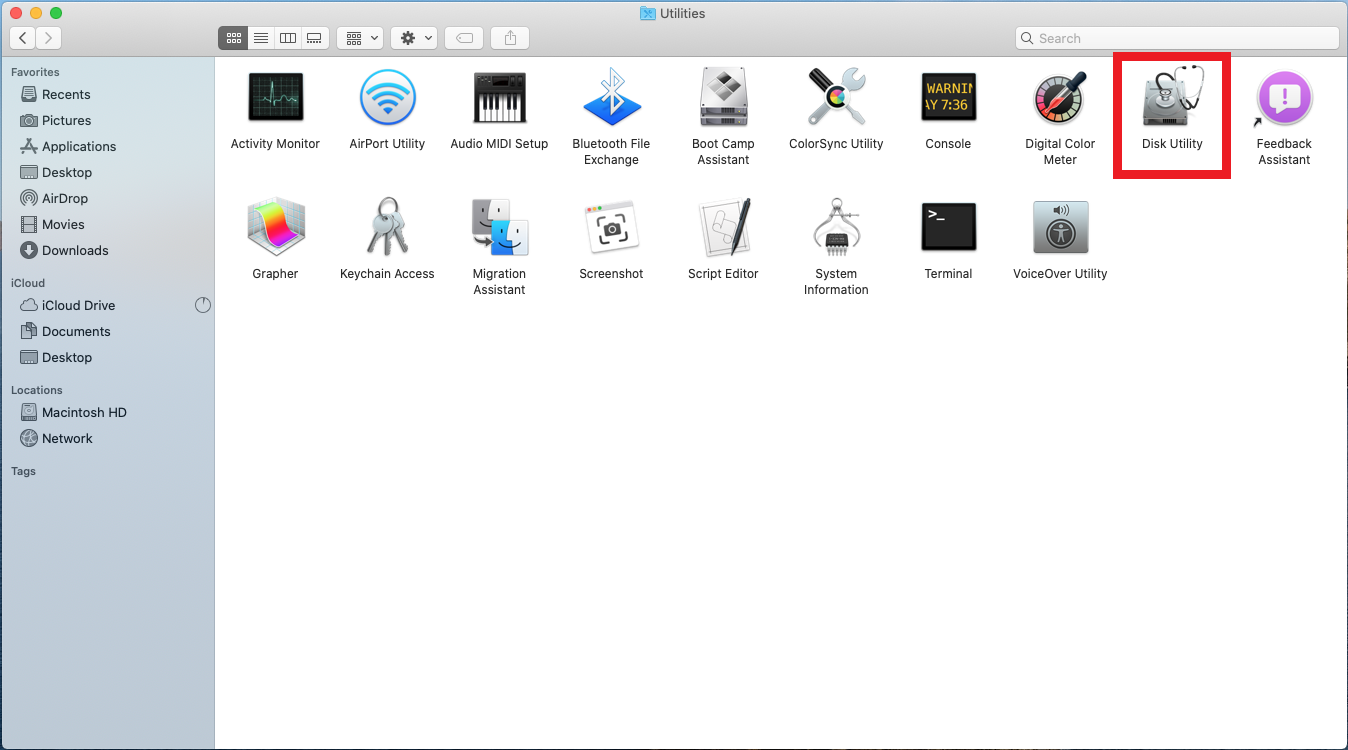
Step 2: From the Utilities folder, open the Disk Utility app.
Step 3: Click View on the top left and select the Show All Devices option.
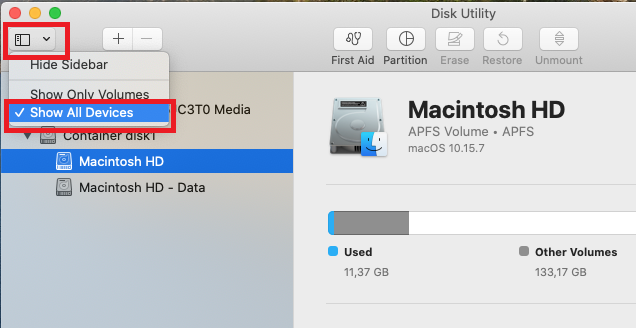
Step 4: From the list of drives that appear in the Sidebar, select the parent folder of the drive you want to erase.
Step 5: Click Erase.
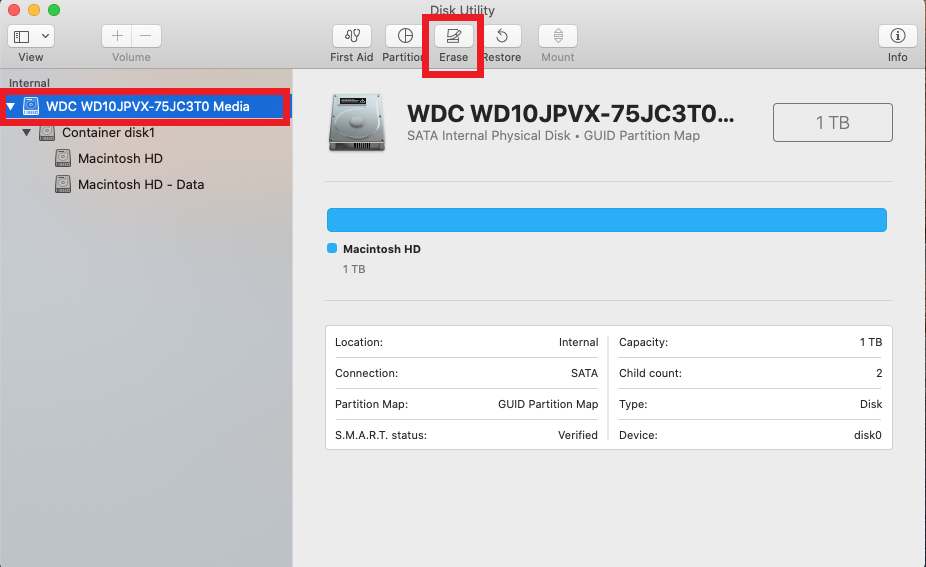
Note: Erasing the parent folder of a hard drive will also delete all the data inside the drive in folders and subfolders. Keep the DIY software Stellar Data Recovery Standard for Mac handy and ready to use in case of accidental data loss.
2. Use First Aid to Repair Drive before Erasing
Mac systems provide an option to cope up with the glitches in the hard drive. The First Aid option in Disk Utility can fix issues, like corrupt files, slower performance, etc., in the hard drive. First Aid scans the hard drive for any existing errors and informs you if it can’t repair any of the found issues. Here is how you can fix and erase the Mac hard drive:
Step 1: Launch Disk Utility from the Application folder.
Step 2: Select the drive that you want to erase.
Step 3: Click the First Aid tab on the top of the Disk Utility window.
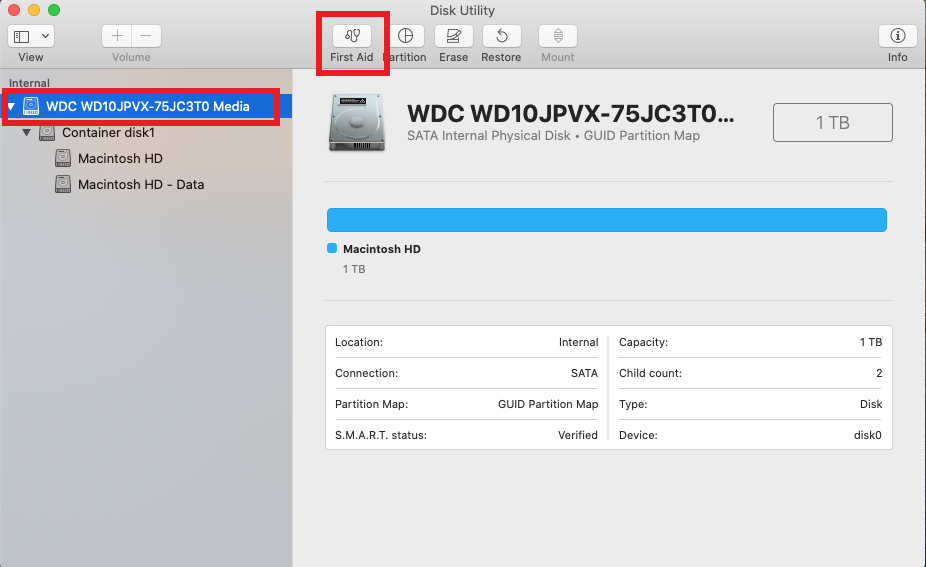
Step 4: In the confirmation box, click Run.

Note: The time taken by First Aid depends on various factors, like size of the drive, number and size of corrupt files, extent of errors in the drive, etc.
Once the issue is fixed, follow the steps described in the first method to erase the Mac hard drive.
3. Use Recovery Mode to Erase Mac Hard Drive
Sometimes, the Disk Utility can’t erase the hard drive because the system is using it. By booting into recovery mode, you allow minimum usage of the hard drive. Follow the steps below to boot your Mac into Recovery Mode and erase the hard drive:
Step 1: Restart your Mac.
Step 2: When your Mac starts booting, immediately press and hold Command + R keys.
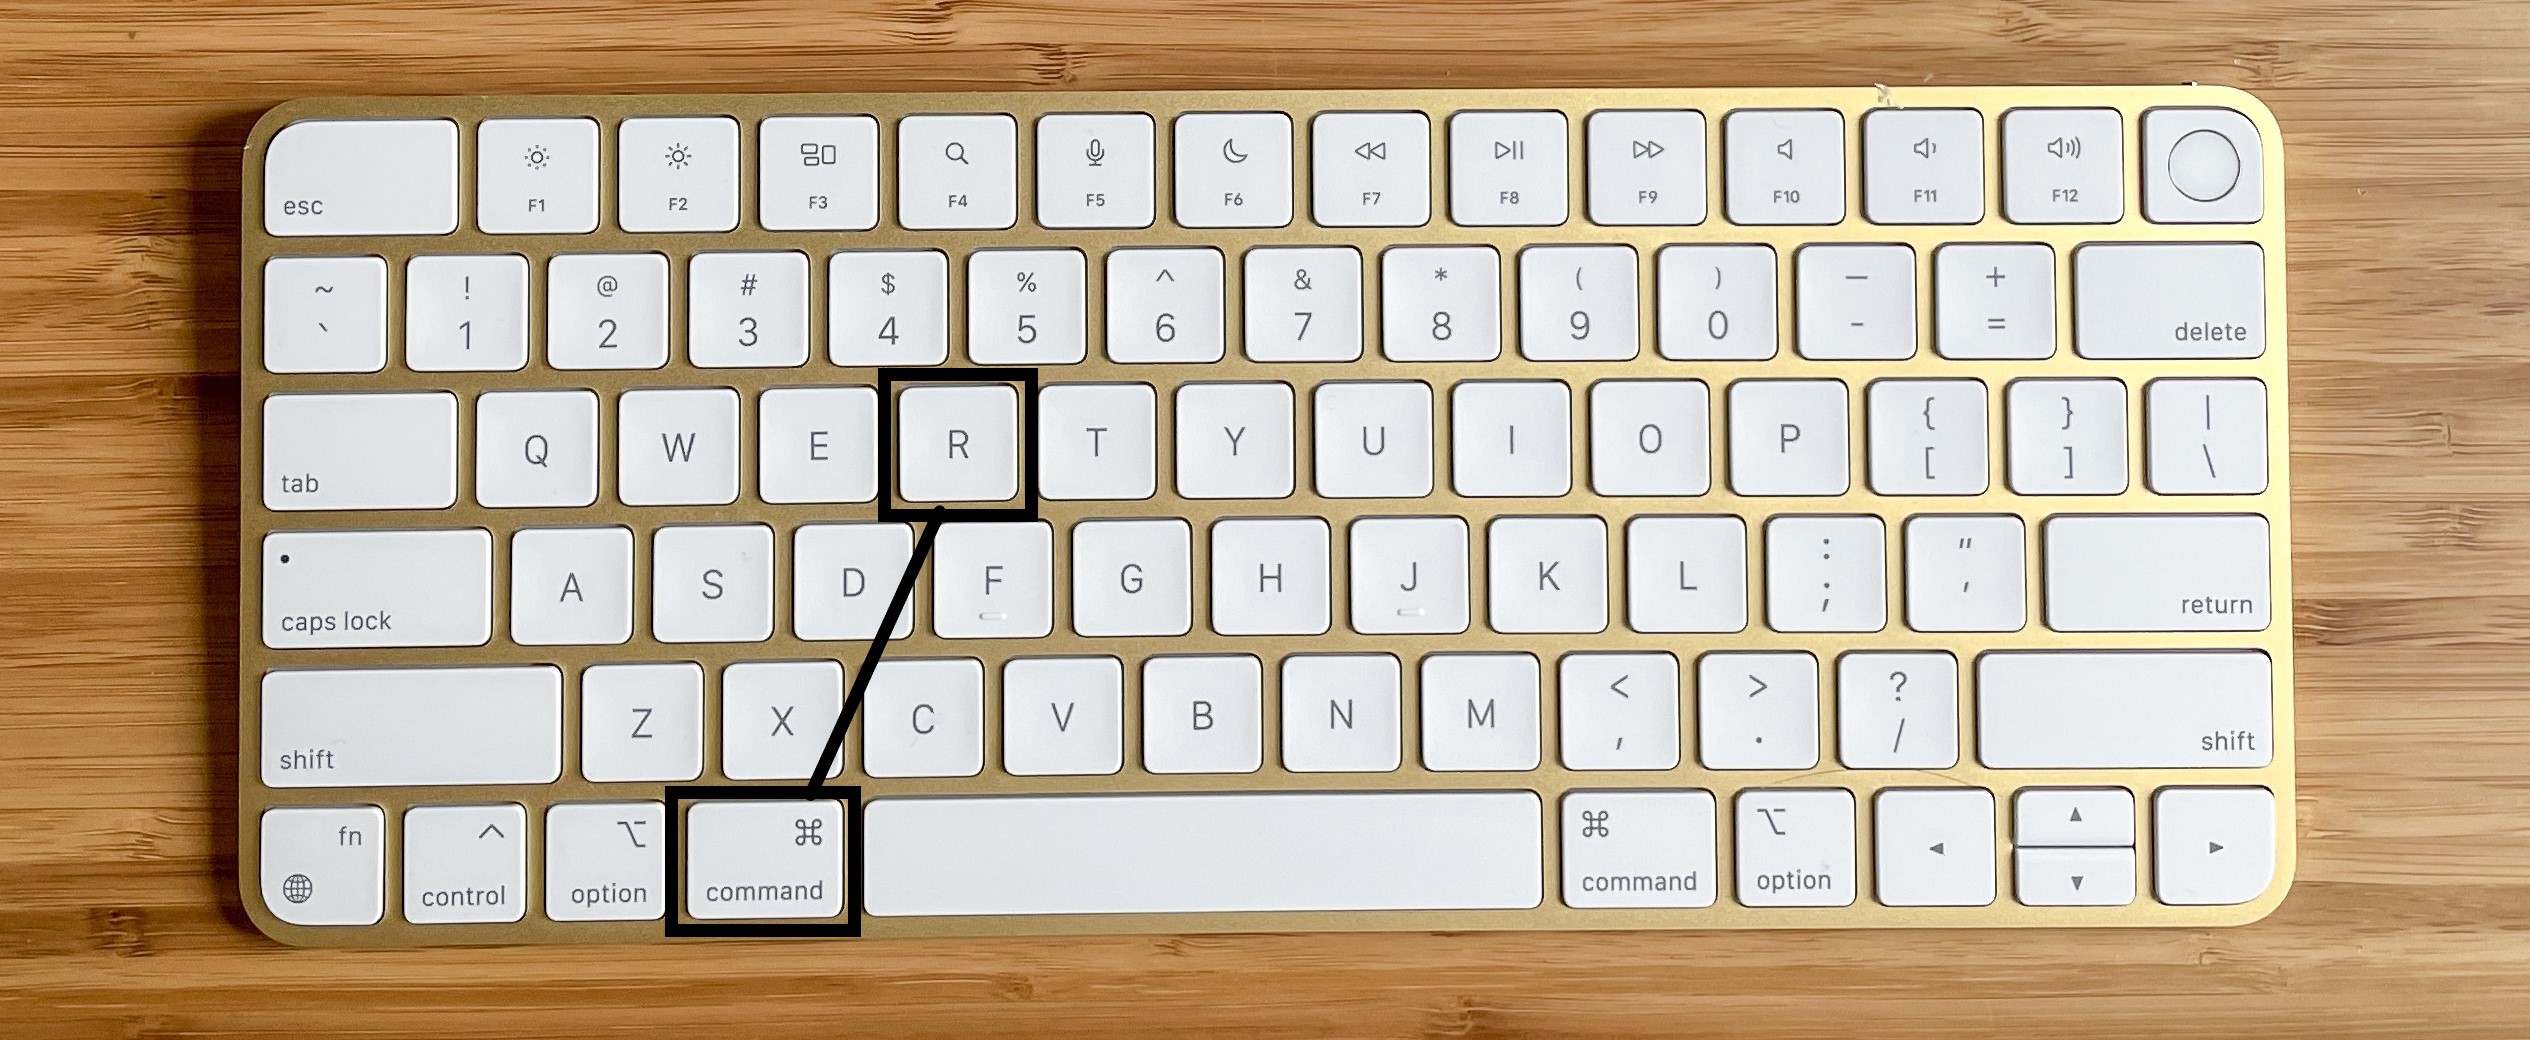
Step 3: Keep holding the keys until you see the Apple logo and hear the chime.
Step 4: You will see the macOS Utilities window. Select Disk Utility and click Continue.
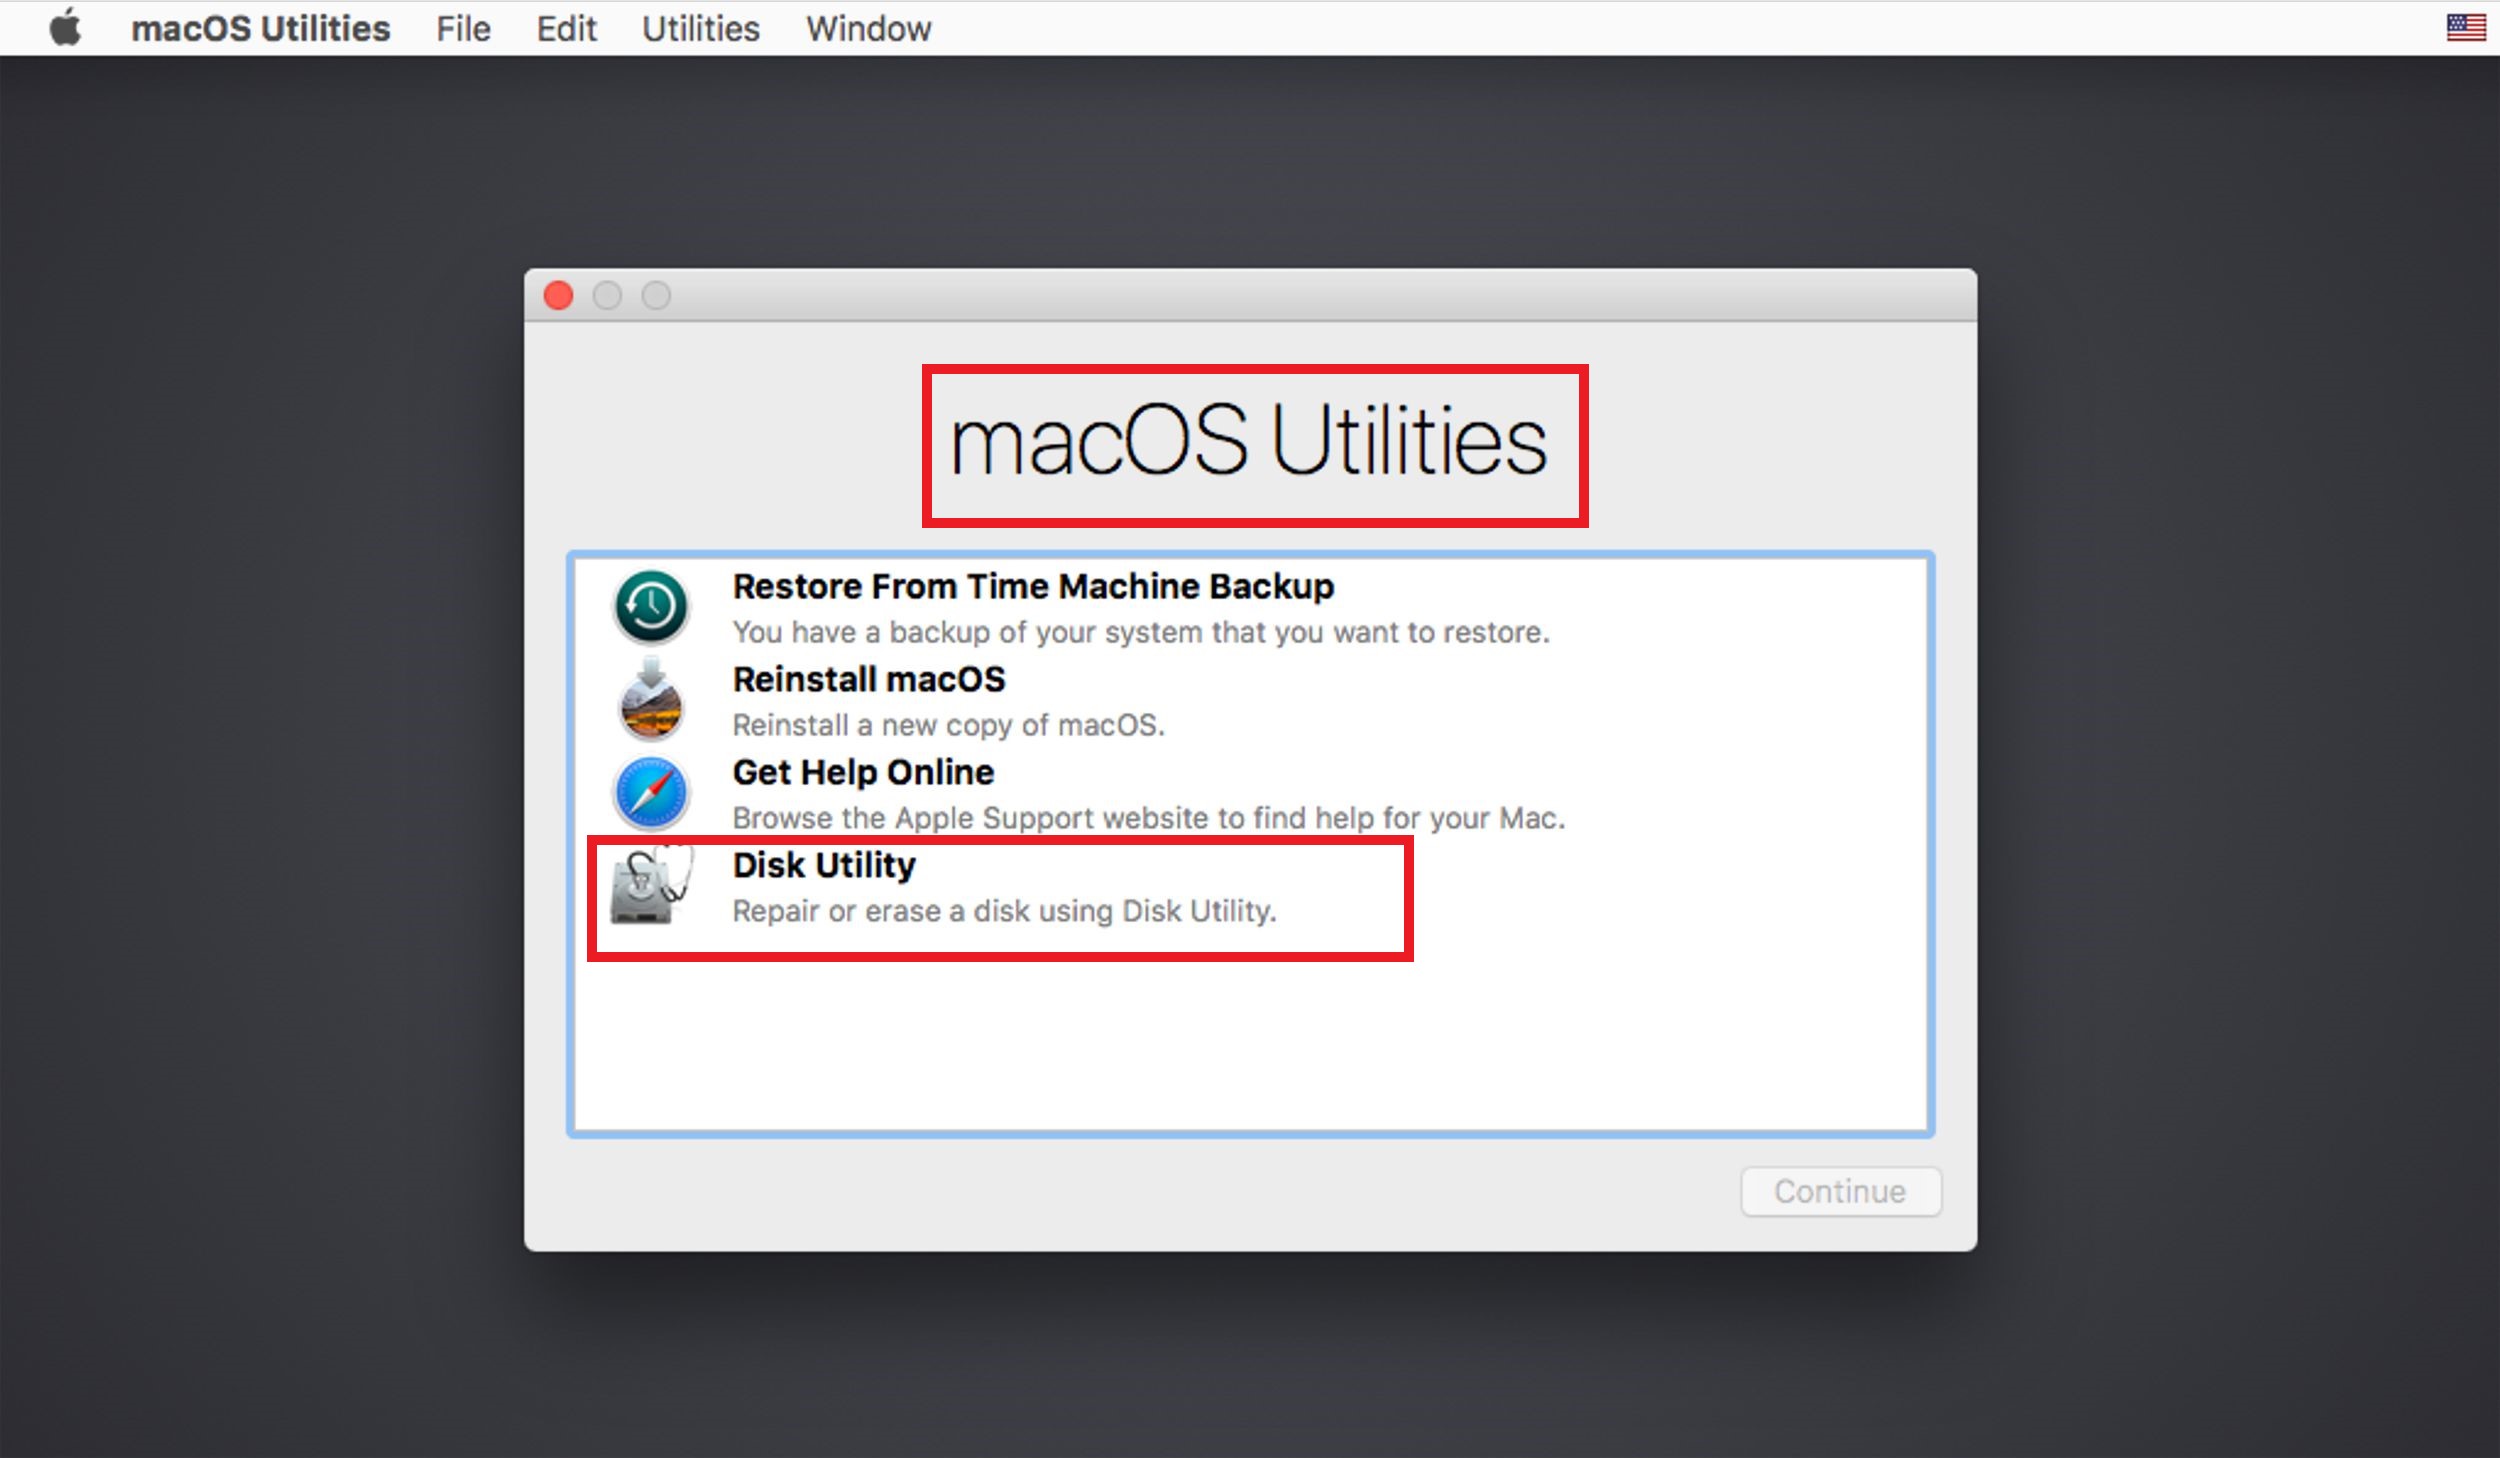
Once the Disk Utility opens, try to erase the hard drive.
4. Erase Data using Stellar File Eraser
If you feel that the above methods are too much work to do and you wish to save your time and effort, you can use Stellar File Eraser software to erase data from the Mac hard drive. Stellar File Eraser is one of the most secure and efficient data eraser software that erases the data on the drive by overwriting it multiple times. It uses globally recognized erasure algorithms that make data recovery impossible. Follow the steps below to erase the hard drive:
Step 1: Download and install Stellar File Eraser on your Mac.
Step 2: Launch the software and click on Files and Folders in the Select What to Erase window. Then click Next.
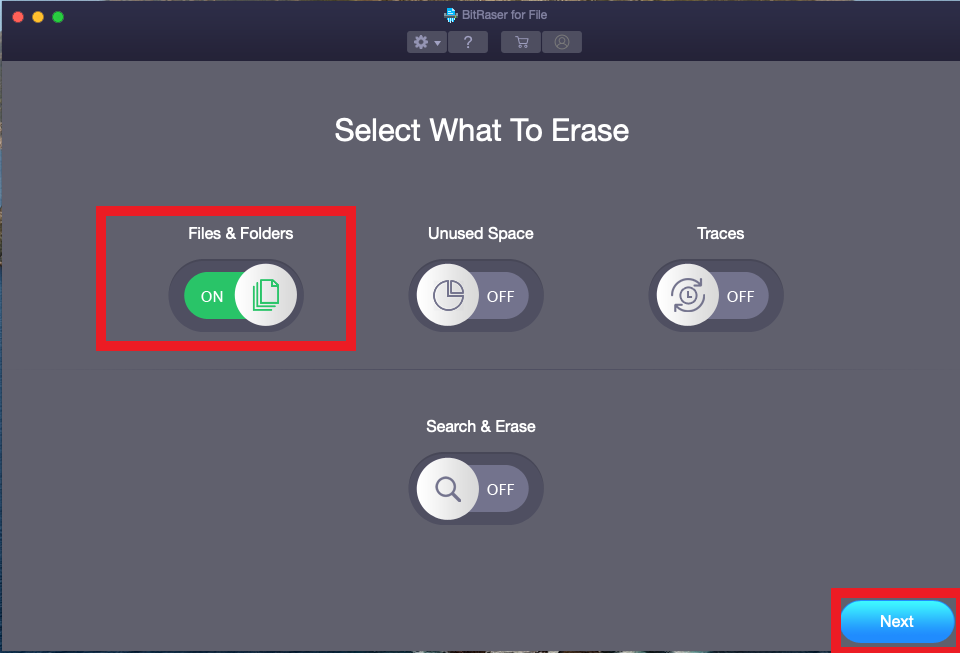
Note: You will need to enter the Admin password to allow Stellar File Eraser to erase the files and folders on your Mac.
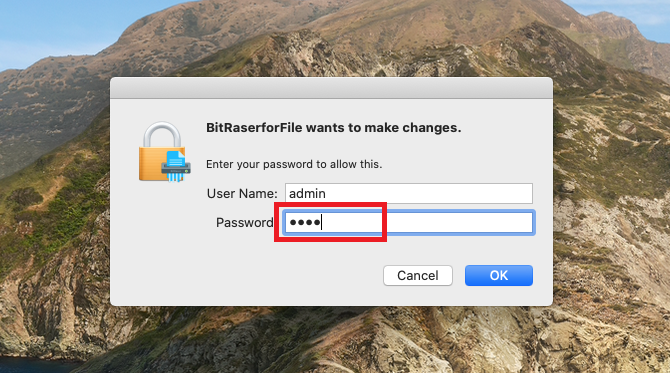 Enter Login Credentials">
Step 3: Select all the folders and files to completely erase the drive.
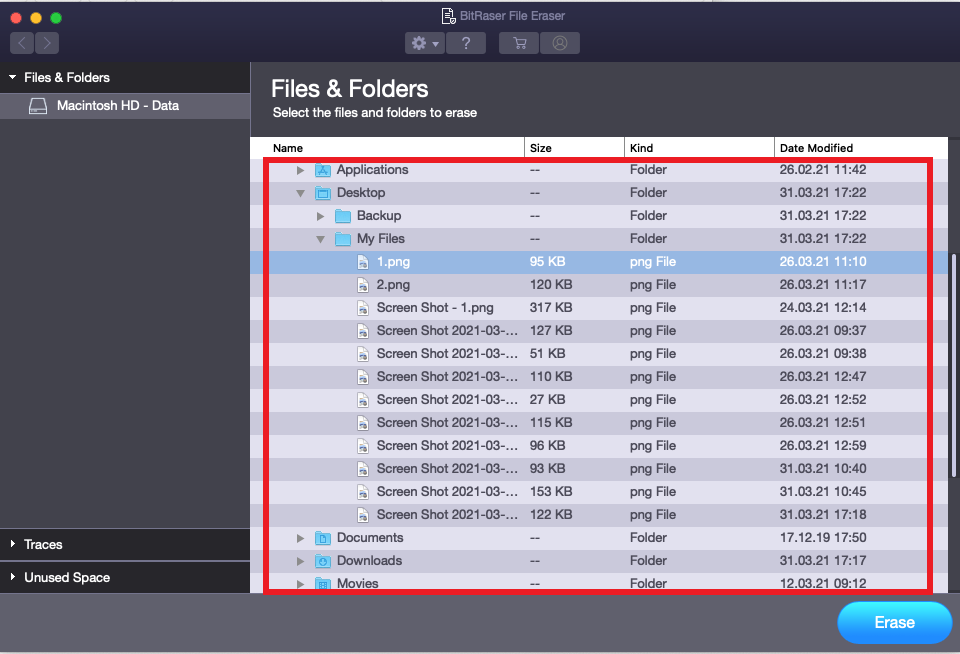
Step 4: Click the Erase button in the bottom right of the software window.
Step 5: If your software is not activated, you will need the Activation Key to activate the software. Insert the activation key.
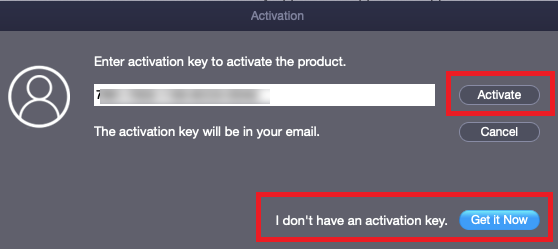
Note: If you don’t have the Activation Key, click Get it Now to purchase the product and get the key.
Step 6: As soon as you enter the Activation key and hit Activate, you will see a message BitRaser for File Activated successfully. Click OK.
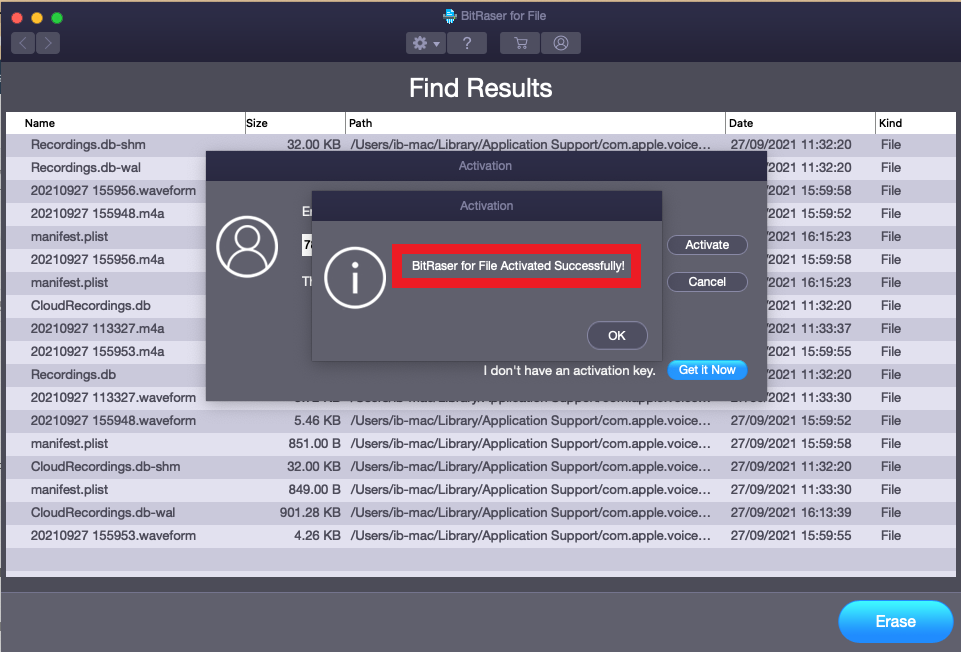
Step 7: Again click Erase and the eraser process will start.
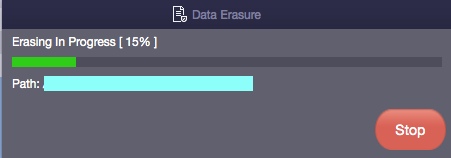
All the selected files and folders will be deleted beyond the scope of recovery.
Note: The BitRaser File Eraser software provides you with an option to erase traces, deleted data, and also to schedule the eraser tasks.
Conclusion
Erasing data from a Mac Hard Drive is not a difficult task. You can easily erase the Mac hard drive by using the Disk Utility, which is an inbuilt feature of Mac. However, sometimes, you face difficulty in doing so due to different reasons. In such cases, you can follow the methods described above to erase the Mac hard drive.


 6 min read