So one day you're ready to clean the unwanted images, videos, documents, and other data from your system. You remove them by right-clicking on them, choosing the Delete option in the context menu, or pressing the Delete key. Now, you must be aware that simply using the Delete option/key doesn't permanently delete files but sends the files to Recycle Bin, further allowing you to recover deleted files. And it's good because if you mistakenly delete something important, Recycle Bin lets you restore it quickly.
However, some users want their files to be gone in one go. One way to do it is by using the Shift + Delete key. But what if you can delete files permanently with just one click? Things would be sorted. Right! It is possible. You can add or remove the Permanently Delete option in the Windows Context Menu. How? Here's how to do it.
Add the Permanently Delete Option to the Context Menu via Registry Editor
When you right-click a file or folder, you get multiple options such as Edit, Copy, Cut, Delete, Share, etc. But the Permanently Delete option is not there. It means that you can't delete a file with a single click. The file would reach Recycle Bin, and you'd need to open that folder to remove the files forever.
If you want to save yourself from this double effort to remove your data, adding the Permanently Delete option to the context menu is the way. You can edit the context menu via Registry Editor with the following steps:
Note: It'd be better to keep a backup and restore the Registry before performing the instructions. You could restore things to normal with the backup if something goes wrong.
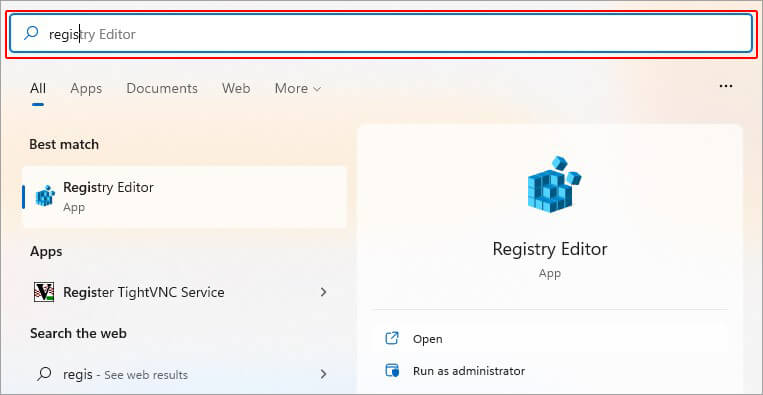
- Go to Windows Search, type Registry Editor, and click Open.
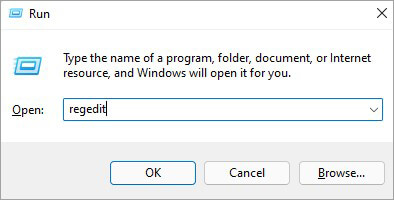
- You can also press Windows + R to open the Run dialog box. There, type regedit and hit Enter.
- Now, double-click on HKEY_CLASSES_ROOT and find AllFilesystemObjects.
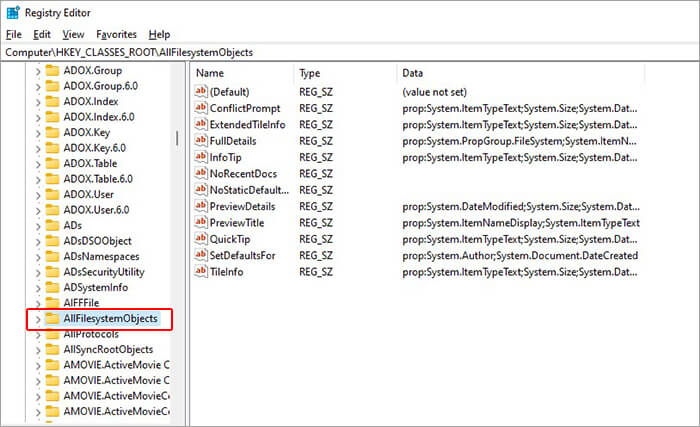
- Expand AllFilesystemObjects and there locate Shell.
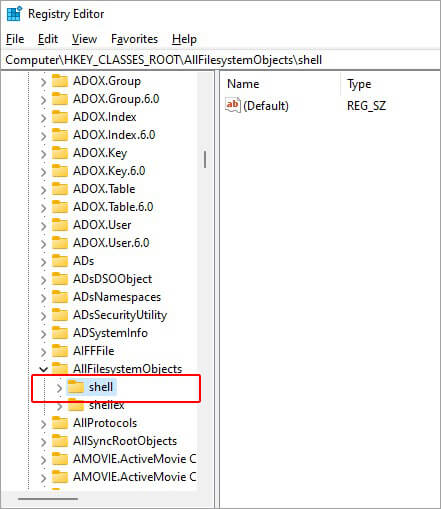
- Right-click on the shell and then follow New > Key.
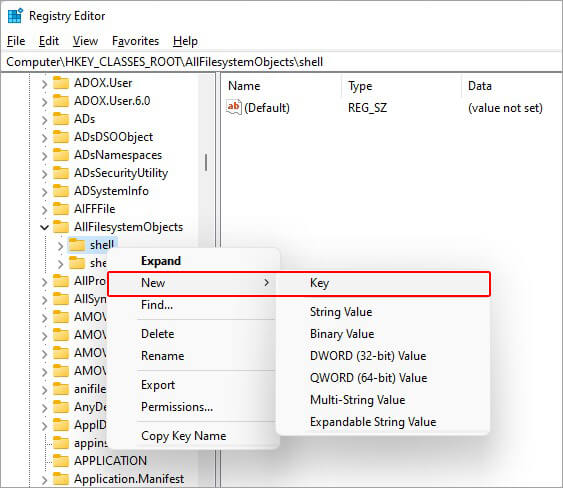
- Now, enter Windows.PermanentDelete to name this key under the shell.
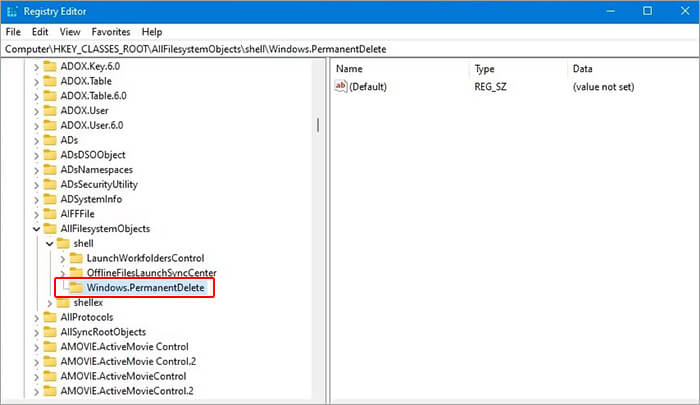
- Now that the Windows.PermanentDelete key is created; you'd need to build four string values under it. So, for the first string, right-click on Windows.PermanentDelete key and follow New > String Value.
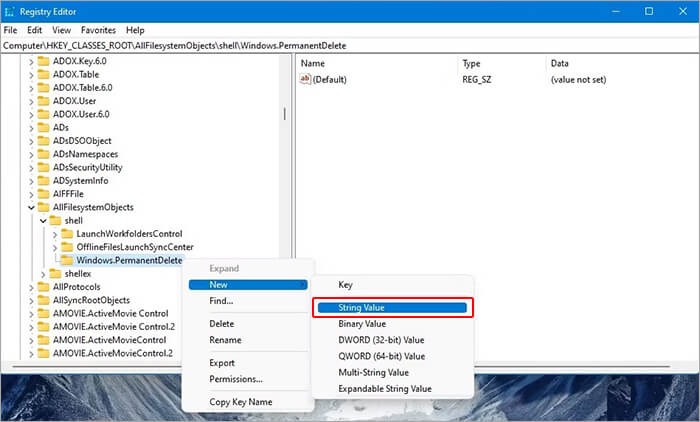
- Now, name that string - CommandStateSync. If you can't name it, right-click on it, select Rename and then enter the name.
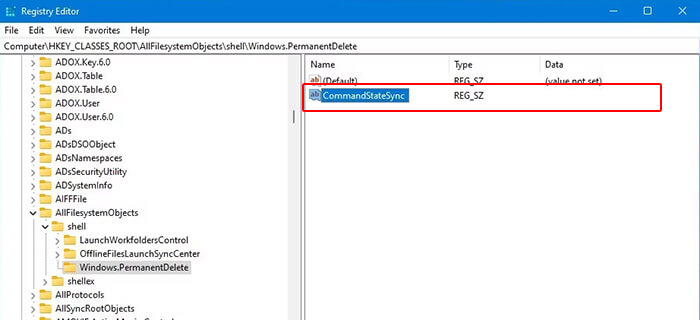
- For the second string value, right-click on the blank space in the right panel under the first string value, and there follow New > String Value. Then, type ExplorerCommandHandler and hit Enter.
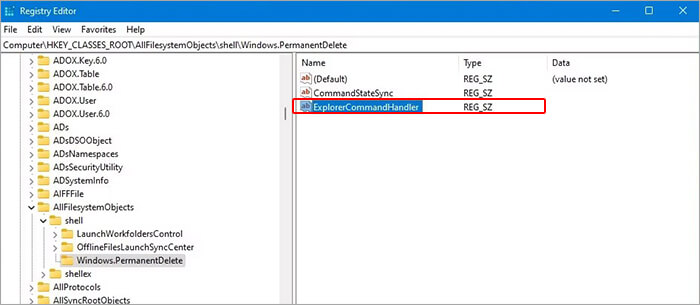
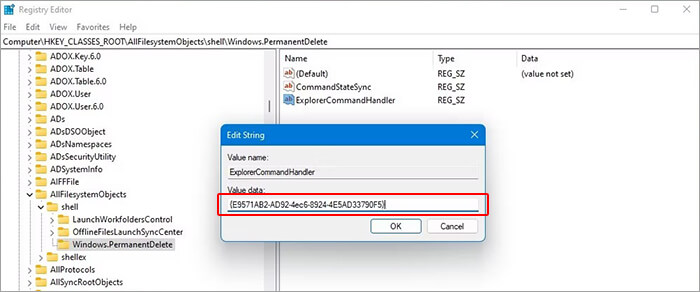
- Next, double-click on the Modifier Window, copy - E9571AB2-AD92-4ec6-8924-4E5AD33790F5, and paste it into the Value data box > OK.
- Create a third-string value as you created the second and name it Icon.
- Double-click Icon to open Modifier Window and copy-paste the shell32.dll,-240 in the Value data box; click OK.
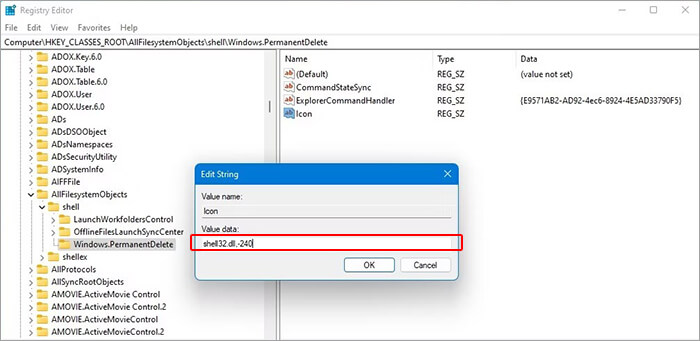
- Doing so will add a Red Delete Cross icon next to the Permanently Delete text in the Context Menu.
- Lastly, create a fourth string value following the same steps for the second and third string, and name it Position.
- Open Modifier Window for Position, type Bottom in the Value data box, and click OK.
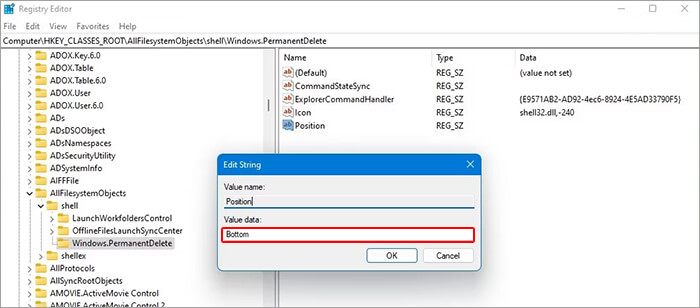
- The fourth string – Position, decides the placement of the Permanently Delete option in the context menu.
- As we have added the value – Bottom to this string, the option will appear at the bottom of the context menu.
- Close the Registry Editor, go to File Explorer, and right-click on any file or folder. Check if you can see the Permanently Delete option in the Context Menu.
- To access it, you'd need to click Show more options after right-clicking on the file/folder and then confirm the delete action.
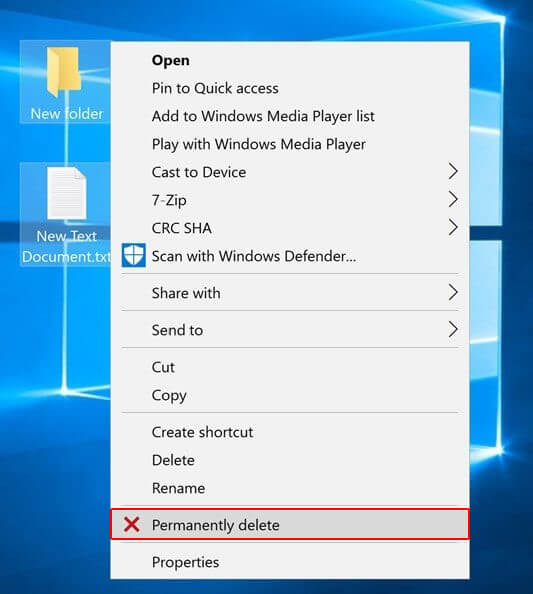
Important: Permanently deleted files will be removed from their existing place, and you won't be able to find them in Recycle bin. So, if you accidentally deleted some important files, use your backup to restore them. Moreover, if the backup isn't available, permanently deleted file recovery is possible with a data recovery solution, such as Stellar Data Recovery Software. It supports the recovery of all file types from Windows systems and storage media drives, such as SSDs, HDDs, USB drives, etc.
Remove the Permanently Delete Option in the Context Menu
If you don't want the Permanent Delete option, you can edit the Windows Context Menu easily by following the given steps:
- Open Registry Editor as discussed above and follow HKEY_CLASSES_ROOT > AllFilessystemObjects > Windows.PermanentDelete.
- Right-click on Windows.PermanentDelete and click Delete.
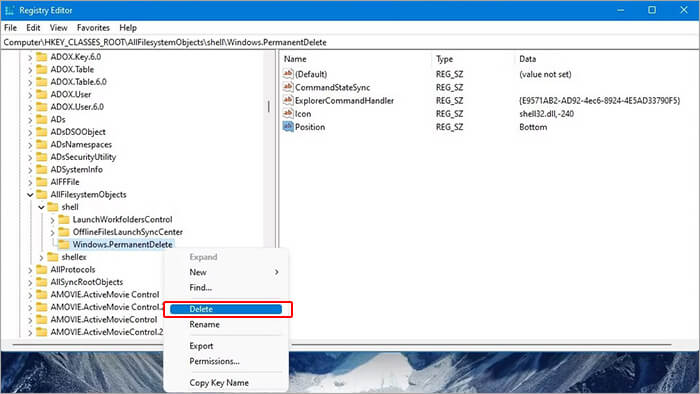
- Now, check, and you'll find the Permanently Delete option no longer exists in Context Menu.
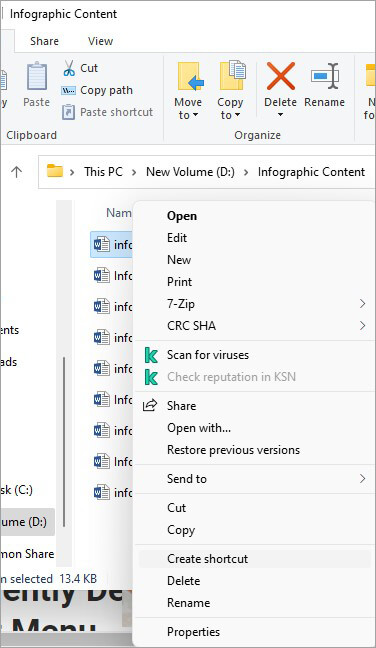
It is sure handy to have a Permanently Delete option in Context Menu to delete unwanted files, folders, and other data in just one click. But be careful as an abrupt action may cost you important data. However, permanently deleted file recovery is possible with reliable data recovery software.


 9 min read
-1505.jpg)
